ScanNCutDx: Celebrate card

As I tried to make graduation cards for my girls, none of the usual cap, black and gold kind of themes seemed right! I wanted color and fun as they move into a new school and chapter of their educations! That’s where my ScanNCut came in! Disclaimer as always – I am a paid consultant for Brother, however all ideas and opinions are now (and always!) my own

My inspiration was to utilize a favorite built-in cut file along with some custom water colored fun! For the full video tutorial you can view my YouTube video here.

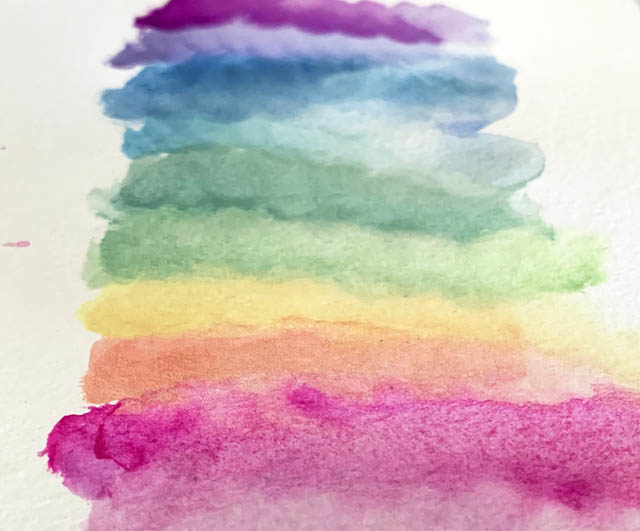
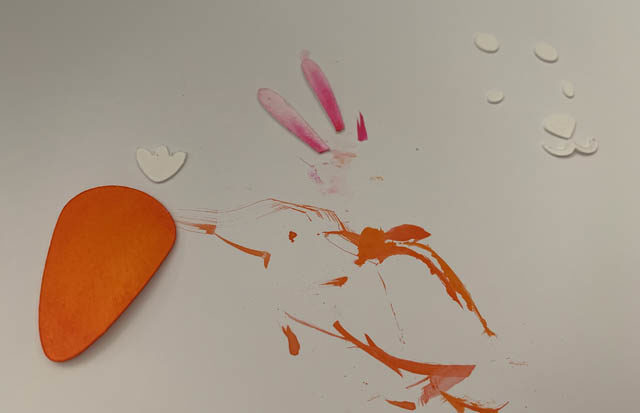
You’ll need to start with a colored surface. In my case, I watercolored a rainbow of soft colors (as you can see above), and let it dry fully. I really mean FULLY! Watercolor paper gets very soft and that = tear/mangling vs a clean cut with any die cut (machine or not!) so let it dry.

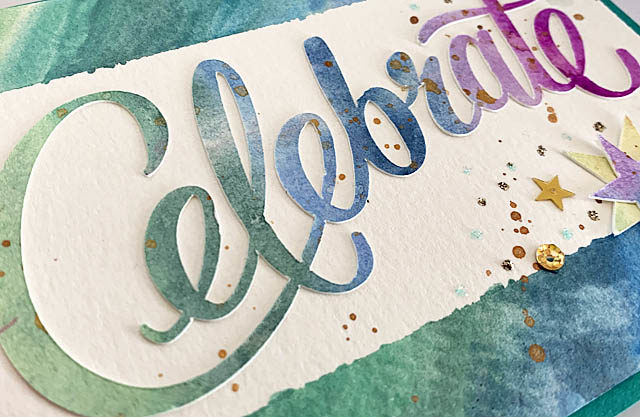
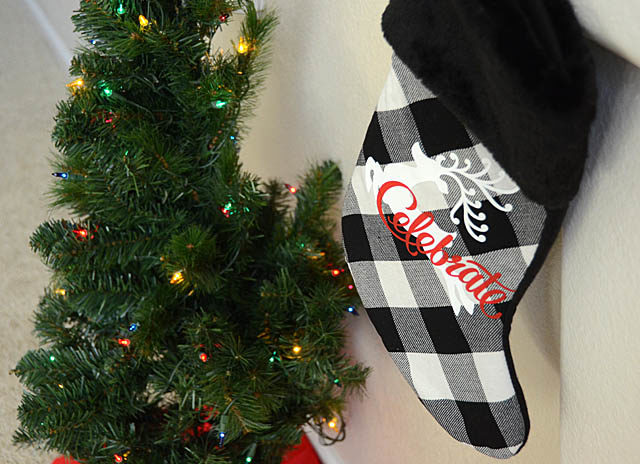
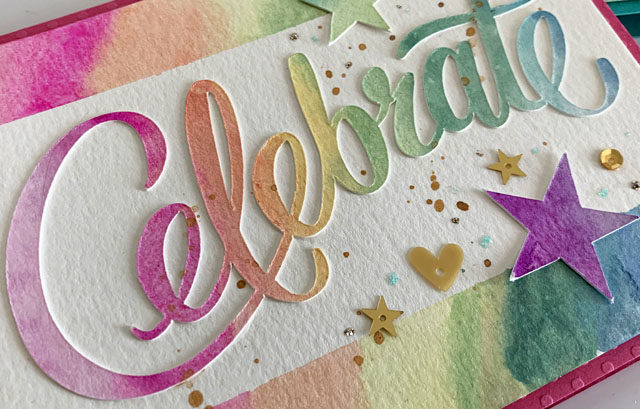
Once it is dry, you can cut to your heart’s content! I love that the ScanNCut allows me to scan the paper I’m cutting so that I can see exactly what colors I’ve got, and where I want pieces to go. makes for such a beautiful finished product! (exact how-to in video linked above). I cut stars as well as my “celebrate” before mounting onto watercolor paper (with edges colored), adding some flecks of gold and sequins, and putting it all onto a folded card.

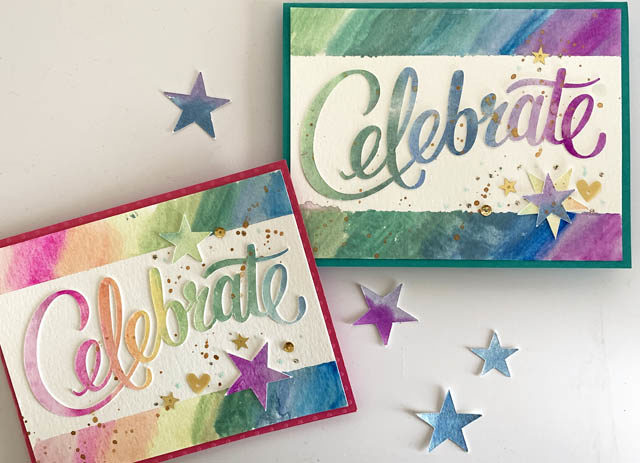
I LOVE the results! These are such fun cards, and they could be done with any word, for any occasion! You can also use the idea for scrapbooking or other paper crafting embellishments as well. I will be remembering to pull out this colorful technique for more word art in the future – just love the results so much, and love the reminder that Grad stuff doesn’t have to all be black and white!

ScanNCutDX: Customize planter

I really want more plants in my office, but I also want them to be fun container wise and don’t like most of what is available at the store. What’s a crafter to do? Just add vinyl! Usual disclaimer here that I am a paid consultant for Brother and work with them, however all ideas and opinions are always my own.

I started with a smooth grey pot that I felt sticker vinyl would stick well to. I picked a dark grey so white would pop, as well as other colors. I also I wanted intricate patterns, made note of height and widths, and otherwise just did a bit of planning before cutting and preparing my materials.

I decided to cut my main (pink) design, as well as a different design in white and apply them before I made any further choices. I like this tactic when building a project like this because it lets me see how my design is going, and choose when and where I should add more.

Here is a link to my YouTube video. That shows the full process of prepping vinyl and reminds of the basic process:

  1. Place vinyl on mat, load mat
  2. Select & size pattern. Select cut, change to 1/2 cut, and let auto blade on the SNCDX do the rest!
  3. Cut around vinyl closely, then weed out what you do not wish to transfer.
  4. Use transfer material to take vinyl design and place onto your surface
  5. Repeat and enjoy!

I ended up placing white cuts into the pink design for more contrast and pop – and I LOVE that!! How to achieve this? I cut a second pattern exactly the same as the first (same size), but this time in white. Then I removed the “pattern” vs weeding out the small bits. Once done, I used transfer material to transfer all those small white parts onto my grey pot – I love the results! I’ve always wanted to try that and I am really happy with how it turned out.

I’m tempted now to add some vinyl to that typewriter of mine – the possibilities are endless! I also want to play more with layering vinyl colors as I did here with the floral design – that was easier than I imagined and I think it really looks neat. With this corner of my office so nice and ready to work… I guess I better get back to paperwork!

Some Bunny Told Me…

The ScanNCutDX as you know, is a product I’m really loving! (the usual disclaimer that I work with Brother, but all ideas and opinions are my own) One of the things I love is that when I’m in a hurry I can find amazing free and paid files ready to rock on Canvas Workspace (free online software/editing for ScanNCut products)


Today I’ve been playing with some from an Easter (available for purchase) set that are designed as cupcake wrappers. The thing about cut files – just like anything you can make what you want of them!


I downloaded these onto a USB and put it in my ScanNCutDX. Then I selected the files (both of them), and deleted the “wrapper” part of the pattern – it’s all separate so this was really easy! You can see below the “wrapper” part that I just needed to select, delete.

Once I had both bunny and chick in there, I moved all the pieces close together because I had determined I wanted to cut them out from white watercolor paper and color myself to have a bit of fun.

If ever you aren’t sure what color you want things- DIY works and is super fun! I used watercolor markers to color up my pieces…

Once all of the pieces are colored, assemble!

Remember that the ScanNCut (and your craft supplies!) aren’t rated food safe – so you do want to take caution! I used food picks to attach to the back of these – toothpicks would work too. Then I made sure to not touch the cakes with the paper – just the pick.

How cute are these critters atop these little carrot cakes? I just love how this looks and how much fun this adds to Easter festivities without a huge amount of time and just white cardstock and some color markers!

I’m wishing you a wonderful Easter week and spring! Happy Crafting!

Customized Christmas Stocking with ScanNCut DX

When we get into December I am big on quick, easy, and big impact projects. I like to make use of ready to go designs, and tried & true projects. Today I want to share with you a stocking that I think turned out just so very cute!

Continue reading “Customized Christmas Stocking with ScanNCut DX”