3 ways my ScanNCut helps me scrapbook

I’m beginning to work on my 2016 scrapbooking, yes, pretty much all of it.

I will be doing a series of posts on how I’m breaking the task down. Right now I’ve got everything in pocket page protectors though that could change to a mix of traditional pages + pocket pages. Ah but today, I want to share a video with you where I go over 3 of the best ways my ScanNCut is assisting me in this epic project.

disclaimer, as always that I do work with Brother as a paid consultant, but all ideas and opinions are my own.

Here is a link to my YouTube video on the three ways I’m really enjoying the ScanNCut right now with my scrapbooking.

In the video I mentioned a type converter tool – here’s a link to that video.

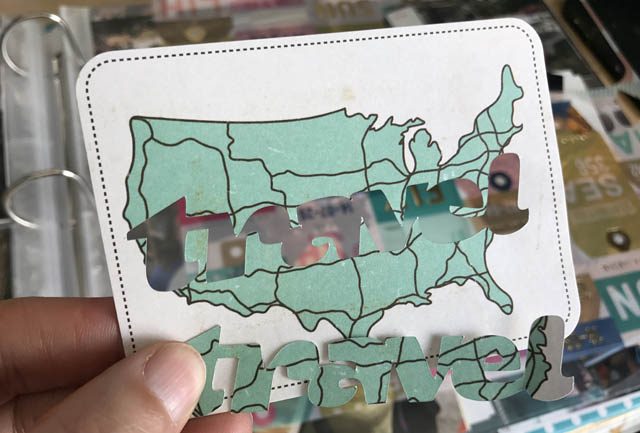
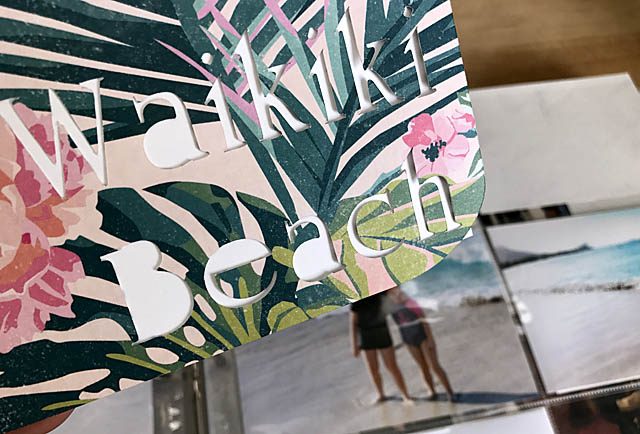
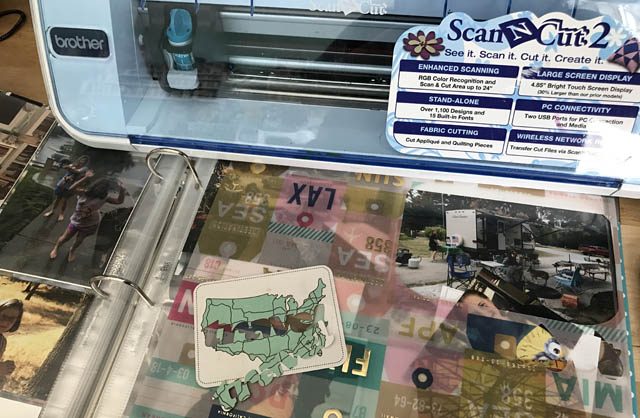
If you are a pocket page type of scrapbooker I could really see the ScanNCut being so valuable! When I know exact dimensions as you saw in the video I am able to cut exactly what I need in the right size. I’m also able to position my cut files to get the best possible spot and really make something lovely, as well as cutting out shapes as decorative elements to tie pages together. This is also allowing me to work in a few cut files while I’ve got the machine out and am already working on other assignments. It’s helping me “sneak in” bits of work on this big project just a few minutes at a time.

This is vital, and so very key to me succeeding in a quick album! Sneaking in bits of time here or there, and breaking the process way down so that I can work on things in between other appointments, assignments, and otherwise the details of this busy life. I will be back to share more scrapbooking ideas and you’ll see these ideas progress of course. For now, I hope if you’ve been meaning to get some photos out and some stories told that you’re inspired to just begin.

Have a wonderful weekend!

Valentine with Heart

As you may know, I love giving myself space to create and test new to me supplies without any kind of pressure. One of my favorite things to do if I kind of like the results? Use the ScanNCut to create a shape for future project! For this project, I began with an image on watercolor paper that I colored then spritzed with water (really, that’s it!) and after figuring out it works… what to do with the paper chunk?

Here is a link to my YouTube video tutorial.

When it comes to Valentine’s Day, we’re all about friendship, and all forms of love. It’s a happy (low key) day- but I sure am happy to use this paper in this way. I so love mixing a stamped image + cut shape + embellishments!

Here are my tips for this kind of creating:

  • Figure out where you want the bulk of the embellishing/layers to be clustered. Don’t compete with main image!
  • Consider several textures, sizes, and forms of color (mist, sequins, beads, buttons…)
  • When cutting out your shape, consider being slightly off center and cutting a few bits off. There’s something to this at times that just makes a project work!
  • Don’t forget contrast. Here I used black ink to edge. That’s just one example but contrast is your friend always!

Here is my finished card –

I hope that you have a wonderful week and Valentine’s Day as well!

disclaimer that I am a paid consultant for Brother ScanNCut. All ideas, opinions, and projects are 100% my own – I just really love this machine and am so happy to share projects with you here and on the ScanNCut website too!

Looking back: ScanNCut favorites

As I sit and plan new creative projects for 2017, I couldn’t help but take a stroll down past videos and blog posts for inspiration. Sometimes ideas or things you’d want to revisit can get forgotten! So today, I want to share some of my favorite ScanNCut projects that I’ve created in the past. As a paid consultant for Brother, I create a lot of things with the ScanNCut and I always enjoy new creative challenges.

Don’t have a ScanNCut but thinking about it? Let’s begin here with my post that gives my thoughts on “Is the ScanNCut for me?

One of my all time favorite projects and realizations was that I could create whole scenes of stamping (using masks cut from scanNcut!) and then cut the whole thing out. I just love this – and if you’d like to see the how-to you can check out this “fairy simple” post.

Of the accessories available, my favorite has to be the iron-on material. I just love the glitter and sparkle! At great timing for St. Patty’s Day, here is a favorite of mine Lucky Tote bag that features both the iron-on glitter material and the rhinestones that iron-on! I love a good fabric project that doesn’t require sewing!

Cupcakes to succulents and hostess gifts too, I want to dress up my gifts and treats more this year. This decorative Picks post shows how simple it is, and reminds me that I should probably make a few to have ready to go!

Speaking of love, one of my goals this year is to try more layered detailed designs. This Love cut-out card reminds me how much fun that can be.

Coloring watercolor paper and adding sparkle & fun? One of my more popular past projects is this detail cut + watercolored card.

Finally today, I want to share a bird ornament that I created with the ScanNCut. I want to get into more fabric + felt + embellishment projects and I recently checked this project back out to recall the details and remember what works.

If you couldn’t tell by now – I sure do have a whole lot of fun with my ScanNCut! I hope you found a new idea to inspire you creatively in this post, and I wish you a most wonderful week!

Wild or simple, complex or quick – enjoy some happy crafting today!!

ScanNCut Valentine with fabric hearts

Today I’m creating a mixed media Valentine inspired by the newest ScanNCut ambassador Rebekah Meier! (reminder that I am a paid consultant and fellow SNC ambassador as well, and that all ideas and opinions are my own). I am excited to see what she does with the ScanNCut, and can’t wait to see her projects. Thinking about her I realized I still have some of her fabric and so I decided to film a how-to on fabric basics + the ScanNCut.

The real trick? Prep your fabric so it wants to hold still and ‘behave’ for the blade. Here’s a link to my YouTube tutorial.  

While none of these products is specifically Valentine’s themed, with the holiday sneaking right up I decided to run with that as my inspiration and I just love the results! To remind you of a few tips when working on a project like this with fabric:

  • Don’t be afraid to mix & match your adhesives! Dry, wet, stitching – adhere the fabrics however works!
  • Remember your contrast! All the bright color and white on this? Well my black scratchy pen work was the perfect counter part!
  • Remember fabric is more “wiggly” than paper, so keep that in mind and use the property to your advantage when possible, prepare for it to work when not (like the stabilizer on the back I used before cutting)

I hope you enjoyed this fun little Valentine project – what are you crafting these days? I’ll have a few more coming up over the next week.

ScanNCut: colorful possibilities

Heading into the new year, I want to push my creative limits more. Try new ideas and if my recent posts on ‘getting started’ with projects have shown you anything about me it should be that I am one to really start small. Test ideas in theory. See where things lead. Sometimes these techniques and smaller bits add up to BIG ideas, after all!

Today I’m sharing a test from my ScanNCut machine (disclaimer as always that I am a paid consultant, however all ideas and opinions are always and forever my own!) I wanted to play a bit with watercolor, stencils, and well just see where my ideas took me. So I first began by making a stencil and then decided to play with the universal pen holder tool.

I found a lot of really great things out, and I love that from one (built-in on some models) design I could achieve a lot of different looks and that there were a lot of different ways to get the look as well. I also realized that if I left the backing on a foam adhesive strip it turned my too-skinny watercolor pencil into the perfect fit for the pen holder AND it came off with no fuss too. Though, I found pencil to be a less than desirable choice for more detailed drawings since the tip wears down quickly and I had to stop and adjust the pencil several times to compensate vs a pen which will remain fluid throughout.

I also discovered that I like watercolor pen + pencil together! This is something that I haven’t played with in so very long, and I was thrilled to do so. To see a video of my tests, here is a link to my YouTube video.

The wonderful thing about making time for experiments and tests like this is that you can learn and store the knowledge for future use. So when you are working on a project and think to yourself that you’d like to do something with a specific look you’ve got the skills! The universal pen tool for the ScanNCut is one of the most under used tools I’ve got, and I really want to explore using it more this year for sure.

Have a wonderful (crafty) weekend!