Hoppy Easter with ScanNCut

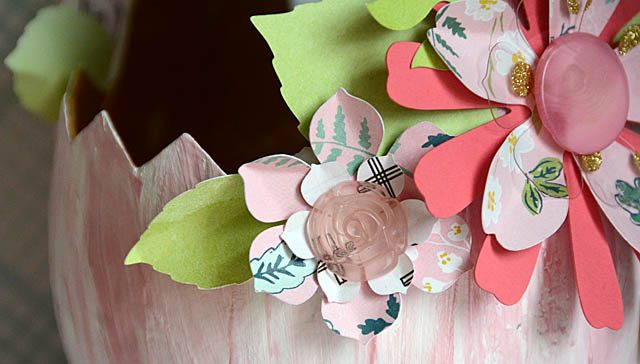
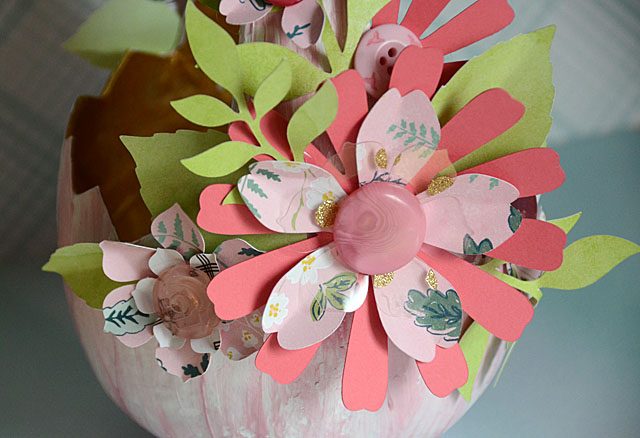
Spring is here, and I’m in the mood for some pink flowers! When I found this cute egg basket I thought it would be the perfect holder for some candy. But first, to decorate! Some acrylic paint, a bit of gold shimmer – and of course leaves & flowers cut out from my ScanNCut and I was ready to rock!

Here is a link to my YouTube video tutorial.

I really love how the soft spring colors come together – and most especially how easy this was!

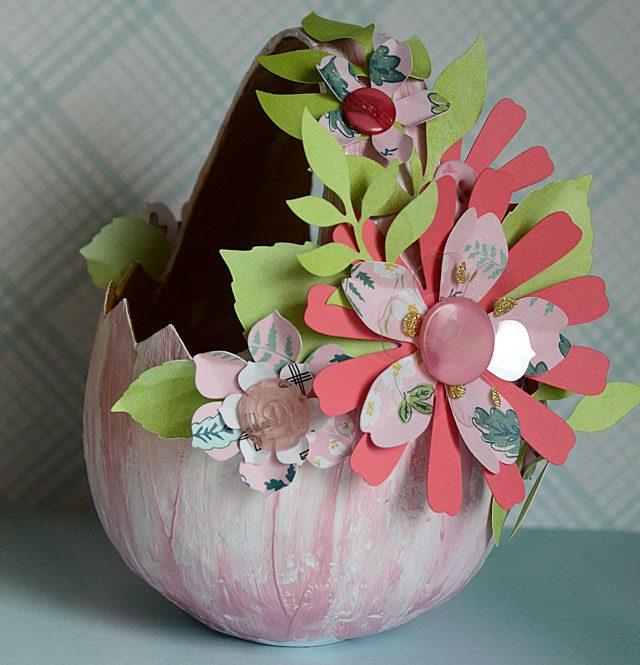
It really didn’t take a lot of time (well, the paint drying sure did!) or supplies to make some custom décor for my house. I love how this turned out, and I’m looking around to see what else I can add here to add to the spring vibes. How are you decorating this season?

as a reminder/disclaimer as always – I share with you that I am a paid consultant for Brother, but all ideas and opinions here (and anywhere I post!) are my own. Love this machine and how it’s changed my crafty life!

Happy St Patrick’s Day!

I’m really lucky to work with such a great company (Brother), and create projects to share on their website, seen on HSN and in ads, and so much more. Love that ScanNCut!  Today I want to wish you a happy St. Patrick’s Day and share with you my latest feature project created for them.

The sweet Miss Rebecca is modeling the photo booth props I created as a tutorial. Here is a link to the PDF file instructions on the ScanNCut website. I love that they offer so many tutorials and ideas on their site – and I always love when they come to me with a new crafty challenge such as this. My personal favorite? When I can make interesting things out of basic shapes. Love that!!

These props were a lot of fun to make and I’m inspired to try my hand at more seasonal props – for photos and just to have around! These turned out so darn cute (if I do say so myself!) and I hope I’ve inspired you to play a bit with your seasonal crafting.

Happy St. Patrick’s Day!!

Shaker pocket with ScanNCut

Crossing over lines and knocking out creative barriers is on my mind. I want to see what I can do with what I’ve got – and how I can play more and “cross over” things I’ve got in use already in new ways. Since I’m feeling motivated to be extra organized and to get on top of my many things to do from the post office drop off to writing this very blog post, I decided to make my notebook a bit more festive.

a disclaimer, as always that I am a paid consultant for Brother, but that all ideas & opinions here are my own. Just being totally honest as always!

So the question on my mind has been: what to do to at least make this book of daunting lists a tiny bit fun? Answer: sequins and beads! Here is a link to my YouTube tutorial for this quick and easy project.

While it in no way will help productivity, it should make opening this book a touch less overwhelming on the busy weeks, and more motivating when things are slow, don’t you think? I found a clear pouch, but I want to experiment more with card making and scrapbooking shaker pouches and the options for creating them. For this simple stitching or tape runner could have worked.

But what else could I do? What materials do I have that could work for a shaker window or partial clear pouch? I will keep investigating the possibilities for sure.

My other take-away is that I love the word connected by the bar at the top. Where else can I put this into action? What else can I do with it? I am all for finding creative ideas and opening up my mind to the various crafts they could apply to. I’m thinking the word + bar could be real neat for many things from art journaling to card making to pocket page scrapbooking.

I’ll explore more of these ideas some other time – for now it’s back to the lists for me!

So Lucky: felt pouch with ScanNCut

It doesn’t happen often, but once in a while I get lucky and a project turns out exactly how I want it to.

I had an idea for some stiff green felt (see my YouTube video for full tutorial and story) and I wanted to make a gift pouch. This was not only easy – but it turned out so darn cute! I am absolutely delighted with the details and I will be buying more of this style of felt to use with my ScanNCut for sure. (disclaimer/note as always that I am a paid consultant and work with Brother, but all ideas and opinions are my own here. It’s a machine I love to use – but like total honesty and want you to know I am affiliated with the company!)

Back to the project at hand – the finished size is 4×4 (front) – and oh how I adore it! I really don’t know how or why I have never tried my hand at a project like this. Silly me!

This project also reminded me of my love of bold Kelly green and how I need to use it (and other bold greens!) more often in my crafting. I hope I’ve inspired you to share a bit of a treat with someone else today – and enjoy some St. Patrick’s Day inspired crafting!

Birthday cake topper with ScanNCut

Miss Elizabeth is turning 12, and she wanted just a small simple chocolate cake. No party, no fuss. The party planning, decorating, DIY side of me just couldn’t let that go down so uneventfully! So I came up with an idea: use supplies here at home to create a cake topper for that cake. But it needed to be something just right for her, and I recalled the pencil case I decorated last year. (Here’s a link)

Inspired to use the same clip art design, I pulled out my ScanNCut and got to work. Here’s a link to my video tutorial.

I only needed 5 things for this project: popsicle sticks, white cardstock, red paint, black paint, and old paint. The dragon I brushed with black paint then paper toweled it off. Because my gold paint was applied in a textured way, it was that easy! I just love the results.

So what does the birthday girl think? She was BLOWN AWAY! She loves that it was the colors (gold red and black) as well as theme that was perfectly her and unlike anything she’d ever seen. Mom win! I need to remember that I can do so much with just a few supplies. And really customize things and save money too. My ScanNCut as you know has become a game changer in my crafting, and this is no exception! I hope you’ve enjoyed sharing this bit of craftiness with me this week, and that you have a great weekend!

The usual disclaimer – I do work with Brother as a paid consultant, but all ideas and opinions are my own. This is a machine I love and use very often, and I’m happy to share ideas with you here!