Art Supplies to-go tote with ScanNCut

As you know if you regularly read my blog, I do work with Brother as a paid consultant. (but all ideas + opinions are my own as always!). Well things have been so busy there is a MAJOR new development with the ScanNCut: A free type converter tool! Basic run-down is this: use any font you’ve got and in an instant have a ScanNCut ready to rock file. Now I knew about this and thought it was cool, but I hadn’t really done much with it. Little did I realize how FAST it is, and now I’m using it on scrapbook pages and just running wild with it!

Have a ScanNCut and looking for this? Log into Canvas and a direct link to the Brother Solutions Center and this application is at the bottom of the screen. It’ll walk you right through it!

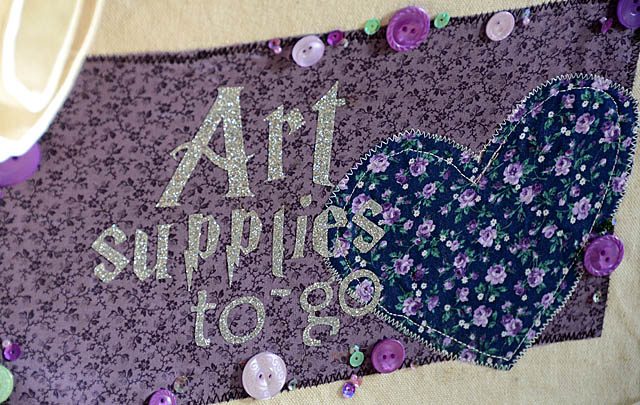
So for my first project I decided to take some iron-on glitter material (love it!) and add it to a tote bag I’d begun decorating and hadn’t yet finished. You see this  had a LARGE and very unattractive logo on it. It was a freebie bag from years ago. I added a rectangle of fabric to cover it (and used basic stitches to attach), as well as a heart (cut from ScanNCut) stitched with zig-zag and straight stitches. I had gotten that far when I forgot all about this particular project. (whoops!)

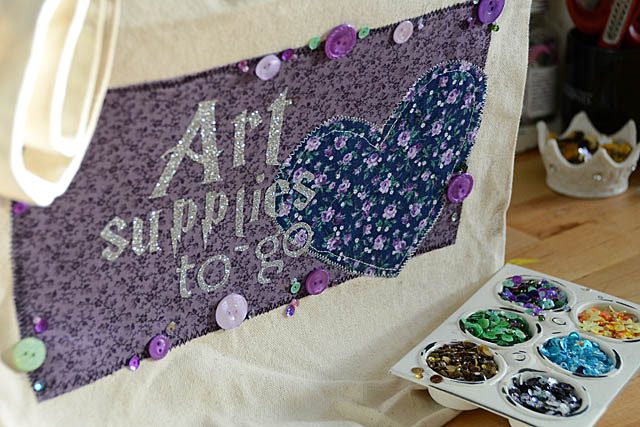
Anyhow when I uncovered this partially done project in the studio cleaning last week I knew I wanted to test run this on it. Results: Totally LOVE IT! Those letters are simply ironed on, and the buttons and things glued with fabric adhesive. The girls and I are ready to fill this tote up and take it on the road.

Here is a link to my YouTube Tutorial if you’d like to check out the how-to use the new text converter application. I can’t believe how easy it was – and how much I am going to use it in future for my scrapbooking.

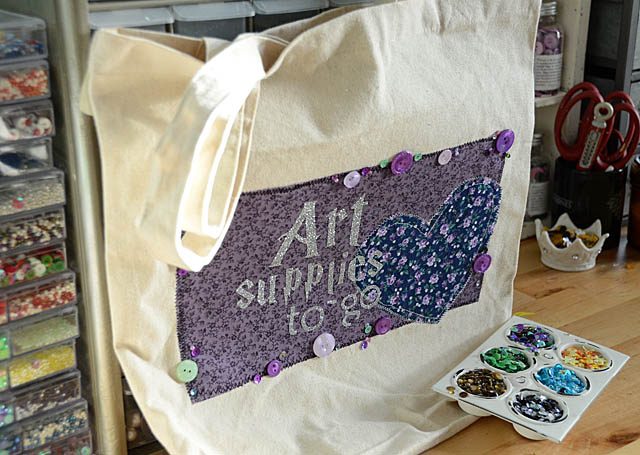
And here is my finished tote bag. This makes me happy for so many reasons! That  realized I was underutilizing a wonderful tool, I finished a project I’d been meaning to get around to, and I have a bag for our adventures all pretty and ready for the road! This was such fun to make – and I always love simple projects not to mention how wonderful this glitter iron-on material is. A personal favorite!

ScanNCut vs the sketchy stamp

With the studio pulled all apart I’m not feeling like much of a crafty super hero – but that’s not going to stop me! You see with a new sketchy stamp set, a black waterproof pen, and my ScanNCut I can still have plenty of fun!

note that I am a paid consultant for Brother, but all ideas & opinions here are my own. ScanNCut is a machine I adore and love sharing ideas with you here as well as on the Brother site!

Above you see my final colored stamp. Can you tell where my pen work was vs stamp? Is it obvious? hopefully not to you – I have to really stare close and think about it because when doing a zero outline it doesn’t tend to show up as different for me.

Here is a link to my YouTube video showing the process of how to do this to your ‘sketchy’ stamps.

It works best on images with some kind of definable outline of course, but I encourage you to go ahead and play! If not with cutting out stamps, then with coloring and mixing color mediums. My one tip if you’re going to try this technique of altering your stamp: use a pen that is compatible with whatever color mediums you’re going to use. if watercolor pens like mine, then you’ll want a permanent waterproof ink. If using alcohol markers you’ll need something different. Know those mediums!

Now I’m off to try and embrace my wonder woman side and get my studio put back together!

Thanks – one design four cards

’tis the season… for thank you cards!

I decided to test out one design built into my ScanNCut (note, as always that I’m a paid consultant for Brother but all ideas & opinions are my own) and see what I came up with.

The answer? Very different looks – and none of them Valentine colors as I’d originally been inspired to use! I love challenging myself to do use the same supply in multiple ways – and I had a lot of fun with this.

Here is a link to my YouTube video tutorial.

I had so much fun testing things from making a shaker card to applying ink, layering with foam adhesive to adding details like the epoxy hearts that I think I’ll have to try again in the future to sit down with one design (stamp, cut file, etc) and see what all I can come up with!

I hope you’re having a wonderful day – and wish you a very happy New Year!

shaking up giftwrap with my ScanNCut

When it comes to giftwrap, I try to dress up at least a few packages each year. Today I’ve got a video (click here to see it on YouTube) to share as well.

I love the shaker tag on this one – so fun! I also really had a good time mixing it up with pink & white on silver. This is toy for Rebecca – she is going to flip! Since she’ll know what it is if she sees her name on it I intentionally didn’t put a name.

The clear snowflake is hard to see in photos, but it adds so much. Vellum and acetate are great additions to projects like this because they add texture and a subtle detail that is simply wonderful.

disclaimer: I am a paid consultant for Brother, however all ideas & opinions are my own. The ScanNCut makes my crafting life so much better all the time – so I love sharing my creations with you here!

Joy home decor piece

Sometimes when I’m in a shop I see something cute and it’s on the plain side I grab it (especially if it is on sale!) so that I can take it home and put my own stamp on it. This “Joy” battery operated light/sign is definitely in that category!

dsc_9589

disclaimer – I am a paid consultant for Brother. All ideas and opinions are my own – including that I love this machine and all it’s done for my crafting!

The process for a project like this is so simple. Measure/find the maximum size you want and work down from there. I picked flowers, but you could do something like this with stars, hearts, or other basic shapes too! I love the combo of glitter, buttons, and paper to make this project perfect for me and my home. Adding personal touches is one of my favorite things to craft this time of year because it both saves time and gives me a creative outlet.

dsc_9592

Here is a link to my YouTube video tutorial, if you’d like to see how I put this together.

dsc_9580

I just adore how this project turned out and I love that I’ll be able to have this on display but with my own personal touches as well. I hope you’re having a joyful December so far – what have you been crafting? Or have you been too busy for creative endeavors? The weeks are flying right by!