I am home and unpacked from the Creativation trade show in Phoenix, and I’m ready to talk some faves! You can find a lot of photos on my Instagram – I tried to post as I gathered faves. In this article (there are a few affiliate links) I will share some things I’m most excited to get and use, as well as why!
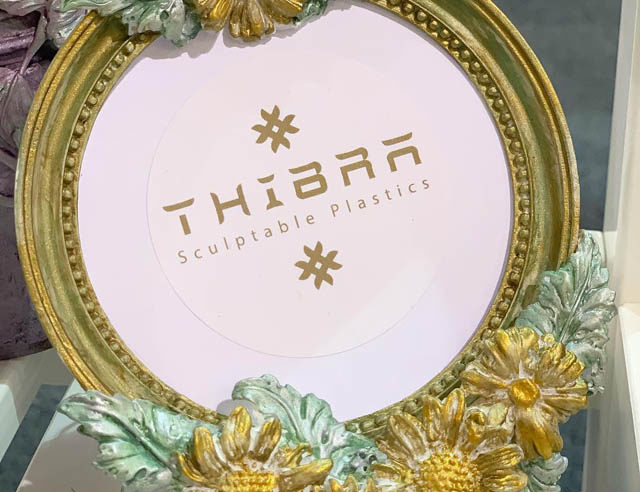
Thibra Plastic sculptable sheets are awesome – and can be found in stores. This stuff is good for anything from frames (above) to costumes to jewelry. Watch for videos from me soon – I’ve ordered some from amazon.
note: Affiliate links are used in this post, and this tool was sent to me by Tonic & Scrapbook.com to review. All ideas, opinions, and thoughts are totally my own!
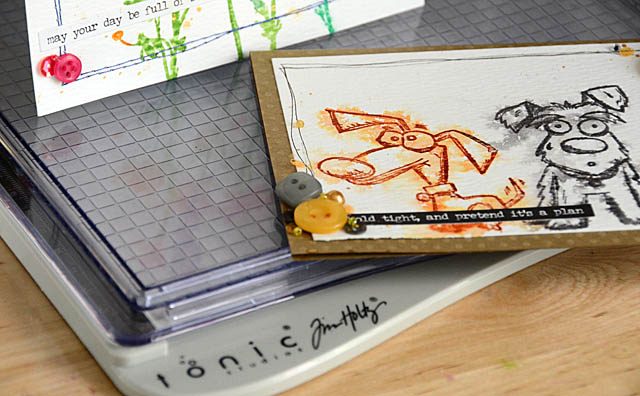
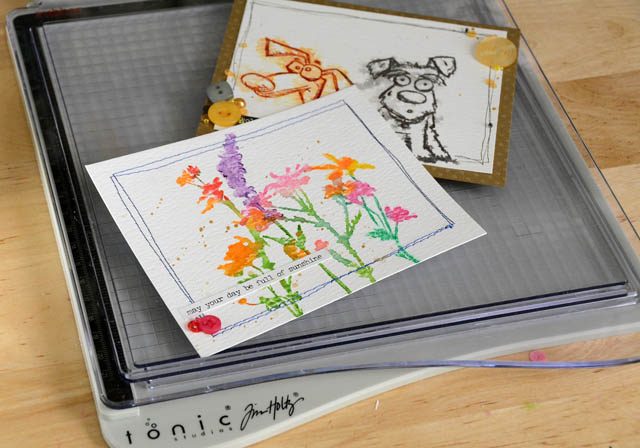
When I was contacted asking me if I’d like to test out the new Tim Holtz Stamp Platform (link), I immediately accepted for a few reasons. First of all, Tim’s scissors with Tonic are by far and away my favorite ever since he convinced me to give them a try years ago. Secondly, Tonic is a very high quality tool manufacturer and I anticipated they would get the job done right. Third, as I have yet to be convinced of the “must have” nature of any stamping platform (and I’ve seen and owned a number of them over the last 10+ years!) I wanted to really test this with a critical eye.
The great:
The platform comes apart to allow for 2 different thicknesses of stamp (clear and rubber unmounted), also for easier cleaning
The platform grid is textured/part of the plastic which means no amount of heavy scrubbing will change that. Important for us messy folk!
The base is designed beautifully including two open sides (so any size paper can be used) as well as having a rubber-ish base that prevents it from moving even on slick surfaces
The overall design means that when I’m doing heavy water stamping, I can stamp upside down. Or at least set it up that way at first so easily. A HUGE plus. If I found any fault with it I wish the magnets were rectangular and about 3x larger (or at least that one of them was!) for better holding down of paper while I get crazy.
Here is my video review and a look at one type of stamping (link to YouTube).
Overall, I’m just incredibly impressed with this tool.
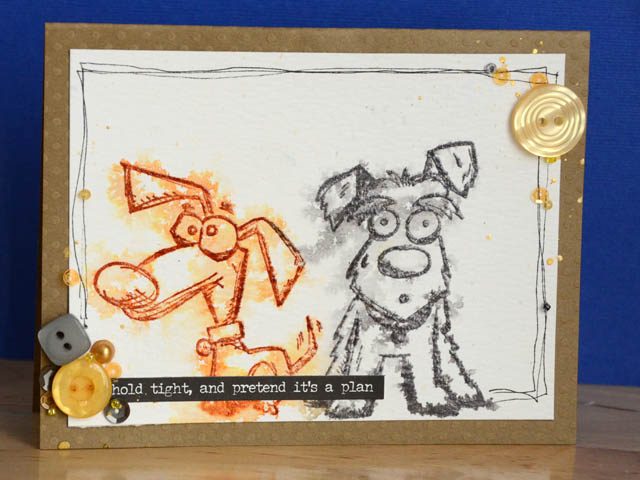
This tool is not needed if you like to take one stamp, stamp with a single color ink, and move on. For that type of stamping a stamp block makes far more sense, and I will still use my various stamp blocks for sure. This tool becomes an awesome tool for those who want to:
Color parts of a stamp separately
Repeat stamp (as shown in video) same image
Work with multiple mediums on same project with precision
Want a more controlled way of getting wild and messy with stamping
With all the experiments over 3 days that I did, not one drop of water or liquid medium hit my desk surface. Not only that, but this tool was so easy to clean off! I am sure there are even more uses for this stamp platform, and as I work with it more and discover good uses I will be sure to share those with you here.
I am delighted to find this a “must” tool for me – and that I was so very impressed with its construction. What is your favorite tool these days, and what are you crafting? I’d love to hear from you!
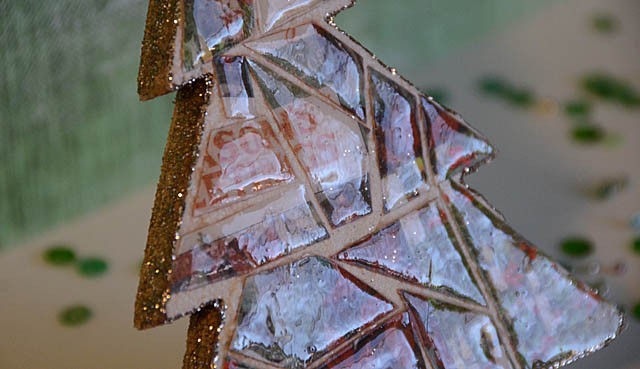
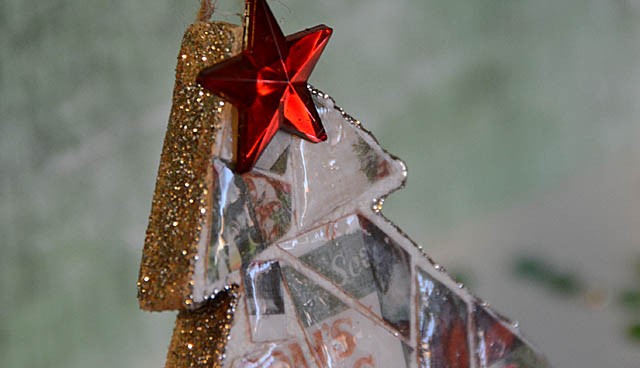
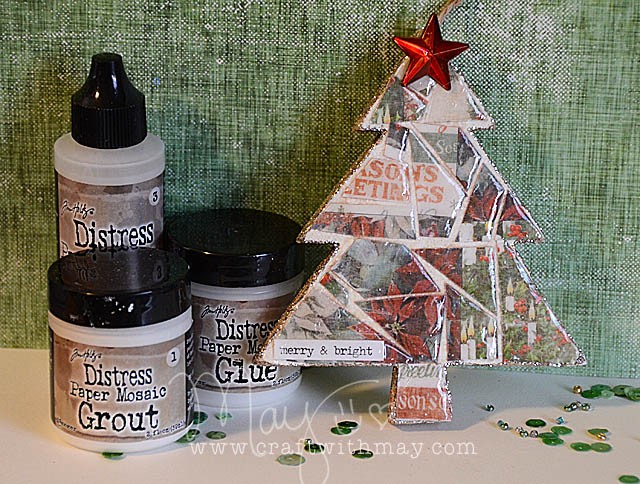
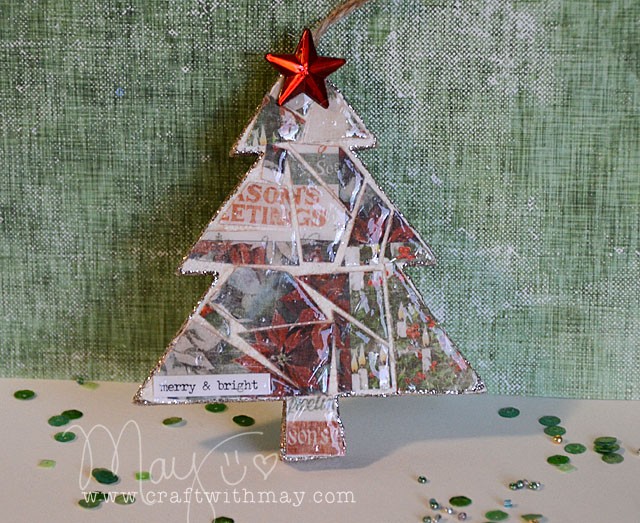
Recently Tim Holtz released a paper mosaic kit. When I saw this kit online I knew I had to buy one immediately and check it out. Upon receiving it I realized there were good directions inside so I decided to give it a shot and see how I did without online videos or tutorials – and I’m super impressed all around. The kit (containing grout, glue, and gloss) worked great and you’re not limited to any specific style of paper either.
As I had hoped, Tim did not disappoint. This kit was super easy to use, and I see so many wonderful (fun!) applications for paper mosaic creating in my future.
Want to see my full review and tutorial for this project? Here’s a link to my YouTube video
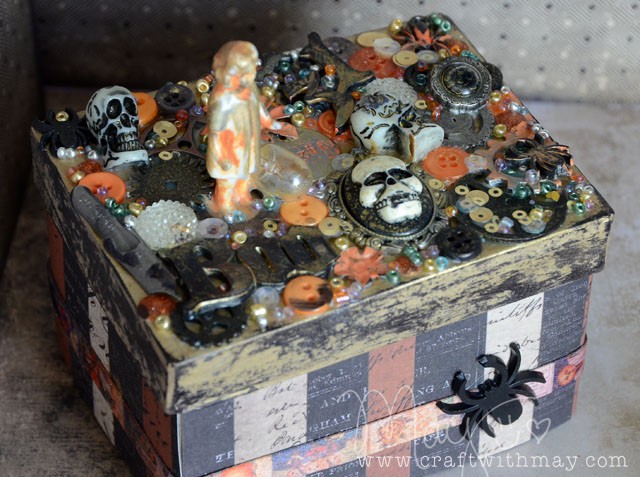
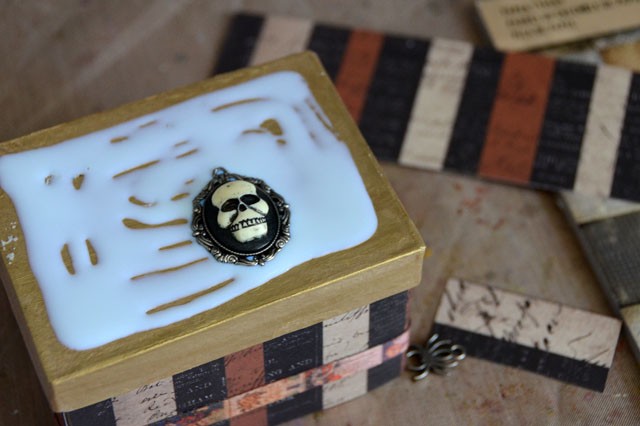
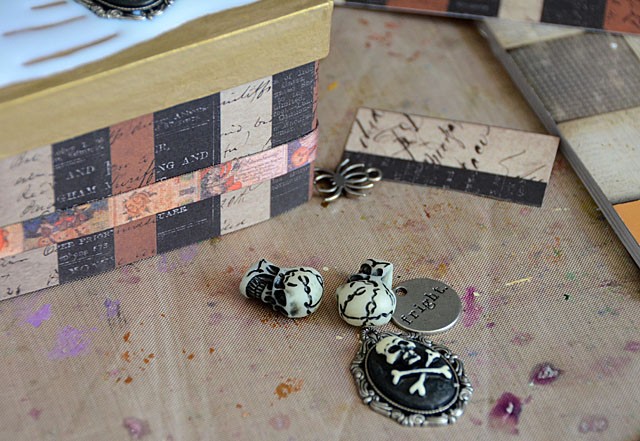
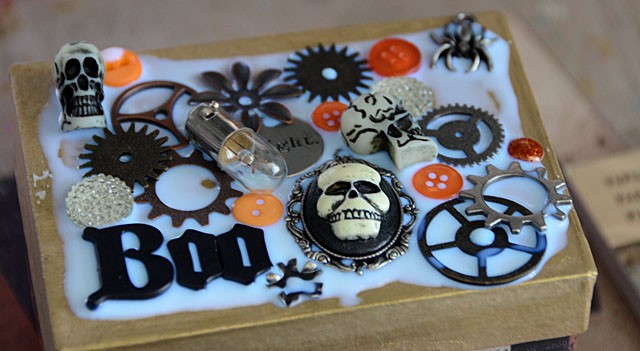
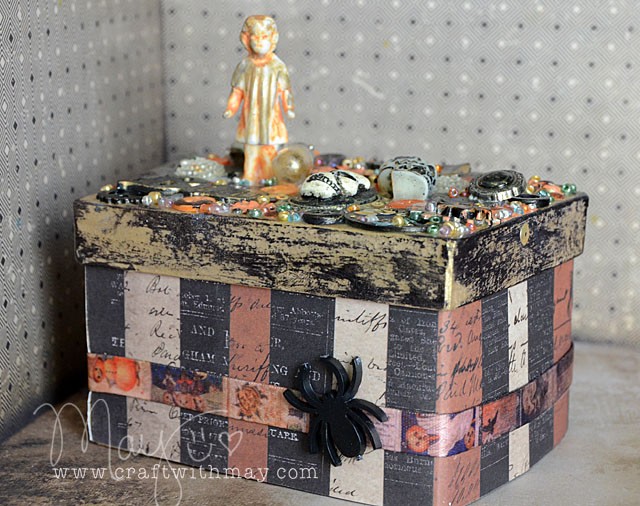
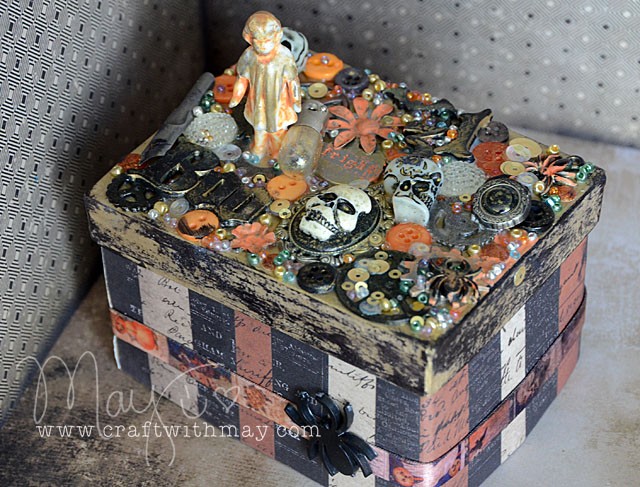
This project was the spookiest and most fun I’ve had in ages! To make your own gather some of the fabulous new Tim Holtz Halloween goodies. Wrap a paper box in paper. Paint the lid gold. Add PPA (affiliate links used – PPA is a fave and available at Ellen Hutson, Simon Says Stamp, and more) and get wild!
Start with a few big pieces…
add a few more…
and then once you have the big pieces put in place, add little details!
My “creepy” girl was altered by simply applying some orange paint that I wiped off, and then the same with gold. Just acrylic dabber paint from Ranger – no big thing. The black on the edges of the lid is just archival ink. While this project looks super intense and like a ton of work you’d be surprised how fun, quick, and easy these come together! I’m going to be sharing a video post of my process next month so that those of you who want the step-by-step process can see just how easy it can all be.
This has become a part of my décor for this year – I simply can’t part with it! It makes for a fun little addition and boy did I have a good time. Things are sure spooooky around here…
Looking to shop? I’ve got you covered – and thank you in advance to those who use my affiliate links used below. Costs nothing extra – just helps me keep the lights on and the free content coming! BlueMoonScrapbooking, Ellen Hutson, and Scrapbook.com carry most if not all of the supplies I used, and so does Simon Says Stamp.
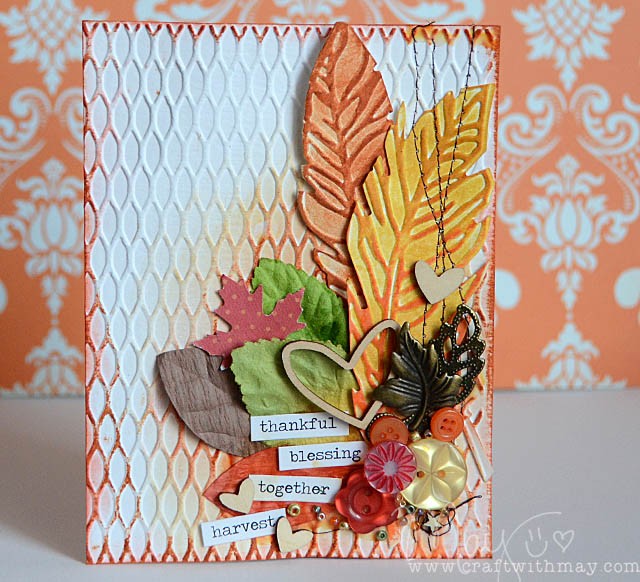
One of my favorite ways to utilize my Tim Holtz texture folders is by making a card – they are the perfect size, after all! Today I’ve got an autumn inspired one – and I’m using (for the first time!) the feather duo that came with both die cuts and the texture folder to make them really have great detail. So impressed!
I added pops of metal, brown, and green in my embellishment cluster to balance out all those lovely shades of persimmon and marmalade.
The finished results! I love how this turned out, and the choice to add last minute wood and beads was a good one – this cluster needed that texture pop. Most of the embellishments are older and were found by diving through my lovely tacklebox drawers ‘o buttons and things. Love embellishing this way!
Are you in tried & true cards class yet?! Well This and so many more cards will be featured. You can find all of the info for that class coming in November, as well as my ongoing layouts class craftwithmay.com
Key supplies used:
Any dye ink would work – I used Tim Holtz Distress inks (available pretty much everywhere!), an odd assortment of leaves and wood veneer hearts, a few buttons and beads, and of course my beloved Tim Holtz seasonal chit-chat stickers! The background texture folder and feather die+ texture folder combo that I used are also both Tim Holtz, and available lots of shops – some affiliate links listed below.