Spooky house featuring Tim Holtz product

This is something I made just because. A number of creative experiments together that worked out way better than I’d ever hoped. I hope you like it.

Without further ado may I present: the spooky Halloween house that took forever and yet took no time at all.
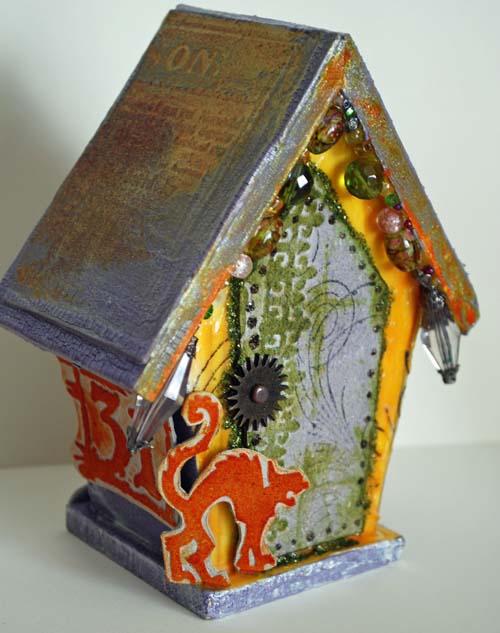
Featuring a whole lotta Tim Holtz products…
Distress Crackle Paint in Dusty Concord
Distress Ink in Spiced Marmalade, Dusty Concord, and Peeled Paint
Distress Embossing Powder in Brushed Corduroy
Distress Stickles in Forest Moss and Walnut Stain
Flourish stamp
Idea-ology sprocket gear + brad
Grungeboard basics- plain
embossing folders: Halloween Night & Poison set and Branch Tree
other: beads, PPA by US Art Quest, Liquitex pearlescent medium
This was a project done in 5 minute increments over a few weeks. A little paint here, an experiment with grungeboard there… it was SO FUN. It needed a lot of drying time so it was a great project for me to work on between other projects and during down time.

First I was messing around with ink, water, Tim’s embossing folders and powder, and grungeboard… and I decided to chop the image in 1/2 and make a spooky roof…

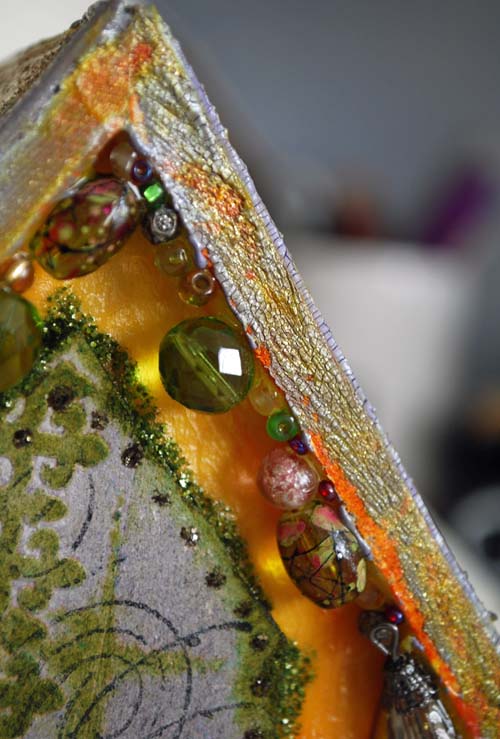
Added in some crackle paint to funk things up, and the front is painted with a mixture of matte finish medium + distress ink (more on ‘how’ some other time on that one). Eventually I ripped off the bird perch and turned this into a straight up spooky house…

Grungeboard door cut to size. Then embossed, inked, stickle-d, and door knob added…

Then I just kept saying “what if…” and adding stuff.

The tree above was done with a paintbrush + water + distress inks (on embossed grungeboard) before stickle-ing and was WAY fun. I don’t know what my favorite part is though – I just had so much fun on this whole thing! {though for me, the crackle paint really made this for me. LOVE that stuff!}

To say I had fun with this would be an understatement. I’m loving the embossing folders ENTIRELY TOO MUCH! Or maybe just enough? Let’s just say I’m adoring them, along with a whole lot of Tim Holtz (genius) product… and I am loving every minute I get to work with any and all of it.

Can’t you just see a whole village of spooky houses? I can. Though I will likely not make another until next year. To say I cut loose and tried a whole bunch of things would be accurate. I’m ready to pull down all my Halloween decor. 

Next stop on this creative fun train? Gingerbread houses + an all new class for Scrapbook Territory (making said holiday houses). Stay tuned for more info on that in about a week or so…

Now. Who has some candy corn they want to share? I’m SO in the mood for fall!

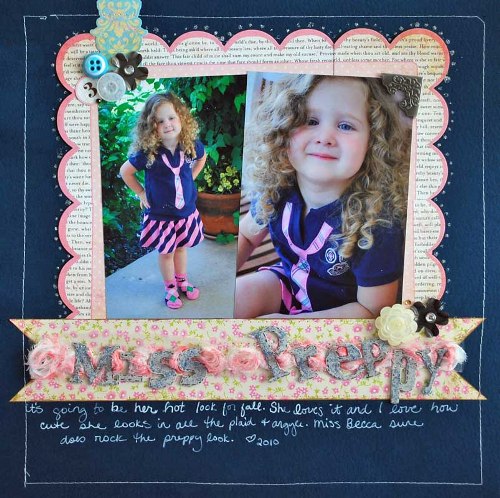
 

Miss Preppy {as seen in Sept 2010 Ella Ezine}

 I was asked to contribute a layout to this article in the September Ella E-Zine

yeah, you say “do something girly with ___” to me and I am all for it. LOVE my girly girls!

Oh and that outfit?! It’s my favorite. I normally don’t buy clothes for the kids at the ‘real’ gymboree (we have an outlet one too) but I could NOT help myself. Loved it – and she does too. Becca + Preppy = fabulous.

Mostly used girls paperie + tim holtz goods on this page. LOVE that the two go together so well.

PS that Tim Holtz ribbon – inked up? TOTAL favorite!! You can check out the article + more about my page here: http://www.ellapublishing.com/ezine/2010-sep/girly-guaranteed (and get more info, see more pages, etc). Also don’t forget Mondays on the Ella blog = prizes!!

Of course, for more girly-fab you can check out the e-book!

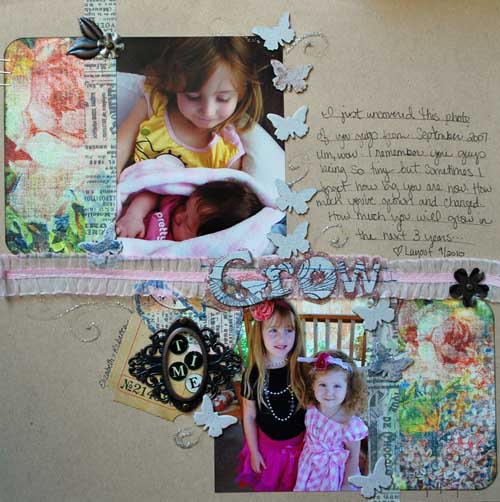
{project time} grow layout

Can you use grungeboard or chipboard plain? OF COURSE! It was a subject brought up over at the UYS classroom, and it inspired me to get creative…

Last night I found this photo of Elizabeth + newborn Rebecca (yeah, my kids are born with load of hair + huge) and got the idea to do a ‘then & now’ page about growth. I have been dying to use the floral paper you see (it’s by Tim) but it was just too overpowering in large quantities so I used a little bit and both inked edges (with forest moss) and rounded the outside corners. I decided to set up the page with loads of journaling room in case I got going too…

supplies:
Tim Holtz patterned paper (lost & found)
Tim Holtz stickles in Stormy Sky, Victorian Velvet, Pumice Stone, and Forest Moss
Tim Holtz distress ink in Forest Moss, Black Soot and Spun Sugar
Tim Holtz (for Sizzix) heart die
Tim Holtz idea-ology ribbon, letter stickers, grungeboard letters, journaling ticket, metal frame, flowers, leaf, brads, staples, and tissue tape
Tim Holtz flourish stamp
Jenni Bowlin chipboard butterflies
unknown: thread and cardstock

I love how the tissue tape (seen above) is a bit sheer so it adds such a soft touch of color. I also like adding bits of both the distress stickles and distress ink here and there. Makes me feel good to use it plus I love the added layer of color and interest. On the ribbon I rubbed it (it was white) all over my spun sugar ink pad before stitching down.

I stamped the flourish stamp over the title letters (before they were on layout) then adhered… but it didn’t work. SO I stitched them down, then added on a bunch of stickles because I’m so in love with that stuff these days! It’s still a bit wet in the photos.

I know a lot of my stuff looks random… but it’s SO not. It’s all planned out to fit just so, not make trapped white space, etc. One of my favorite things to do with tickets and journaling tags and such is to use them as a base to layer things on as I’ve done above.

My assistant is not impressed. Or is she? That’s how she always looks so who knows. I just know I had one good time this morning and I’m off to do more!