Valentine with Heart

As you may know, I love giving myself space to create and test new to me supplies without any kind of pressure. One of my favorite things to do if I kind of like the results? Use the ScanNCut to create a shape for future project! For this project, I began with an image on watercolor paper that I colored then spritzed with water (really, that’s it!) and after figuring out it works… what to do with the paper chunk?

Here is a link to my YouTube video tutorial.

When it comes to Valentine’s Day, we’re all about friendship, and all forms of love. It’s a happy (low key) day- but I sure am happy to use this paper in this way. I so love mixing a stamped image + cut shape + embellishments!

Here are my tips for this kind of creating:

  • Figure out where you want the bulk of the embellishing/layers to be clustered. Don’t compete with main image!
  • Consider several textures, sizes, and forms of color (mist, sequins, beads, buttons…)
  • When cutting out your shape, consider being slightly off center and cutting a few bits off. There’s something to this at times that just makes a project work!
  • Don’t forget contrast. Here I used black ink to edge. That’s just one example but contrast is your friend always!

Here is my finished card –

I hope that you have a wonderful week and Valentine’s Day as well!

disclaimer that I am a paid consultant for Brother ScanNCut. All ideas, opinions, and projects are 100% my own – I just really love this machine and am so happy to share projects with you here and on the ScanNCut website too!

Planner charm

Valentine’s Day is coming right up, but I adore hearts all year round! Today I’ve got a video tutorial for you (and note – affiliate links are used in this post). I had so much fun making this!

So I wanted to create a custom charm with one of the new Paige Evans charms (link to Blue Moon Scrapbooking and link to Scrapbook.com) + some of my new beads (and basic skills!) for my travel notebook. I am working with the (links to scrapbook.com) Webster’s Pages traveler’s notebook cover in rose gold as well as a new notebook from Webster’s for my travels. I absolutely LOVE the Webster’s covers and notebooks!! Anyhow, there’s a spot to attach a charm so I decided to bead one up!

Here’s a link to my YouTube tutorial, if you’d like to see the full how-to.

I absolutely love how this turned out – and that I can re-use everything here if I ever grow tired or want to change things up. This is definitely a great year for fun new supplies already-  off to create more!

Looking back: ScanNCut favorites

As I sit and plan new creative projects for 2017, I couldn’t help but take a stroll down past videos and blog posts for inspiration. Sometimes ideas or things you’d want to revisit can get forgotten! So today, I want to share some of my favorite ScanNCut projects that I’ve created in the past. As a paid consultant for Brother, I create a lot of things with the ScanNCut and I always enjoy new creative challenges.

Don’t have a ScanNCut but thinking about it? Let’s begin here with my post that gives my thoughts on “Is the ScanNCut for me?

One of my all time favorite projects and realizations was that I could create whole scenes of stamping (using masks cut from scanNcut!) and then cut the whole thing out. I just love this – and if you’d like to see the how-to you can check out this “fairy simple” post.

Of the accessories available, my favorite has to be the iron-on material. I just love the glitter and sparkle! At great timing for St. Patty’s Day, here is a favorite of mine Lucky Tote bag that features both the iron-on glitter material and the rhinestones that iron-on! I love a good fabric project that doesn’t require sewing!

Cupcakes to succulents and hostess gifts too, I want to dress up my gifts and treats more this year. This decorative Picks post shows how simple it is, and reminds me that I should probably make a few to have ready to go!

Speaking of love, one of my goals this year is to try more layered detailed designs. This Love cut-out card reminds me how much fun that can be.

Coloring watercolor paper and adding sparkle & fun? One of my more popular past projects is this detail cut + watercolored card.

Finally today, I want to share a bird ornament that I created with the ScanNCut. I want to get into more fabric + felt + embellishment projects and I recently checked this project back out to recall the details and remember what works.

If you couldn’t tell by now – I sure do have a whole lot of fun with my ScanNCut! I hope you found a new idea to inspire you creatively in this post, and I wish you a most wonderful week!

Wild or simple, complex or quick – enjoy some happy crafting today!!

Mix it up with Ellen Hutson & 28 Lilac Lane

It is my pleasure to share today’s blog post with you. Ellen Hutson is a wonderful shop, and they’ve chosen 28 Lilac Lane to highlight in their “mix it up” challenge this month! All of the details on the challenge and how to enter it are here.  Here on my blog I’m going to share two cards, as well as (affiliate) links to the supplies I am featuring in my cards today.

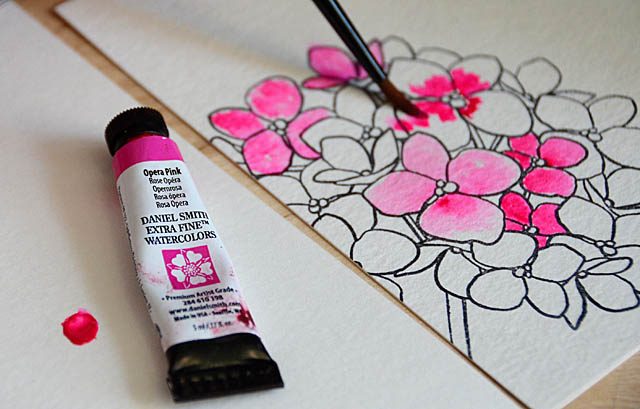
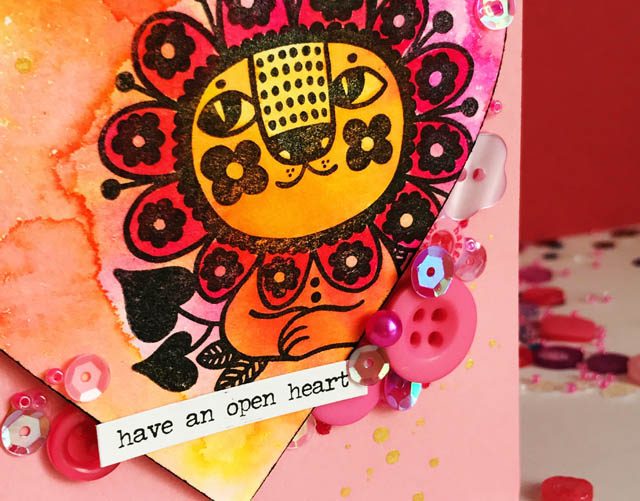
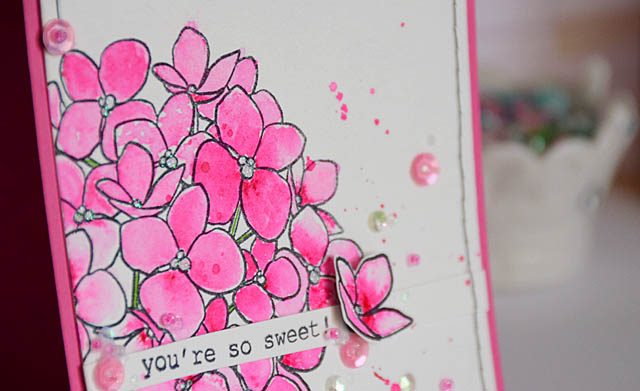
My love of Opera Pink (Daniel Smith watercolor) is no secret, and so for my card I decided to use it (with a good brush and some water) to color the hydrangea (stamp) that I stamped onto watercolor paper with black archival ink. I did a combination of applying color to dry paper, wet paper, and going back over some petals and not others to create a variety of color with just the one tube. I can’t ever get enough of this bold pink color or this hydrangea stamp.

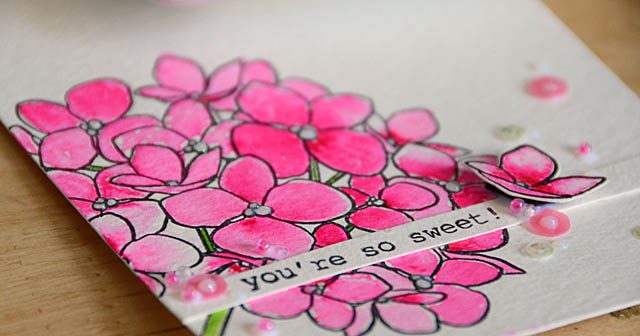
To finish off the hydrangea I added some Nuvo glitter drops for the centers, and used a green clean color marker for the stems.

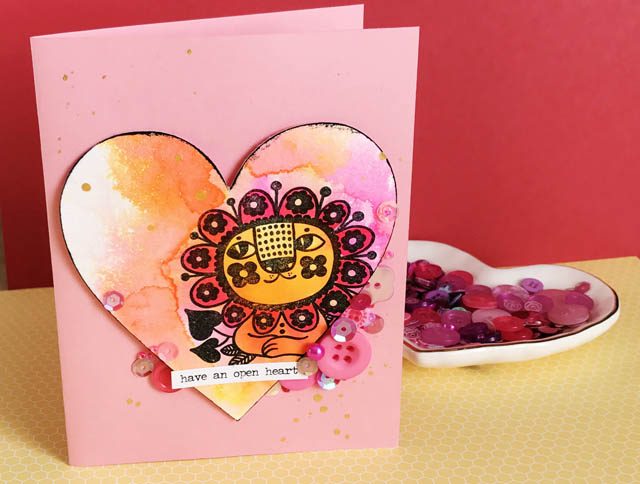
With such a bold bright flower, I didn’t want to overwhelm my card with too much additional items but I do want more dimension and embellishment so I went to my 28 Lilac Lane Rainbow Unicorn shaker mix. What I love about my shaker mixes is that they’ve got a handful of buttons and LOADS of little sequins and beads so from making a shaker card to adding a few sweet little embellishments they’re perfect!

I’m a big fan of mixing & matching stamp sets, so I grabbed a scrap of cardstock and a sentiment set (Ellen Hutson exclusive) and got stamping! Then, looking at my sweet embellishments I decided one more thing was in order so I colored a single flower, adhered on with foam adhesive, and then using PPA (my favorite adhesive!!) added my sequins and beads.

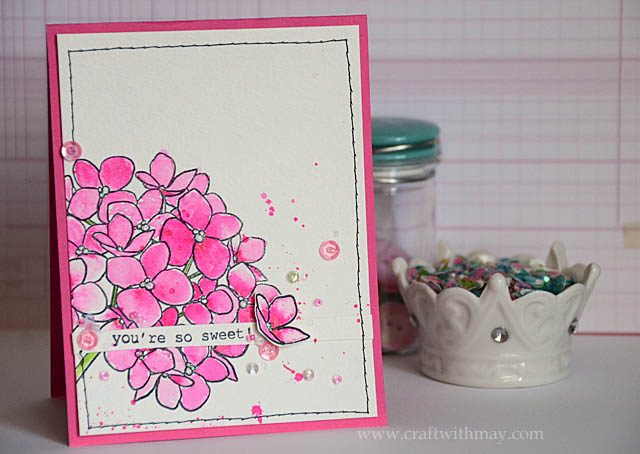
Ah but wait – one last thing once I stitched and then adhered to a (4 1/4 x 5 1/2) card! I took the little bit of pink color still left, got it onto a real wet paintbrush, and flicked! Those pops of pink added detail to the flower and speckles of fun around where my sequins and beads are. This card turned out in a way that I just love – and I hope you’ve enjoyed hearing about how I created it.

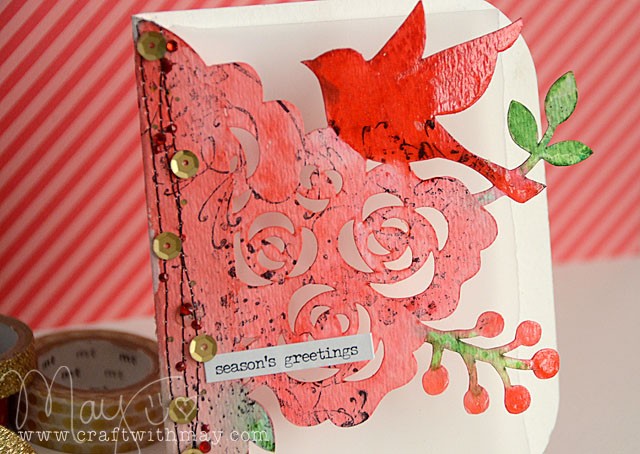
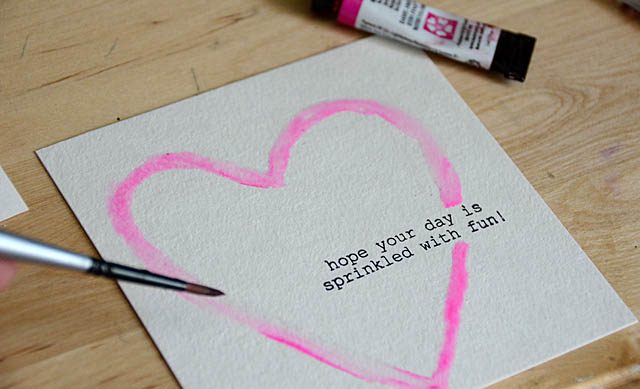
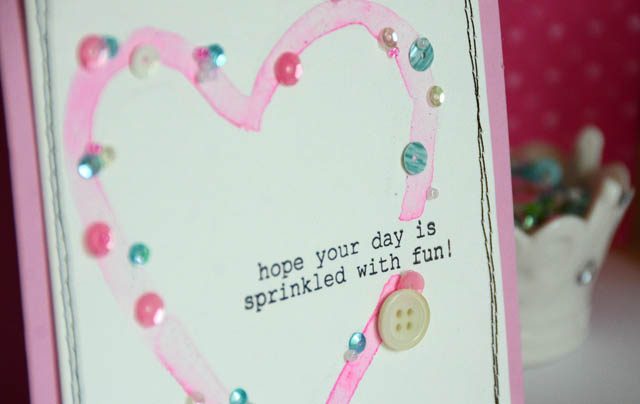
I had some extra Daniel Smith Opera Pink on the paper so I decided to create one more card. This time I began by stamping (black archival ink) a sentiment from the same stamp set used on my previous card. Then I used water to draw a heart onto watercolor cardstock and then with watercolor on my brush just gently touched along the wet line. Before I knew it, the heart was formed!

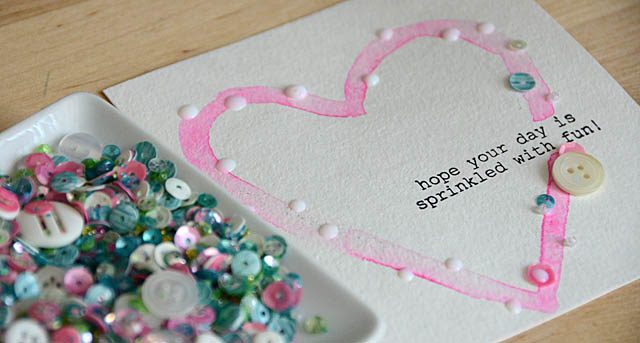
This is such an easy technique, and what a great way to use up my leftover paper and paint! Once dry, we’re ready to finish off this card with embellishments! I’ve got my rainbow unicorn mix out once again, and I’ve placed dots of PPA adhesive around the heart where I envision embellishments. One at a time I add them until satisfied, adding more adhesive as needed.

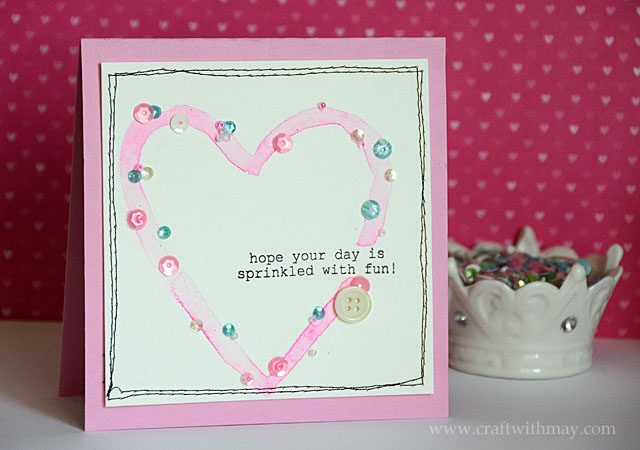
This card really truly is sprinkled with fun, and I love the results!

I am always inspired to try creating multiple things with the same basic supplies, and seeing how different results can be. When it’s favorite embellishments and colors? That’s always fun! Of course my 28 Lilac Lane embellishments do mix so very well with Ellen Hutson stamps & products – so that made this extra fun.

Thank you to the Ellen Hutson team for inviting me to play along as well as highlighting my 28 Lilac Lane line! Ready to join in the fun? Here’s a link to the Ellen Hutson blog where you can enter the challenge (heck, you may win a prize!) and see even more inspiration.