ScanNCutDX: perfect party cake

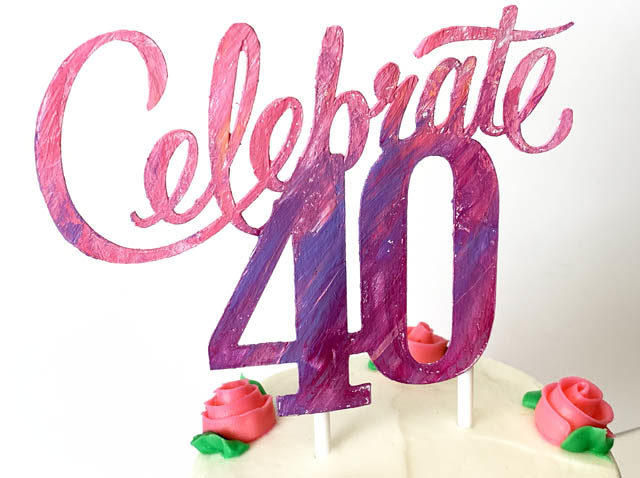
I celebrate my birthday this week, and I wanted to make myself a cake topper for the occasion that was fun! I enlisted the help of my ScanNCutDX, some paints, and of course some food safe cake pop sticks! Disclaimer: I work with Brother as a paid consultant, but all ideas and opinions are my own

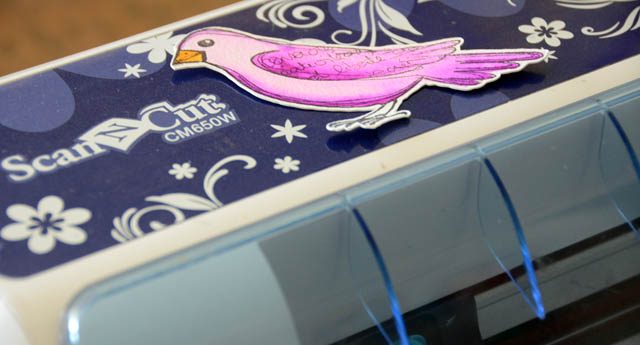
I created a YouTube tutorial (here) to share the process of this and how to weld files together on the ScanNCut to create one cohesive design. I absolutely love the results!

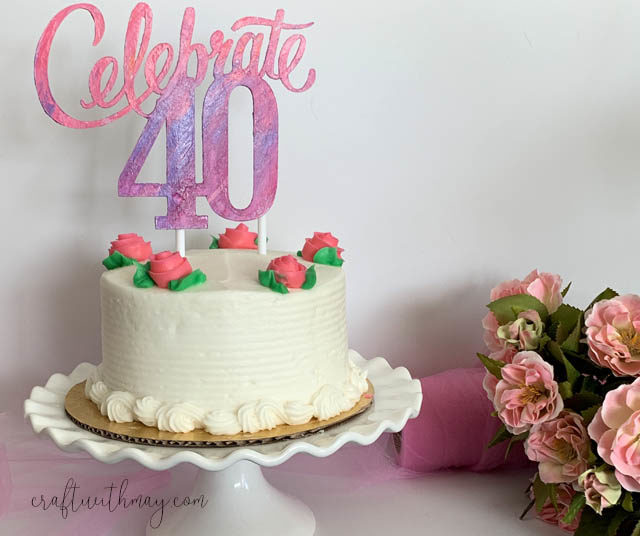
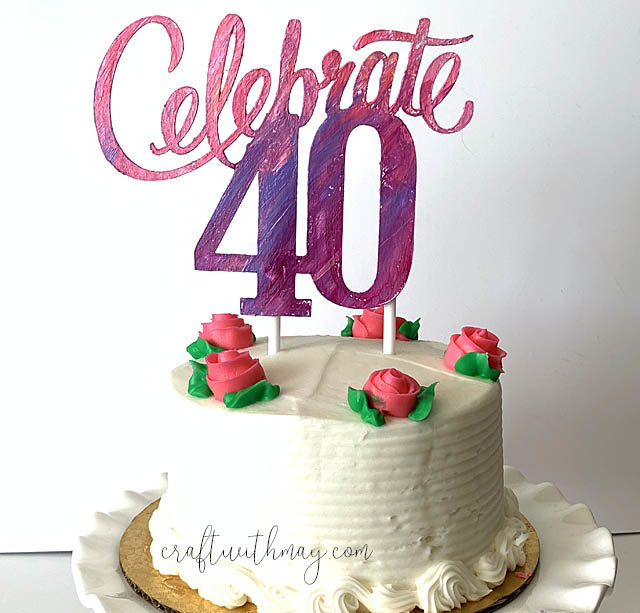
As you can see my cake pop sticks work perfectly (and keep everything food safe!) and my wild painted cut file from Chipboard perches atop the cake nicely! This concept will work for cakes, cupcakes – whatever you like! I love that it can be custom, use pieces from my existing craft stash, and have fun making it!

I hope you have a cake filled fun week – I’ll be celebrating in hand crafted style!

ScanNCutDx: Celebrate card

As I tried to make graduation cards for my girls, none of the usual cap, black and gold kind of themes seemed right! I wanted color and fun as they move into a new school and chapter of their educations! That’s where my ScanNCut came in! Disclaimer as always – I am a paid consultant for Brother, however all ideas and opinions are now (and always!) my own

My inspiration was to utilize a favorite built-in cut file along with some custom water colored fun! For the full video tutorial you can view my YouTube video here.

You’ll need to start with a colored surface. In my case, I watercolored a rainbow of soft colors (as you can see above), and let it dry fully. I really mean FULLY! Watercolor paper gets very soft and that = tear/mangling vs a clean cut with any die cut (machine or not!) so let it dry.

Once it is dry, you can cut to your heart’s content! I love that the ScanNCut allows me to scan the paper I’m cutting so that I can see exactly what colors I’ve got, and where I want pieces to go. makes for such a beautiful finished product! (exact how-to in video linked above). I cut stars as well as my “celebrate” before mounting onto watercolor paper (with edges colored), adding some flecks of gold and sequins, and putting it all onto a folded card.

I LOVE the results! These are such fun cards, and they could be done with any word, for any occasion! You can also use the idea for scrapbooking or other paper crafting embellishments as well. I will be remembering to pull out this colorful technique for more word art in the future – just love the results so much, and love the reminder that Grad stuff doesn’t have to all be black and white!

In a galaxy not so far away..

I have a new scrapbook to start planning out (more on that soon!) as well as wanting to get some Star Wars themed scrapbooking shared today. Why? It’s Star Wars day AND National Scrapbook day! hooray!

Here is a link to my YouTube video – in it I focus on the foil technique used on this layout.

My process of creating this (or any) layout is to really look at the photos and think about color, mood, textures – and what I have. I really couldn’t find anything I liked (aside from themed stickers) in my stash. Time to go shopping? NO! Time to get creative and look a little deeper. Look for colors, materials, and textures that fit the mood.

In this case green painted foil (more on that in my video linked above), blue paper, white cardstock, and some black ink helped me make the wild and grungy page to celebrate this dessert/birthday party. I was able to fit all of my photos and journaling in, as well as some fun details too!

I really like how this turned out and I’m loving that I got ephemera worked in as well. Capturing details like how we celebrated a birthday (while on a vacation!) is just one thing I adore about scrapbooking and I’m happy to have shared with you today! If you do any scrapbooking and post to social media, be sure to tag me. Or, as always I welcome you to email me as well. Love hearing from you and sharing this wonderful hobby of ours!

Craft with May: my month

Well friends here we go – it is my month officially. This month I turn 40, and I’m excited for a lot of reasons. I spent my 39th year really working on habits and good changes. The good news is that I’m doing it. The bad news is that man do I have a LONG road ahead to get where I’m trying to be!

I won’t bore you with all of the details, but for example on the bad side I gained 25lbs since this time last year. But on the good side, I’m working on rebuilding new exercise habits (they’ve never been quite great since ‘the accident’ that wrecked my wrist) and taking baby steps to fix that up.

On the good side, I’ve finally accepted more content planning and spreadsheets into my life and am excited about what this means for all the ideas and projects I’ve wanted to do but needed a bit stronger hand in the organization department. Down side there? Well it’s taken longer to get used to. But that’s ok!

Above you see the office closet – much cleaner! I’ve spent significant time streamlining and clearing out a lot of stuff so that I could better create and not get so bogged down in finding stuff!

In the year ahead I’m hoping to really get a dent going in some scrapbook projects, try more creative ideas, and I also hope to revamp my websites too. You know – in addition to changing my work flow, losing weight, getting more fit, and balancing life with a kid in Jr High and one in High School…

Totally doable stuff, with support and a good flexible plan!

So as I celebrate my month… watch for prizes, updates, and plenty of content I’m happy to share with you here, on YouTube, Instagram, and Facebook too. I’m kicking off my 40th year with positive momentum and can do attitude!

Scrapbooking 101: The basic tools

A while back I was reading an article about getting started with scrapbooking and it made me so mad! There were so many extras listed, so much fuss – and really scrapbooking is this simple:

paper + glue + photos + album

You could, in theory, scrapbook without so much as a pair of scissors. Not that I recommend the approach, but my point is that it does not need to become this huge beast of a hobby! You can keep it as simple as you like. As I revamp and revisit my own scrapbooking habits I also want to share with you a series of articles that I hope will shed light and possibly help you if you are someone getting into this hobby. Note that affiliate links are used in this article. Long time scrapbooker? Do add your tips and suggestions to the comments!

The tools I recommend

  • Good cardstock – acid free, thick/high quality
  • Paper Trimmer -Fiskars Rotary for longevity, cheap ‘chip blade’ style any brand if just going for short term use
  • Quality Scissors -Fiskars
  • Acid Free adhesive- tape runner of your choosing and PPA liquid
  • Archival black journaling pen
  • Ring bound scrapbook album in the size/format of your choice (watch for my “how to decide the size” article coming soon!)

You can find most of the items I mentioned at a local craft or scrapbook store, or online. I have linked most of my picks (and I always am adding!) on my Amazon craft suggested products list as well. Want to take it a bit further and beyond absolute basic? Next steps I would get into:

  • Black, white, metallic colored alphabet stickers
  • a “pack” or “kit” of coordinated paper and embellishments that goes with a current batch of photos/project you’re working on
  • Black archival ink and 1 word/phrase stamp set to see if you’ll use it!

What do I not recommend? For scrapbooking or any new hobby, don’t dive in wallet first. While things like paper punches or stamps or piles of patterned paper and stickers might seem appealing, you may discover that you prefer digital scrapbooking, a clean style, or even that you’d prefer making your own custom embellishments with an electronic die cutting machine! Save money and stretch your creativity especially at the start.

I think of it like when I’m shopping for clothes. Oh sure I love lots of purses or bracelets or shoes or fancy tops… but will I use them? Actually wear them? That difference between “ooh I like —” and “I will use —” is a key thing to know, watch, and respect as you shop for your crafting supplies to be sure.

In this series of articles I will be covering how to work with a limited set of supplies, design basics, work flow and album organization, and much more! I hope you’ll stay tuned and I hope you’ve enjoyed this article. Please do feel free to let me know topics you’d like me to cover in the future as well.