Keep at it: craft disaster turned win

This year Miss Rebecca had one wish: a fun Pusheen inspired cake.

Now… I’m a person who can not decorate a cake to save her life! Me & frosting? piping? forget it! Ah but to make a layered cake would save SO much over buying one. I would have had to pay someone a ridiculous amount for a themed cake so… I went for it. And I failed. But I kept at it. I fixed it. Making frosted cakes look good? Difficult! It reminds me that in crafting I have a few rules:  Continue reading “Keep at it: craft disaster turned win”

Crafty Freak Shakes!

Have you heard of “freak shakes”? Basically over the top craziness also found in cake form – and the girls want to create “freak cupcakes” too.

We decided to try and see if we could create some that weren’t SO over the top but also that were themed to the new Disney movie coming out this week (on Disney Channel – Disney Descendants 2) all about villain kids!


Continue reading “Crafty Freak Shakes!”

ScanNCut tutorial: Luau party bags

luau

note: I’m excited to announce that I’ll be working with Brother International once again creating project tutorials featuring the ScanNCut! If you’ve got any questions or requests let me know!

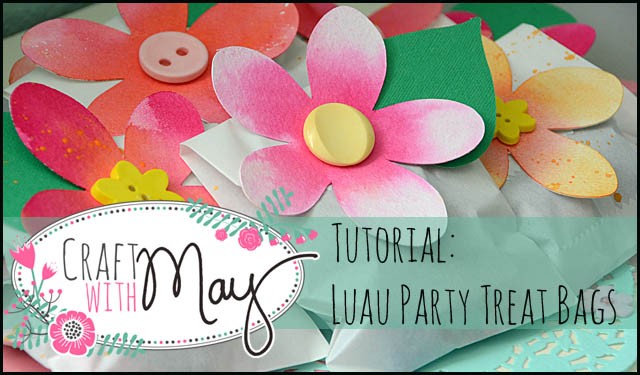
So, you’d like a themed party treat bag but you want it to be inexpensive, simple, and more importantly you want to be able to make it from home. I’ve got the solution for you, and while my tutorial is inspired by the beautiful flowers of Hawaii you could easily take this idea and use any shape you like from simple circles to stars or any other shape you would like! The key is to think about the colors and mood you want to convey, and figure out what will get that feeling across simply.

Supplies Needed:

  • ScanNCut
  • Watercolor paper
  • Watercolors, mists, or other fluid color
  • buttons
  • treat bags
  • hot glue gun

First, fire up your machine and pick your shape and size. I will be cutting 4.5″ flowers that remind me of Plumeria and I think will color nicely. The next step is to sort out how it will best fit on your paper. I was working with 9×12 watercolor paper, so I arranged the four towards the top knowing I would need to cut a total of three pieces of paper to get the amount of flowers I needed. The process is simple – pick a shape, decide the size (4.5″ wide for me), how many you want, and cut!

Untitled-1

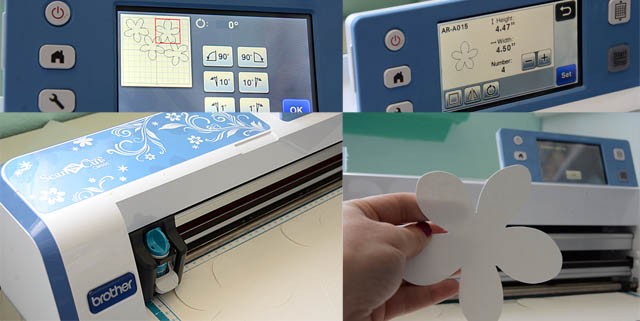
For this paper I put the cutter setting at 8 as this is very heavy cardstock. Two great things: First that I could just keep adding a new sheet of paper and cutting without going through the steps of selecting and resizing, and secondly that I can and will keep the scraps to cut smaller items out later!

Once all the flowers were cut out the coloring fun begins. I *love* cutting white paper because then I can get inky and play!

pic2

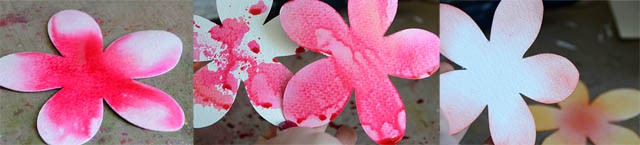
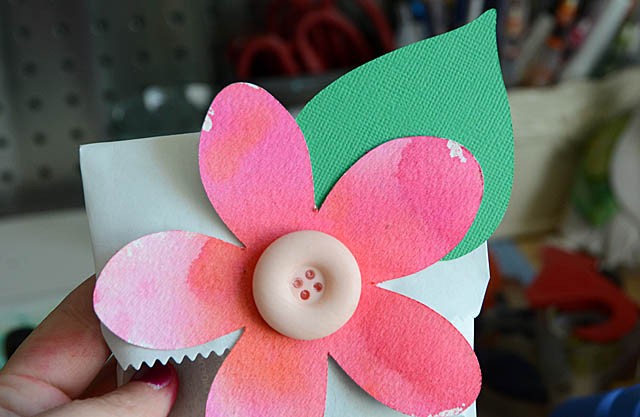
ANY color medium will do! What you see here (left to right) is watercolor, spray ink (on dry paper vs wet paper), and blending dye ink with a foam blending tool. Play, experiment, and make whatever you have work!

123

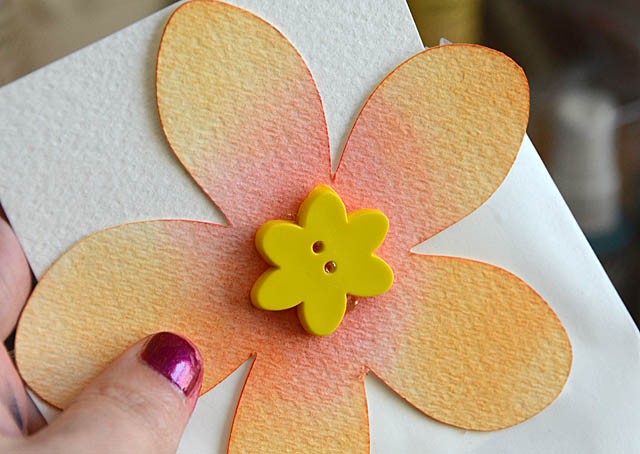
The next step is to glue these to the top of your treat bag. I put a tiny drop on the front (to secure a button), and a drop on the back and secured slightly hanging off the top of the bag. Once this is done fold over the bag, and you’re done!

Want a bit more fancy? You could add spray mist for sparkle, glitter glue edging, or add a second shape as I did here.  I had some green cardstock scraps left over from Christmas that I used to cut leaves for my bags – once again added with hot glue.

131

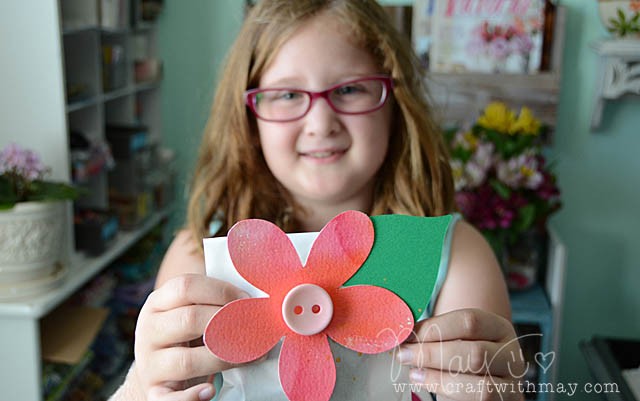
What I love about this is that I was able to play and have fun with colors, it was totally simple, and the girls all loved that there was a treat bag that looked so special and homemade. The bags I used are just little glassine bags from the craft store with a few candies tucked inside.

151 copy

I hope you’ve enjoyed this tutorial! Stay tuned for many more. I’m excited to share the ideas and projects I’ve been working on here in the studio. In fact- I’m on my way to Ohio to film some segments for Scrapbook Soup! I’ll share some sneak and behind the scenes peeks next week when I get back.

Happy Crafting!


I am a paid consultant for Brother International Corporation and have received a ScanNCut from Brother to evaluate. However, the opinions expressed are entirely my own and based on my use of the product.

Inspired by Ever After High 10th birthday party

IMG_0595 copy

Elizabeth is really into Ever After High. If you’re not familiar – it is books + TV specials about the kids of fairy tale characters. You’ve already seen her invites (here) so here is what I did for the party. I had wood crowns (Michael’s) that I painted, and I took my ScanNCut machine + various cardstock scraps laying around and made some random signs and things to try and help with the theming.

IMG_0593 copy

New Ranger paint dabbers, for the win!

IMG_0689 copy

With all my parties, I set up a crafts table where the kids can play and enjoy. My key? I always put supplies in cute containers!

This time I got everyone little paper mache heart shaped boxes (hearts being the logo/branding of Ever After High!), I also found some “Ever After High makeover” kits on clearance that I set out to play with.  This was great because it was a bit more big girl friendly and didn’t make them feel like they were playing with toddler stuff.

Onto dessert!

IMG_0676 copy

Lawn Fawn cupcake die cut + patterned paper to the rescue! LOVE how these make ugly or “baked in” cupcake wrappers look so clean and lovely. I had a few random treats + the real star.. fancy cookies!

IMG_0654 copy

I hesitate to share my source (haha!!) these cookies were made to order from Aunt Bea’s Bakery. I ordered them about a month in advance – she gets booked up! She did an AMAZING job! I told her what character we were using as source inspiration and she ran with it. The Mad Hatter hat with the “10” aka age of the birthday girl was the favorite.


IMG_0670 copy

This is the area by my front door – welcoming guests “madeline hatter” aka our inspiration for the party sat and watched over the goodie bags. It looked a little clip-arty for my taste… but the girls approved it so I didn’t stress.

Because sometimes? The details I think about they really don’t care about. There were streamers. Paper lanterns. Balloons. Cookies and cupcakes. pizza.

Therefore, the party was a success.

IMG_0699 copy

Now, I’m heading back in to clean that wild craft table mess…

Frozen inspired birthday party


098 copy

Finally got time to edit these photos – excited to share the “how-to” and full look at Miss E’s Frozen inspired birthday party! First of all, I was (PHEW!) able to find a few Frozen movie details that really helped bring it all together. The Olaf balloon (pictured above)? a HUGE hit.

So first I took her feedback: she wanted the “food” area to be Elsa’s (all blue/snowy) and the “art” area to be Anna (pink/green/flowers). Ok. I could do that! To start off with I thought about the movie, the feel I wanted and looked around to see what I had.

090 copy

Continue reading “Frozen inspired birthday party”