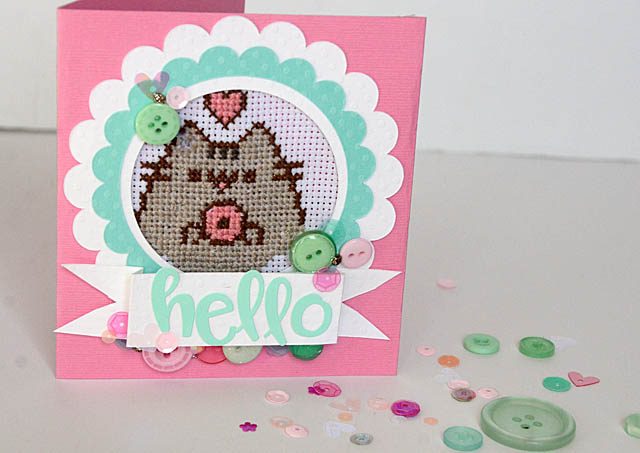
Rebecca and I have been super into Cross Stitching lately (more on that another day!) and one thing I wanted to see was how we liked combining it with card making! I’m going to be dipping my toes into embroidery as well (another topic for another day!) and I want to be able to use those skills on cards as well. I just adore the idea that a card can be a frame-able little work of art! It is also able to be removed by taking off tape.
Recently I spent an entire day pondering this, and figuring out “ok, so how can I best make a card with a little cross stitching?” I don’t know if I answered the best question, but I do know that one tool helped me make my visions reality: My ScanNCut DX!
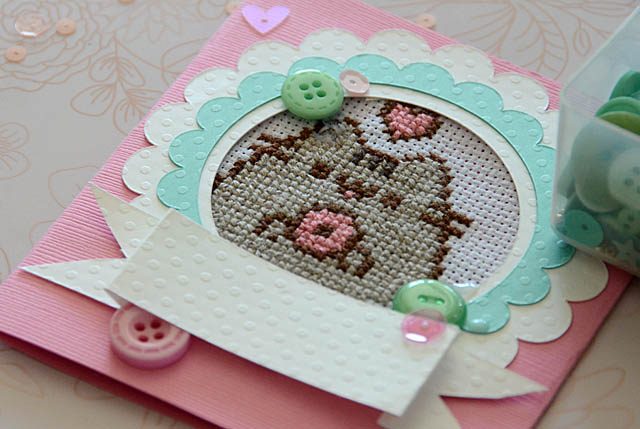
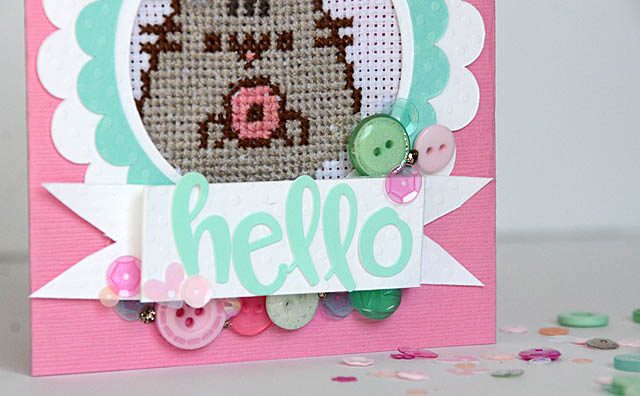
For a brand new idea like this it really helps me to make a sample, and so I used my ScanNCut to cut, recut, and spend time sorting out the ins and outs of a project like this. As a really visual person creatively, being able to make samples and prototypes and get my hands on mock ups to see if my ideas are feasible or not really makes me happy! I am also always learning new ideas and tricks and I have to tell you – the scalloped frame you see here? It shall return!
A few notes to share about this fun project:
- I accidentally CHOPPED the upper left corner of my cross stitch and it made me wanna cry! This was our first and both Rebecca and I took turns working on it one fine day! No!!
- I realized a combination of glue, clever button work, and pure determination could save it in this form!
- Other than the accidental chop (still shaking my head over that boneheaded goof) I worked very slowly and thoughtfully on this project. I really thought about the logistics. Things like the back of the stitching, card size, and more.
- I strongly believe in pushing your creative limits and stepping outside of what you know craft wise!
Basically? You’ll see another cross stitched or embroidery card from me. But next time? I will be so much better prepared having spent time and energy figuring this all out!
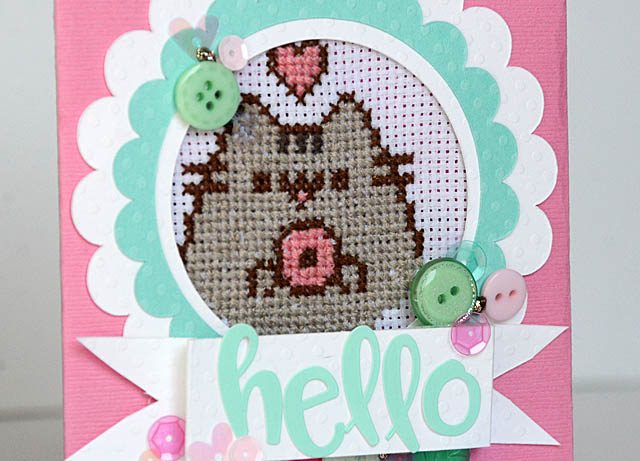
I did film the process, and then condensed it into a video about 5 minutes long. If you’d like to watch how I worked with my new favorite tool (That ScanNCutDX is so lovely!) you can do so here. I cut out the hole in the card itself, then added the other paper layers on top. Personnally I am absolutely thrilled with how this worked out – and that I saved such an awful blunder!
For more videos on this new machine as well as all my other crafty adventures please do stay tuned! I’ll be back soon with more crafty hi-jinks. In the meantime, I’d love to hear from you on what you’re working on!
and as a reminder the usual disclaimer: I am a paid consultant for Brother, but all ideas & opinions and crazy craft creations are always 100% my own.
May this is SO beautiful…a tiny work of ART. Love it so much. xoxo
This is just adorable May! I’m really into cross-stitch too … I’ll tell you two amazing places to buy Disney-ish patterns: The Frosted Pumpkin Stitchery and Clouds Factory. But be warned, they have a LOt of cute cute cute patterns!