7/2 prizes & winners!

It’s that time… winner announcements! If your name is on this list email me craftwithmay @ gmail.com and let me know what you won as well as your mailing information no later than July 20th. After that date if prizes aren’t claimed, a new winner will be drawn and announced.

Waffle Flower $25 GC: Rhea Skomorowski

Craft With May class of choice:
Kay Myers
Cori Peck
Kimberley Machamer

Neat & Tangled goodies: Liesl Doty

PenGems trio of pens: Cheri Stine

And of course – happy mail! These winners are drawn from other posts, Facebook, Instagram, and more. Congrats to: Laura Mooney, Tara O’Rourke, and celisemcl

If your name wasn’t here don’t despair – I’ve got three posts of winners still to come! Keep leaving comments on the blog posts (each one does indeed have a prize!) and stay tuned! Thank you SO  much for your support and being a part of Camp Scrap!

stamping: one stamp many ways

It’s so easy to forget: we can do things more than one way! Today I’m working with Pink Ink stamps (and wow they’ve got a lovely give-away!) and I am sharing several ways you can use the same stamp. I’m linking up to Ellen Hutson.com for supplies today – and affiliate links are used. Thank you in advance should you use the link as they support this blog and cost you nothing extra.

I’m featuring the Pink Ink stamp “Pretty Petals” – it’s a new favorite for sure!

Way #1 is the obvious: stamp it onto paper and color as seen here. Continue reading “stamping: one stamp many ways”

mixed media: shaker frame

Camp Scrap 2017 rolls along, today inspired by my embellishment line 28 Lilac Lane! The products used here are new mixes – coming to your favorite stores soon. For more information about my Camp Scrap event you can check out the FAQ page here.  Mixed Media isn’t always about pastes and color mediums – sometimes I mix & match embellishments! That’s where I’m taking today’s mixed media Friday…

I’ve made shaker cards… but can I make a shaker frame? When I saw these cute little frames at Michael’s I decided to try. What I’d like to find is bigger (thick/sturdy) sheets of acetate to try this on an even bigger frame. I also think it could be fun to do this in a frame where you have a photo, hand crafted art/stamp/image or any other variation.

Here is my YouTube video tutorial sharing my how-to. 

To recap supplies I used a frame, assorted 28 Lilac Lane embellishments, PPA adhesive, and of course a sheet of acetate… well 2 in my case.

I’m really loving how this turned out – such pretty fun! What could be more fun? How about winning not one, not two, but SIX brand new, never before seen, can’t even get them in stores yet mixes?! Leave a comment on this post for your chance to win, and on July 16th a winner will be drawn at random to win a box full of 28 Lilac Lane goodness.

This project reminds me to look at materials and the possibilities outside the usual. And as ALWAYS – enjoy the process. Have a great weekend – thank you for joining me!

scrapbooking: with a Gossamer Blue kit

Me and paper crafting kits go WAY back. Once upon a time what I loved about them is that someone would coordinate supplies to go together. I could add as much (or as little) as I liked for my specific projects but I could get coordinated, beautiful products often times things I didn’t know existed nor could I find locally.

These days kit clubs have truly evolved and become so much more – and today I’m going to share some of my thoughts, tips, and explore the four options the wonderful company Gossamer Blue offers. OH yes, and they were so generous that I’ve got a kit to give away so be sure to enter!

Where to begin? When looking at a kit club I look for product types that are useful to me, and I look for unique products I can’t get myself easily. If all I wanted was just coordinated product, I’d just buy from one specific line/brand. Kit clubs can (and sometimes do!) take it way farther with unique offerings and also design teams that share projects and video tutorials to inspire you further.

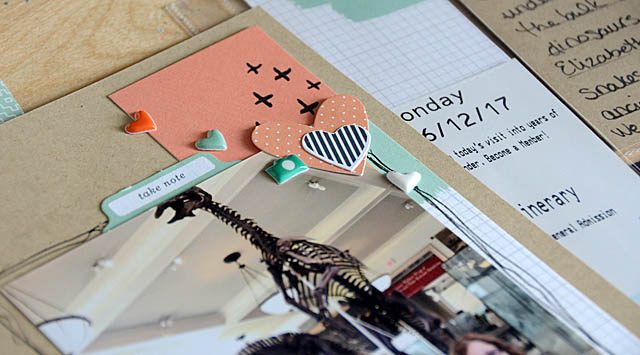
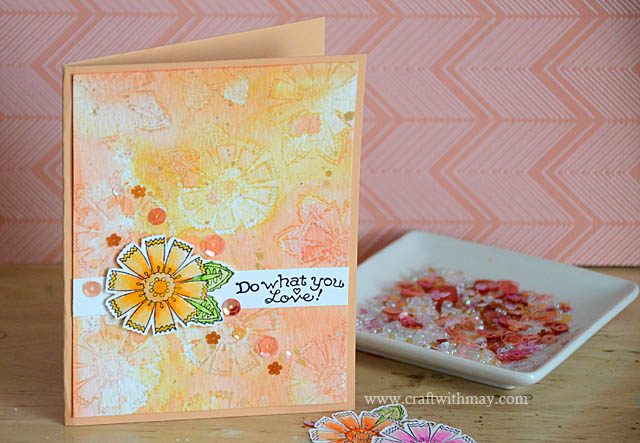
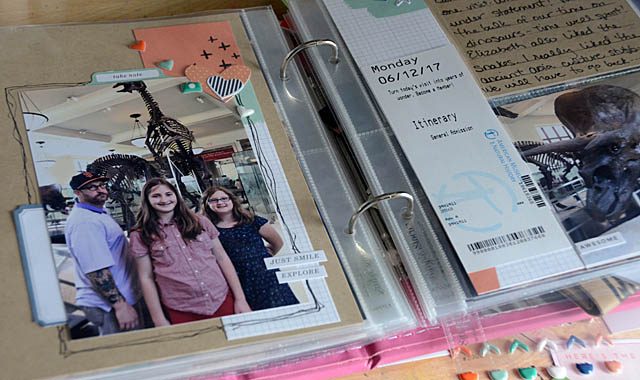
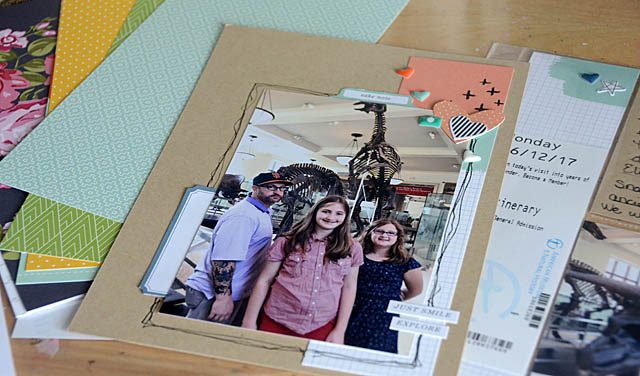
Today I’m using a Traveler’s Notebook kit from Gossamer Blue to work in my 6×8 pocket page scrapbook album. You can see (and purchase) that kit here. I’m mixing it up like this because I wanted to prove a point. The life pages kit would have been perfect (and easy!) for me to use but I really want to show that you can take any paper craft kit and make, well, anything you want with it!

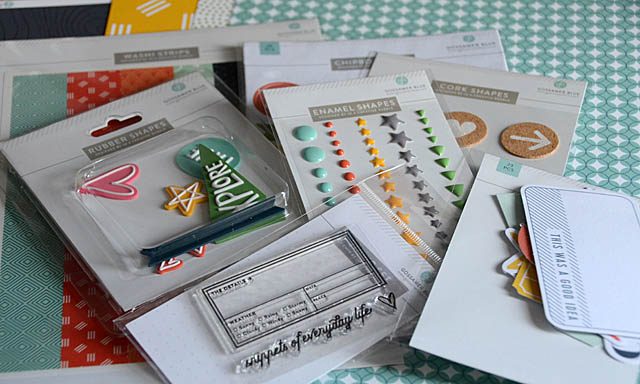
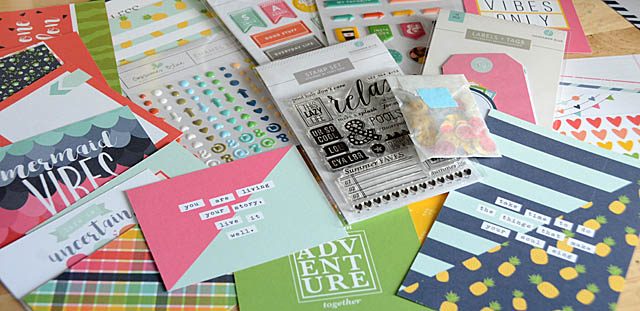
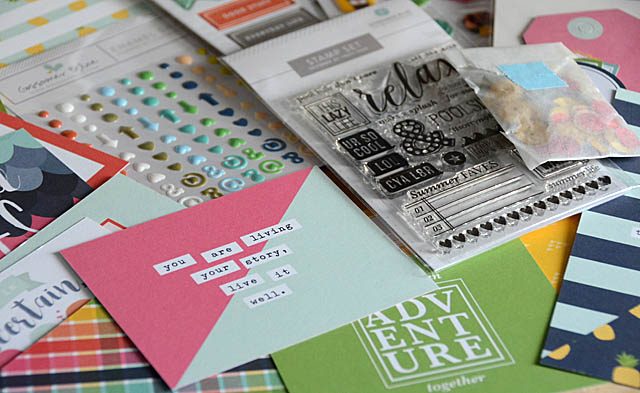
Gossamer Blue offers four different kits: Life Pages, Planner, Traveler’s Notebook, and Scrapbooking. I could use any and all of these kits for any and all paper crafting of course. Their kits are filled with exclusive product which is a HUGE selling point for me because it means this is unique “can’t find in shops” product. My recommendation with ANY kit club is to look at the contents, and see which variation(s) are actually the most useful to you. I’ve created a video to share with you as I walk through this simple page and also go over what I’m loving about these kits on YouTube.


As much as I could (and would love!) to keep all these beautiful kits to myself (mwahaha) I’m going to share them…

But before we get to that – let me share a couple of tips for purchasing kits:

  • Don’t fall in love in general – view specific elements consider them separately. Would you buy them?
  • Do consider what item(s) you tend to use, and if the kit contains types of items you use (or don’t use)
  • Do consider purchasing one at a time/a la carte vs subscribing if you don’t use a ton of supplies each month
  • Do consider the support/inspiration such as blogs, videos, etc.

I’m a “one at a time” kind of kit purchaser. Which does mean sometimes I miss out if they sell quickly, but that’s ok. Some months I purchase 2-3 various kits. Some months I purchase no kits from anyone! It works well for me, while for others having a beautiful kit every month automatically come in the mail works well.

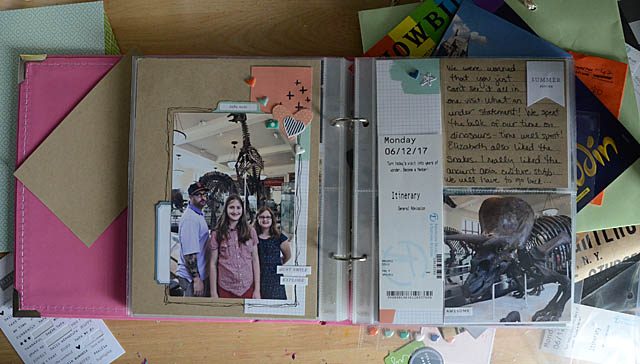
As for this particular page – it’s actually the first (of MANY) in this album about our recent NYC adventure. I am a HUGE 6×8 fan for when you want a binder/album but 12×12 is just too big. Or when you want minimal decoration/fuss and maximum story telling fun. Before I end this post I will share a few top tips for adding your own supplies into kits:

  • Don’t treat a kit as something other than a grouping of supplies. Be open and willing to mix & match!
  • Consider what the kit doesn’t have. What isn’t there? White cardstock? gold mist? kraft paper? What are your go-to items? Add those.
  • Work on a one project at a time basis. As you create, feel free to add in, mix, match, and otherwise customize.

Kits make our crafty lives fun – so have fun creating with them!

Give away time!

One lucky winner will receive the June 2017 scrapbooking kit (so beautiful! so full of goodies!).. but wait there’s more! A second lucky winner is going to receive a surprise kit! For your chance to win simply leave a comment on this post. Winners will be announced on July 16th in the round-up post here on my blog.

I will be back creating more with these kits here on my blog – in addition to the ongoing Camp Scrap event. So stay tuned!! Thank you SO much to Gossamer Blue for supporting Camp Scrap and for sharing a give-away.

And thank YOU for tuning in to Camp Scrap, for your wonderful comments, and for being a part of this fun adventure!

Inspired by: Sandy Allnock

Welcome to Camp Scrap! For more details about this special blog event, prizes, community, and more check out the FAQ page here. Note that affiliate links are used in this post. 

Today I challenge you to be inspired by someone that has a totally different approach or style than your own. Me? I’m inspired regualarly by an amazingly talented artist and card maker: Sandy Allnock.

Sandy blogs and shares her many artistic talents through online classes as well (check it out here!)  I learn about coloring techniques, copic markers, and always enjoy seeing what she does with stamps. Her classes are epic – if you’re looking for watercolor, copic, or coloring instruction? Look to her. She’s a MASTER.

Me? I’m not a master of copics or watercolor but I do enjoy learning and dabbling in techniques and new ideas. I love the process and enjoy them tremendously and that is definitely what matters. Last summer Sandy sent me some brusho colors  while I was struggling with feeling totally useless and only able to work left handed. I could stamp an image onto watercolor paper. Sprinkle some brusho. Add water. And OH! How creative I felt and how magical it was to be making stuff one-handed. Brusho saved my sanity at a time I was barely hanging on – and I’ll forever be grateful to Sandy for sharing with me. Thinking back on that, I knew I had to create with them for this post, and I decided some star gazing Lawn Fawn stamps would be the perfect compliment.

Here is a my YouTube video tutorial for how I made this fun card.

I used (links go to Ellen Hutson) the Lawn Fawn “Upon a Star” stamp set.  Oh how I love this set! Looking at this set I thought of Sandy, the gift of brusho, and let inspiration run from there. I also used black archival ink, white embossing powder (and pigment ink) and the coordinating dies for the stamp set.

Speaking of Brusho, I used Prussian blue, violet, turquoise, and cobalt blue – Ellen has all of these and many more in stock. If you want to get a few I’d stick to a trio that go together and see how you like them or the starter kit. While I did a background here, there’s some really fun stuff you can do with water + stamps + brusho. In fact, I’ll be sure to create another video (or three) with them in the coming months because they really are just the most fun! Used carefully, they really don’t make a mess either.

Sandy inspires me so much with her intricate creations, but not to make my own. You see I’m a big fan of a enjoying what someone does with something, then taking it in your own direction. Two examples – I’ll take just one idea of how she colors a background, or take a general coloring tip such as shading. I thought the stars would be the light source hence the dark on their booties, light at top. How else can you be inspired by someone who has an entirely different style than your own?

  • A single tip or technique that they use
  • General design of the project
  • A color combination you’ve not thought of or used before
  • Try something “not you” just to see how it goes and stretch your style
  • Get inspired to use that — (paper, stamp, ink, whatever!) because they used it or something similar

I get great joy from watching Sandy create intricate backgrounds I’d never attempt to do myself. And, people like her who do what they do as well as they can and continuously challenge themselves creatively are the BEST inspiration! Similar style to me not required.

For one of you, I’ve got a fun goodie bag of (not yet released!!) 28 Lilac Lane sequins & paper crafting treats I think you’ll enjoy. If you’d like your chance to win simply leave a comment on this post. The winner will be drawn and announced on July 16th in the ’round up’ post here on my blog. Good luck – and happy crafting!