Crafternoon: Embroidery Hoops

DSC_5876 copy

This Hazel & Ruby “Crafternoon” kit was the one that had me running down to JoAnn’s to find the line. I was so very excited to learn (FINALLY!) proper use of an embroidery hoop! This is such a fun craft, and I definitely learned a lot. Ok so a few things to tell you:

  1. It took me 5 hours to create the two hoops
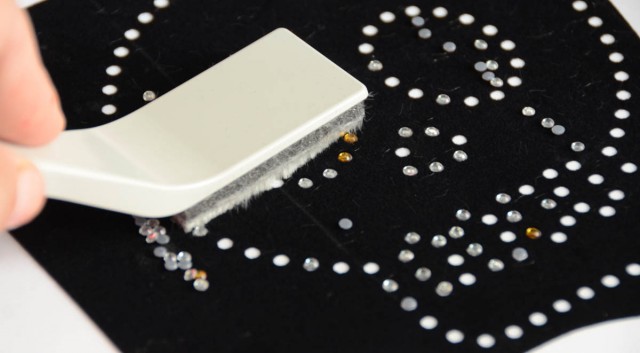
  2. All I needed was an iron, black pen, and scissors
  3. I ran out of two different thread colors – I think this was a glitch with my kit as all others had plenty

DSC_5854

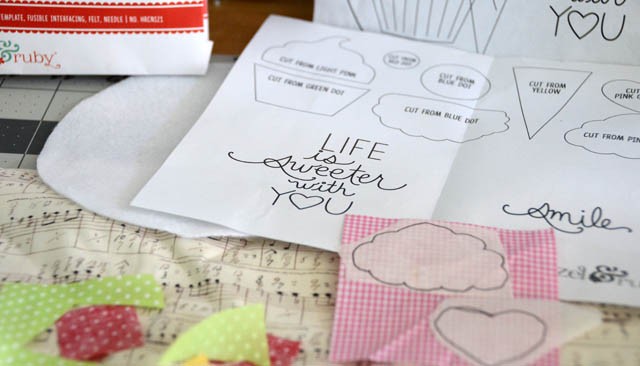
Ok so I watched the video first which was great (except two issues – more on that later) and that really helped show me what to do. Ironing on and cutting out the shapes was easier than I anticipated, and I got into the drawing words right away. Of course, me being me I couldn’t just leave the design alone I had to change the sayings!

DSC_5856

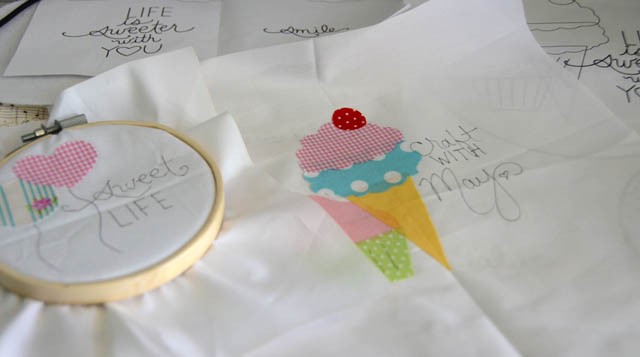
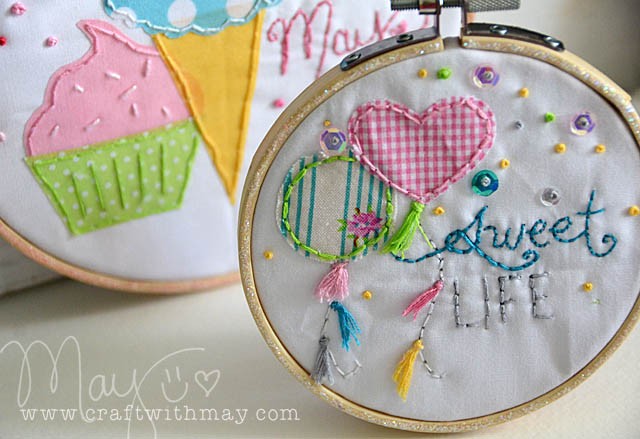
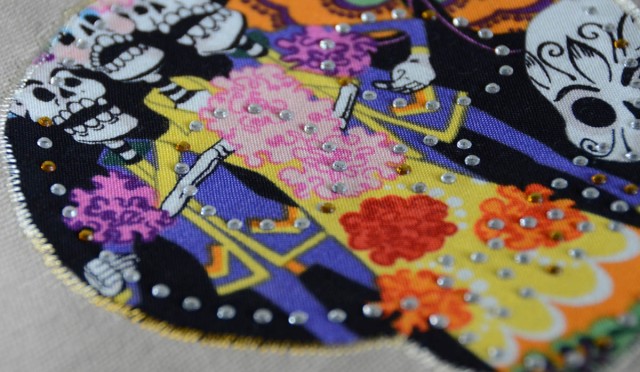
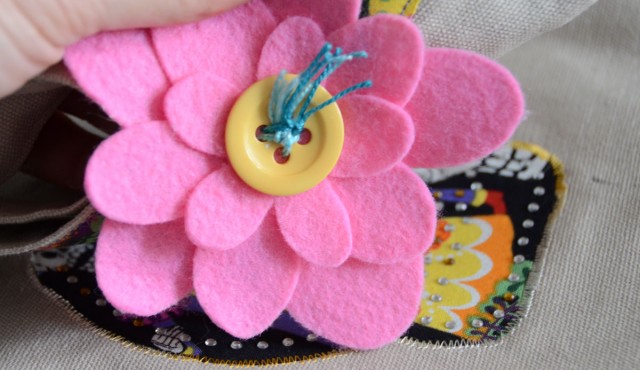
Drawing on with black pen was no problem! You can see (below) I definitely made these my own. Now I had to use a lot of my own pink thread (ran out) – but that’s ok. There was more than enough of most colors and I liked that it was easy to substitute. I goofed and mis-cut my blue polka dot which is why you see my own stripe-y fabric on the smaller hoop.

Now on the video there were two things that didn’t work. First, there was no explaining of the tassels. I assume I’m meant to loop thread around towards the top… that’s what I did. The other thing was the French Knot instructions didn’t work. I was at the end of my rope and YouTube searched it – figured out that NO, I don’t want to put it back into the same hole, rather put needle back into hole next to original. Also I want to have needle facing away from surface when twisting.

That won’t make sense unless you’re doing the project – but if you are that may help you a lot.

DSC_5884 copy

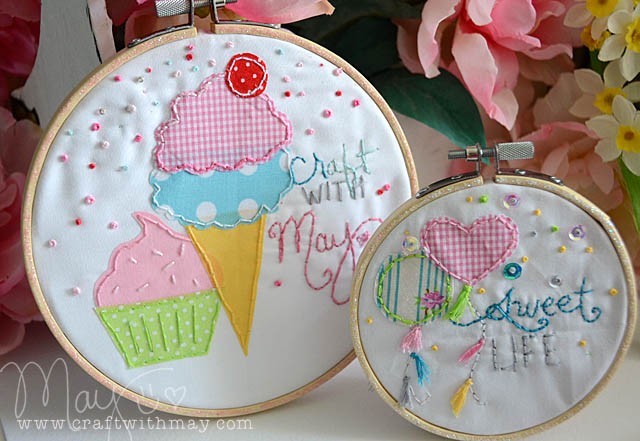
I really loved this kit a ton, it’s so well done and the projects were really fun to sit and relax and make. The designer did a fabulous job, and overall I left feeling like I’d picked up new tips, ideas, and the ability to strike out on my own with this crazy fun (though a bit on the tedious side) craft. Do I recommend it? HECK YES! It’s really a great price for all that you get, and my minor issue aside, something I had a whole lot of fun with.

I’ve got one more kit here – watch for that coming here in about a week…

Have you tried to crafternoon a day away? Which kit? I’m just so loving these!

ScanNCut Rhinestones: Dia de los Muertos inspired skull bag

Disclosure: I am a paid consultant for Brother International Corporation and have received a ScanNCut from Brother to evaluate. However, the opinions expressed are entirely my own and based on my use of the product.

I’ve been apprehensive about diving into the ScanNCut Rhinestone kit that I was sent. Would it be hard? What would I use it on? Did I really need this in my life?

Now that I’ve begun? I can’t get enough!

First of all, I cant recommend enough that you watch this video for a full and detailed how-to. Julie Fei-Fan Balzer walks you through the EXACT process. She does a fantastic job as always – and that really did answer all my start-up questions. Now you want to listen to her every word because what I learned with this first trial is:

  • Do NOT cut through the backing paper! This is vital as if you do, you’ll really truly never get those little circles out without hand doing each one.
  • Don’t be afraid to give your gems a bit more space! This is an option in the Canvas/online portion.
  • Put a LOT of rhinestones down. It worked best when a load to spread around and was much faster.
  • DO NOT wiggle, shake or tilt the box while you have the rhinestones in your pattern and loose. They will so fly everywhere and you’ll have to start over

rhine1

Most importantly: This is a TON of fun! For my design this was my process. Note you can start with any number of files – this is how I made mine:

  1. Go in the ScanNCut machine and select the skull pattern. Save to USB drive. Eject it. Get to computer and open up Canvas.
  2. Re-size skull as desired and save as “outline” to USB. This will give you the outline exactly the same size as your rhinestone outline that you make in the next step.
  3. Use the rhinestone function and size as desired. Save pattern.
  4. Head back to ScanNCut, cut from the black velvet-y material your “rhinestone outline” (USB drive)
  5. Do your rhinestone thing, get your rhinestones ready…

rhine2

But wait! This is where I tried something funky. Remember how I said I saved the “outline”? Go into the ScanNCut and pull up and cut out that file. When you do this, put a bit of tape over the cut-out parts (eyes, teeth…) so it all sticks together. Scan this back in (so it shows as just one solid shape. Then cut out fabric using a seam allowance. (Steps shown below)

skull

Why do all this? Well first because I didn’t want the eyes and such cut out. Secondly because I wanted the pieces to match exactly, and finally now you have fabric cut out 1/4″ or so larger than your skull design, and the rhinestones will be the eyes, teeth, etc. and match up perfectly!

rhine3

This definitely isn’t the perfect example – if I did it again I would not use a patterned fabric. The rhinestones would show up better on a solid. Oh well! It was still really fun.

After I stitched my fabric down onto my tote bag and heat set my rhinestones (so easy!) I added some felt layered flowers cut out with ScanNCut, and I stitched the top with a strip of the same patterned fabric.

rhine5

I love learning and trying new things and I am REALLY impressed with the rhinestone kit. I will be sharing a video tutorial of a different project using this technique next month. Now that I see what I do (and don’t) like about the approach I took with this bag I know what I’ll adjust and that should make for an even better project – though I do quite like this one!

DSC_5739 copy

You can use any heat set rhinestones it says – so I’m eager to find more colors and play around with this tool even more. I’m really excited about how much it can add to my machine’s usefulness and that I can add some touches to fabric projects without getting a sewing machine involved if I just use the rhinestones. Or the rhinestones and the iron-on glitter sheets!

So many possibilities – I’ll have to dive in once again for more.

Note – The rhinestone kit is available at Brother retailers and online including amazon (affiliate link).

Review: American Girls Sew & Share

American Girl Crafts are fast becoming a favorite with my daughters, and today I wanted to take a closer look at the “Sew & Share” items and tell you why I really like them.

They come with all of the pieces you’ll need to make a cute felt craft, as well as a very detailed instruction sheet and tips on tying knots and stitching in general. Right off the bat what I like is that thanks to the pre-punched holes and easy instructions it is a great introduction to sewing.

Everything is nicely packaged and it comes with a needle, lots of thread, and even backing in case you want to make it into a pin.

Elizabeth (age 7) is able to do the project with some help on threading the needle and some light guidance overall. I think second grade is about the minimum age for this project simply because of the small details. Rebecca (Age 5) did enjoy adding the finishing touches to one that I sewed for her. Oh and I must tell you I had fun making one of my own as well! I think they would be cute as pencil toppers (stuff is included to make that happen), pins, ornaments, or as decorations for the top of a package. They’re a great little project to introduce a kid to some crafty sewing, and because they’re so well put together it leaves no mess or frustration.

I sent some of these to my cousin (Jr high age) to try out and I know she really liked them – which is great because for those (crafty or not so crafty) tweens and teens this would be a fun project to have for them to make at a family gathering or just send them some for fun creative time. I really appreciate not only that they are really well made, but that for older kids it is something they can take and do on their own. I also appreciate the great colors and whimsical designs that are fun to make for all ages!

I will definitely be getting more of these in the future – you can see the whole line here on the EK Success website. Locally I saw some of these at the American Girl display in my Michael’s Craft store.

day 7 | homemade apron

Yesterday was a big success for 3 reasons: First of all, I started + completed my FIRST real sewing project of 2011. This year… I have not been sewing and it’s a source of personal frustration. I’ve not made time for it, and I want to. The second reason is that I made my first apron – a type of project I’ve wanted to tackle for a very long time. Finally, I made my big trek to the post office and am all but done shipping gifts. (FIST PUMP!!)


My first apron (soon to be followed by #2 and #3 for my own girls) is for the coolest girl in middle school I know. I saw the fabric shown above and *had* to give it a go. I figured she’d love the funky skeleton animals with holiday cheer. First I doodled (badly) and wrote some numbers and generally wrapped my head around how-to and what pieces I’d be cutting. Making an apron has endless options…

Next up? Carefully cut all the pieces. Despite wanting a frilly ruffled apron at first – I knew it would be too much and I’d either mess it up, or go mad from trying to figure it out on my first time.

Also? get out iron + ironing board. My kids were fascinated. What IS this thing? (can you tell how often I iron?). The lesson I’ve learned in sewing projects past is that you MUST IRON IT ALL. The fabric needs to be pressed flat/creased/etc. The iron is your friend. Straighter lines, fewer screw ups – that is what the iron does for sewing projects. Don’t try to fight it.

Below you see my pieces as I’ve been cutting them and laying out – PRE iron. Laying it out helps me think about the order in which I need to sew, see if I like where it’s going, and generally gives me time to make sure I like what I’m doing. Simple as this project is, it’s not easy in the sense that I was using my brain on FULL CAPACITY the whole time. No day dreaming or “slapping together” for me when it comes to this kind of project!!

Ok. Pleased with my pocket size, thickness of straps, etc. I iron, iron, iron, and sew the pieces as needed. I sewed all the pieces (except neck strap and straps to tie in back) onto front before stitching a (black polka dot) piece of fabric to the back to give apron better weight and such.

There was a point… when I sewed the apron strings into it and flipped right side out to make sure it was working that I realized “oh holy crap. This is going to work.” To be perfectly honest I didn’t do more documenting or anything because I wasn’t sure I could pull it off.

Elizabeth models my apron – and asks when I’m going to make hers with the fabric she had picked out. I used myself and Elizabeth to gauge sizing. Obviously doesn’t need to be exact, but I wanted to be sure it’d be a good size for the young lady it’s heading to.

The very BEST part? I can not tell you how accomplished making this made me feel. I have tried aprons before with patterns – I failed spectacularly EVERY TIME. This time I just grabbed my plain single piece of fabric fronted apron and added my own touches (belt, pocket, etc) – and it worked better. It was a success. I know I’m going on and on – but this was a HUGE breakthrough for me – and I’m slightly giddy.

Will I hit the craft shows? Open my own apron shop? Probably not. My sewing is still weak at best – but I will happily accept this victory and mail off this first (maybe only) homemade gift of the year.

Happy Crafting.

question: would you want to see a process video (of next one) and have sizes/pieces used to make such an apron? Let me know in comments… I am thinking about if I want to do more tutorial as I gear up to make the next one…

autumn card

As promised, here’s a fun card I created using some of the goodies I’m giving away (see previous post)! [note the sparkle on those leaves! mmm!

LOVE this paper + blending distress inks. This paper is the ULTIMATE neutral. Allows me to customize to any season, and blending has never been so lovely…

Supplies:

If you want to know my process – here’s the video!

[youtube=http://www.youtube.com/watch?v=rOgh9S_WnGU]