
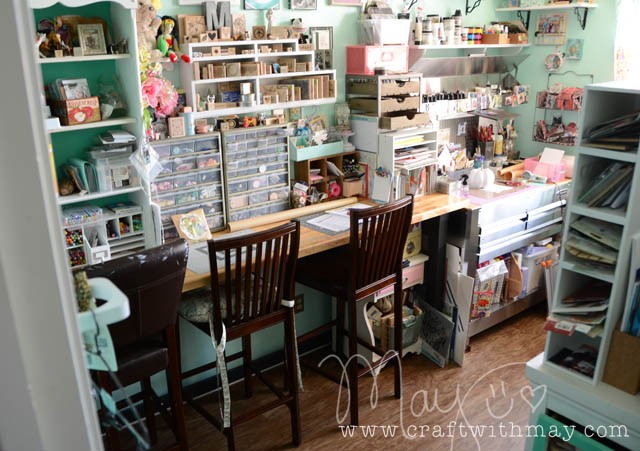
I will get into various organization ideas and tips in future posts – to cram it all in one would be madness! To start, let me show you what it looks like in here right now.
Trying to get a handle on the layout? Here’s a rough sketch of the studio + closet. I did one of these (many times!) when working out how to make the most of a 9×11 foot room + walk-in closet!
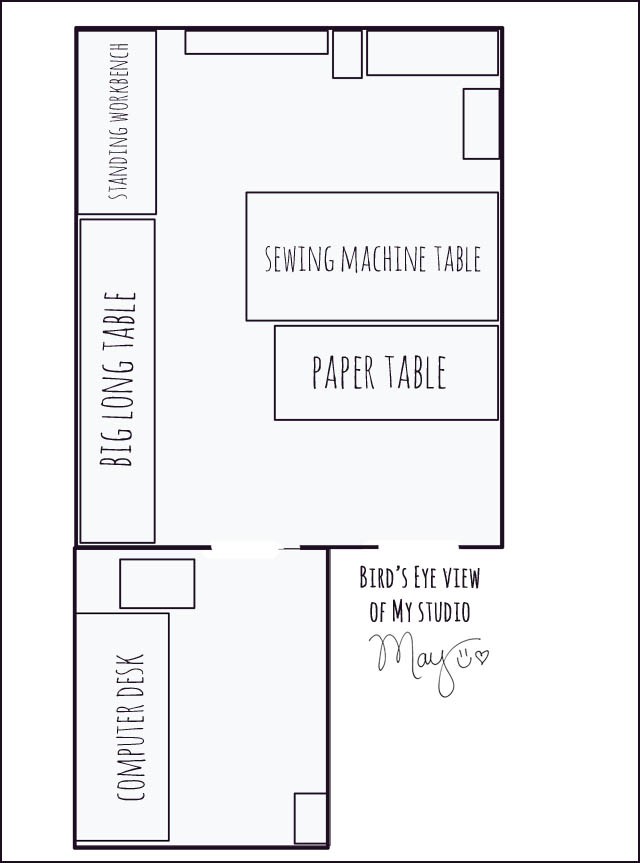
Where it says “birds eye view” is the hallway… and where I took this photo from.
If you’re trying to get organized – from your tote bag to a whole space – the #1 key is to think about how you craft. What you use. What would make your life easier. And working within the space you’ve got.
Here’s a video (link to YouTube) – you can see my studio through the years, demolition, and well as loads of new studio photos!
The most important things I’ve figured out are:
- Leave space for more. Don’t think you can fit a supply exactly. Your amount may increase or decrease.
- Be realistic about how organized you will actually upkeep. A drawer for paint? Great! Specific slots/rainbow order? never gonna happen.
- Have spot(s) for mess. What I mean is, have a box, bin, or other spot where “random/mess/in progress” can go. Not a ton of space – but someplace so messy bits in progress don’t have to cover other areas.
- Think about how you work, what will be great in practice vs looks
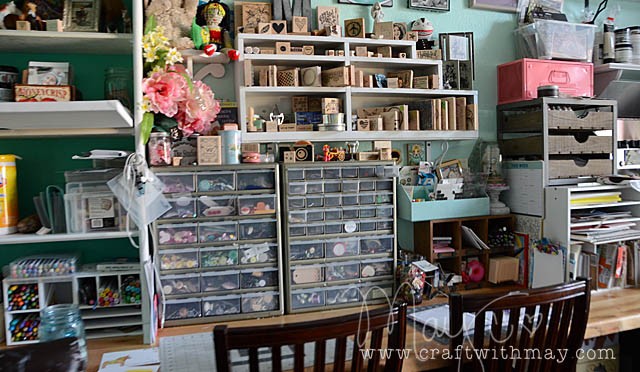
For me, having cupboards and bigger bins is BAD. I just dump and shove. Having smaller areas, having things broken way down is much more useful and easier for me to keep clean.
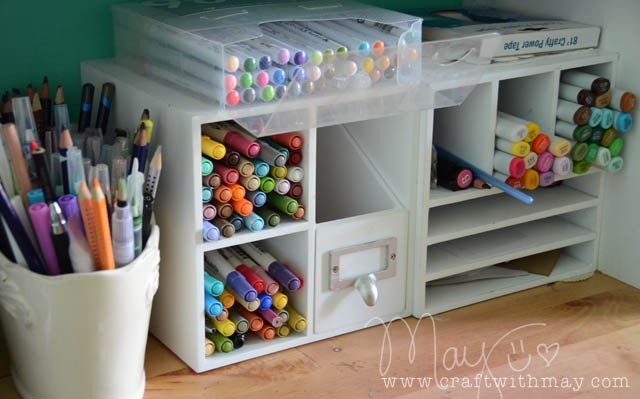
For pens – I like having them all out and ready to work. I don’t have to go digging I can just sit down and color.
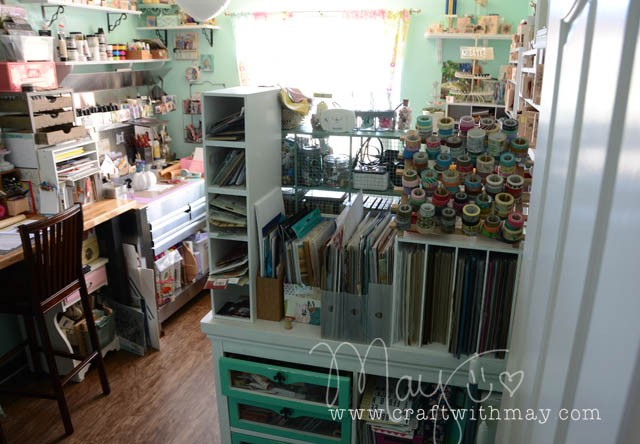
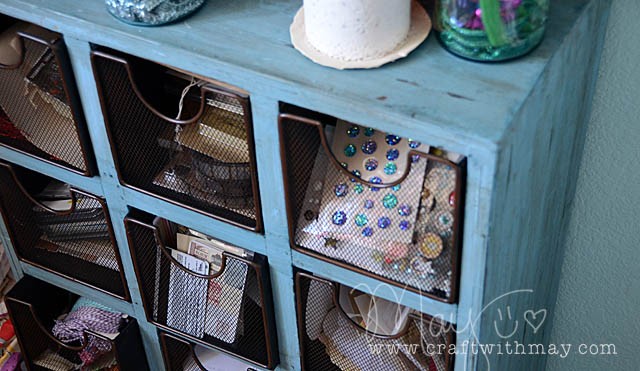
When it comes to bits and pieces from journaling cards to ephemera to epoxy to buttons? fully removable drawers so I can pull out what I’m digging through and then put the whole drawer back.
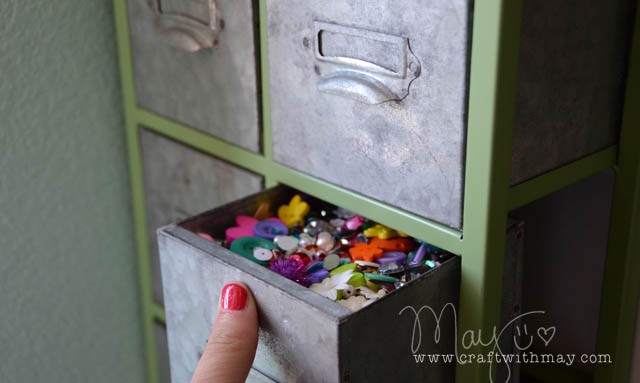
This fun little one is full of “for the kids” and random bits like party beads we didn’t use, sequins, bold and bright not likely to show up in my own projects items. Even better those whole drawers come out!
My latest? This “Supplies” tub for brand new things. I like having a spot for the brand new items so I can try to break them open before they get put into my stash.
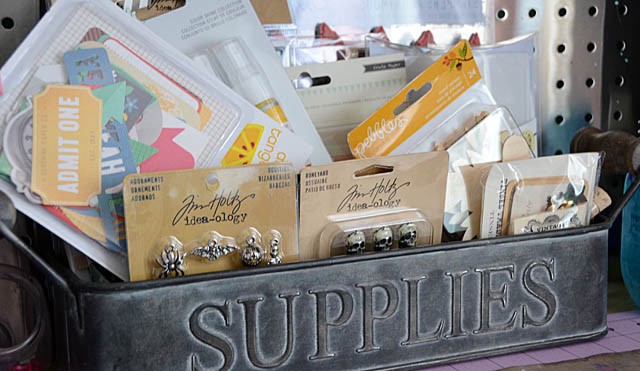
All items like the idea-ology charms will go into their general spots/drawers once opened or used. I love having this because once upon a time a single bin is where everything went!
What are you stumped on storing? That’s what I’ll be covering next…
Great studio. How awesome. I don’t have a dedicated craft space, unless you count my bed, but I’d really love to know how you store and keep track of your stamps. Stencils, too. I love seeing your room, thanks for sharing. Michelle t
I cannot believe you packed all that crafting into such a small space! I covet the chippy blue cabinet with the black wire bins.
It all looks great May! I’ve been in my current craft room three years & make a few adjustments every now & then.
Love how you store pens … I need to figure out how to do this better. Do you have a Raskog (sp?) cart? If so, what do you use it for?
Hello! i love your space! i just find you in pinterest and i really enjoy your videos, and i am looking forward to try some techniques tomorrow!
i am lucky as well to have a room to my self, and i love it! i like that you let your kids “play” there too, my pldest daugther is 11 now and she loves been there with me, she make all the cards for her friends.
i organized my distress ink today and im soooo happy! finaly! i just have to wait and see how long it takes before i change it again 🙂 🙂
have fun and have a nice day, Graciela from Norway 🙂
thanks for showing us a video of your scrap room renovation!!! What do you put your washi tapes on?
I wish I had that very awesome “Supplies” bin for my new stuff. Mine has been sitting in a plastic dollar bin/tub for the past four years. 😉 (NOT The same stuff, mind you-just the new stuff)