Once upon a time I’d just pick a photo at random, sit with it and think about what I wanted to do design wise, and work a scrapbook page up featuring it. Then one day I realized I had a very random stack of stories and images that really don’t tell a cohesive tale, nor did they particularly work together within an album. I mean, they went ok… but it was very obvious that different trends and timelines were at play and it was a bit jarring. What is my point? My refusal to have any kind of system or boundaries actually ended up with me creating a lot of projects that I didn’t want, didn’t like, and some of which I ended up redoing.
A good use of time? NOPE! This is where work flow and strategy come in – and I am a believer that you can thrive with a very large to very small amount of organization and planning in your scrapbook, but that some amount at some point is definitely key. In this article I will touch on a few different approaches I’ve taken that I liked as well as some tips.

1: TBS stands for to be scrapbooked, and this was a huge game changer and the one constant you’ll always find in my studio now. At the most basic level, have a single box (or many, if you’re feeling wild!) of photos divided by topic that you’d like to scrapbook. This gives you the bare bones framework of “here are stories I want to tell” while not telling you an order, which goes where, color, or any other restrictions. Quite simply you are setting up “start here” point. The benefits are easier to grab and go, as well as much easier to NOT accidentally tell the same story twice. If a story is told, it’s not in the box anymore. Any excess photos you didn’t scrapbook go into “photo storage”. Sound simple? It is absolutely the simplest form of photo storage I’ve found, and one that really keeps me knowing where my “to tell” stories are. I’ve been trying to get more specific, have specific vacations or years within their own boxes/bins and that helps me even more.
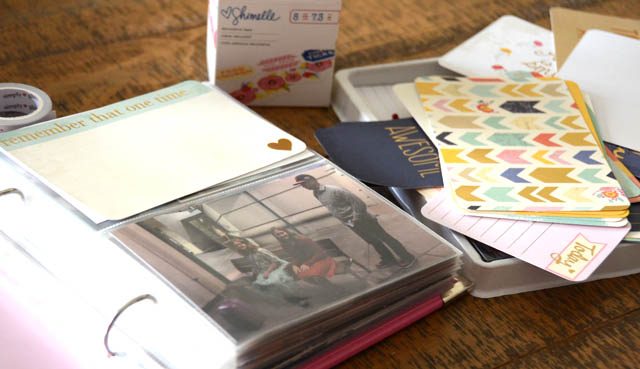
2: Keeping up the album. Where do your scrapbook pages go when done? It might sound obvious – but into the album! For a long time I made stacks of pages, and what ended up happening was me forgetting what I had, me not saving space for pages, and basically just a big ‘ol mess. The other added benefit to this is you can visually see the progress of the scrapbook project, which makes it all the more encouraging to keep at it!
3. Keeping sketches, plans, mood boards, etc. To be honest I don’t often get this deep, but you could in theory mark out every page and what story will be told (within an album), sketch designs and plot in depth every page, have a color scheme for album continuity, etc… however this can at times become all you would do, leaving no time for actual creating. I believe strongly in this (it’ll get a future article!) within reason and for certain occasions. For example, right now I have my Europe 2018 album labeled with which pages go where because there are 2 full albums with about 10 spots left and knowing where I scheduled space for the few remaining pages really helps me know what is left and where to put it.

That’s organized… now what?
Work flow and batch processing is something I am working really hard on for myself to “work smarter, not harder” as they say. With specific application to scrapbooking what I say is, use the time you have and make the most of what you’ve got. For example:
- I was up early and so I loaded photos from my phone onto the computer and ordered prints on Saturday morning before I left for the day. Monday at noon they’d already been delivered, all because I took 30 minutes and used it in a way that suited my energy level and location.
- Today I felt really disorganized and not really sure what to pick, so instead I tidied up my supplies with my scrapbook time.
- I didn’t have enough time to finish a full page. Does that mean do nothing? Nope! I selected photos, thought about the story, and gathered some supplies. The next day when I had a few minutes I worked on the placement and journaling. Day 3? Embellishing. The point here being that 3 days of “no time” to scrapbook and I actually finished a page!
These are just a few examples from my life over the last seven days. As you can see – there are a lot of ways you can group your work together in order to make sense of it as well as get the most from your time and supplies. Sometimes time and other times mood dictates what I do with my available craft time – the key is making sure I did something when I can as that really adds up.

When it comes to the flow of my crafting I do not tend to start many projects for example – journal on 10 cards, then attach those cards, etc… unless I am working in a format such as pocket page where that makes sense and advances my progress vs just starting lots of seemingly random projects. There is however one way I start almost every scrapbook page.
I take out the photos and place them over a sheet (or two) of 12×12 kraft color cardstock (or whatever size format I’m working on) and I think about the story, the photos I want to use, and possible ways that will fit together on a page.

This is how I begin every page because it allows me to imagine within the size confines what might and might not work. Eliminate potential designs. See what ideas pop into my head. Then once I have a good vision I grab whatever I choose to work with and run!
I hope you’re enjoying this series – do stay tuned and watch later this week as I share a page “let the colors run the show” – that I’m super happy with!
There is a lot of great advice here!!! Thanks May.
This is such a great post May! And I’m really enjoying this series!
Yes I agree with Rhonda. Fabulous advice. Thanks so much May. <3