What do you make for a teen headed to college? I went looking around the studio and found a super sturdy tote bag and thought… let’s customize it! In this post I will share my how-to as well as some suggestions for customizing your own tote bags. it’s so fun!
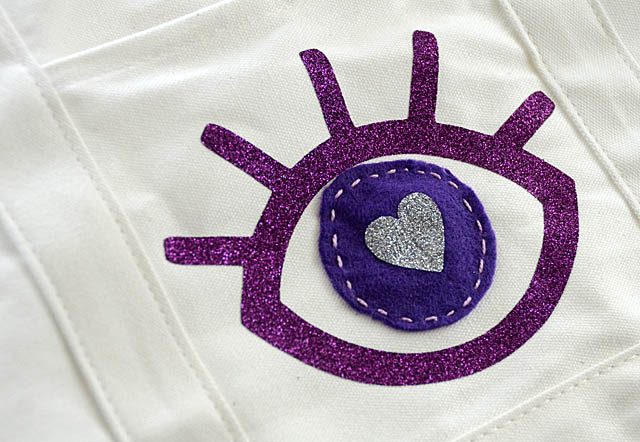
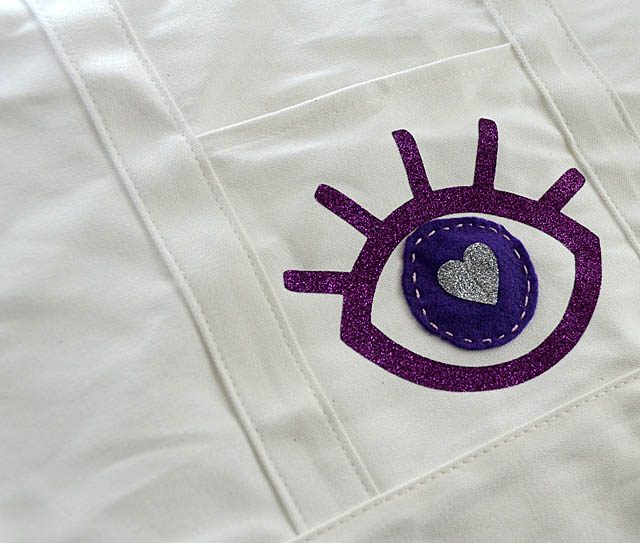
This project utilizes some basic ScanNCut shapes – a personal favorite of mine to do! And of course my usual disclaimer here that I work with Brother, but all ideas and opinions are my own. My inspiration here is that I wanted to design my own eye from basic shapes and do a combination of iron-on and felt stitched to a tote bag.
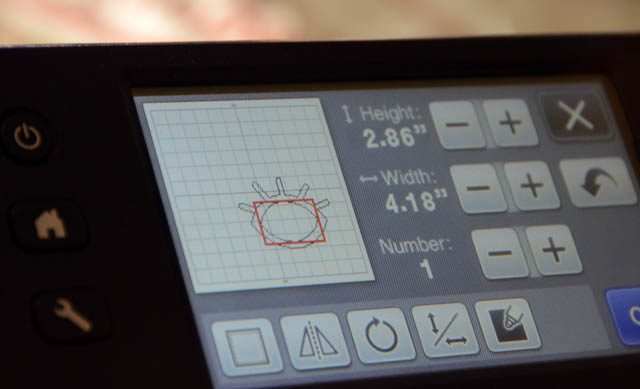
For the ScanNCut portion, the instructions are fairly simple!
- Select the pattern(s)
- Overlap any patterns (in this case one oval and 5 rectangles) then select all pieces and “weld” them together
- Add any other shapes (in this case another oval-ish eye shape)
- Cut out from desired material (glitter iron-on is what I used)
- Now create a heart and cut from vinyl using ScanNCut
- Make a circle that will fit inside, cut it out from felt that has iron-on material heat set to the back side
Here is a link to my YouTube video showing how to weld/create the eyeball.
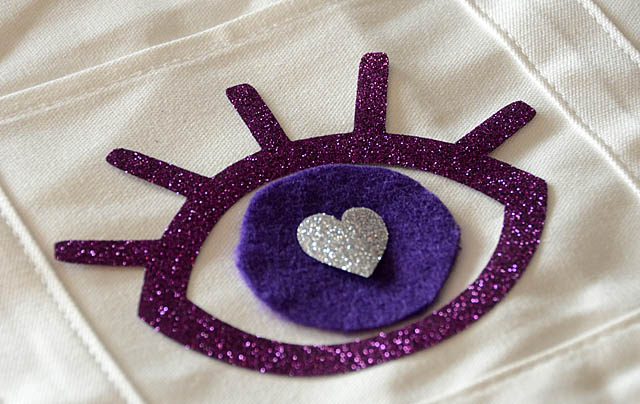
Once everything is cut out, you’re going to want to iron it all onto a tote bag! I just love how this looks and it’ll be such a fun shopping tote since you need to bring your own bags to stores around here now!
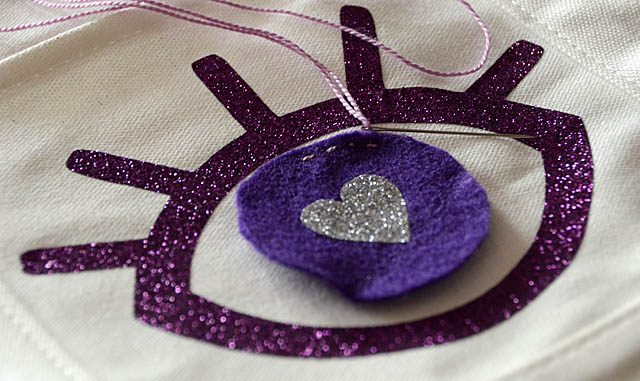
Finally, I stitched around the felt to really make sure that was sealed down as well as adding some fun contrast and color.
I just love how this turned out! I’m off to pick her up and help her move up here to school – I hope she likes the tote bag! I’m excited to check out her dorm and get some dorm life crafty ideas as well…
It’s hard to believe but this is back to school week! Eeek!
This is so fun!!!