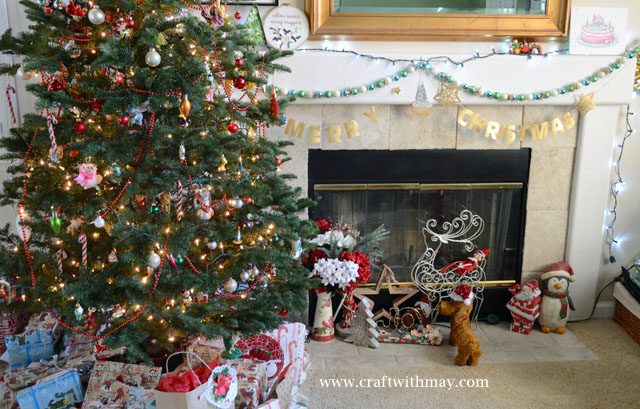
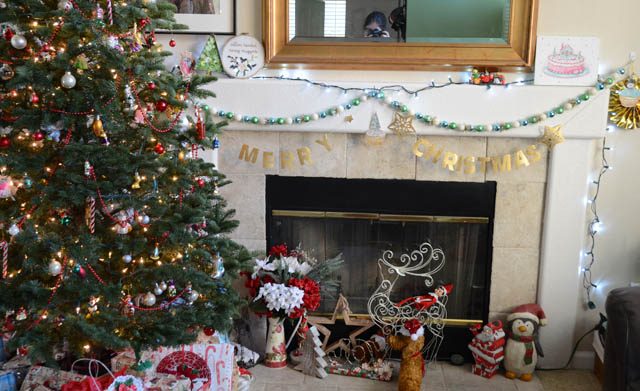
From our house to yours – wishing you a Merry Christmas and a Happy New Year!
The blog will be “closed” for the holidays as I enjoy winter break with the kiddos and some good unplugged family time.
See you in 2018!
no rules, just happy crafting
From our house to yours – wishing you a Merry Christmas and a Happy New Year!
The blog will be “closed” for the holidays as I enjoy winter break with the kiddos and some good unplugged family time.
See you in 2018!

As you know I work with Brother (as always I disclose this, as well as noting that all ideas & opinions shared here are always my own). If you’ll be in Phoenix next month I hope you’ll come see me at their booth at Creativation! I will be demonstrating the ScanNCut – can’t wait! If you can’t come don’t worry – I will keep posting here and will share a recap too!
I recently got a wild project idea that I’ve only just begun and wanted to share. First of all – the how-to of the rhinestone kit (LOVE THIS KIT!) and how I built this flower is up on my YouTube video
I have never specifically designed the colors as I did on this red, black, and clear flower and I have to tell you – I enjoyed it!
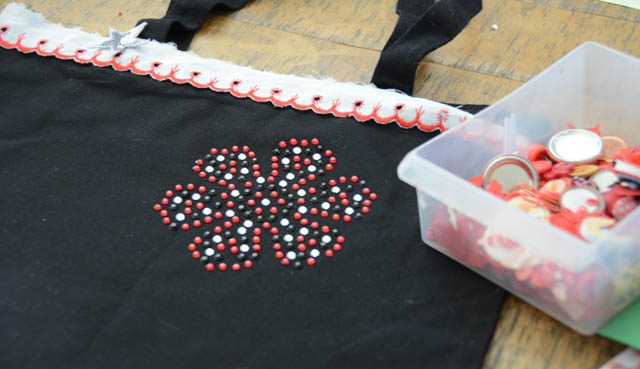
My plan for this tote is actually to totally fill it with colors, designs, and doodles as well as rhinestone designs. I don’t share this often and want to do a better job of it with you. What I mean is, once in a while I take on a BIG project. Something I pull out whenever I don’t know what to work on or am stuck with. Something that takes a ton of hours but can be broken up over weeks, months, or even years. This is going to be one such project!
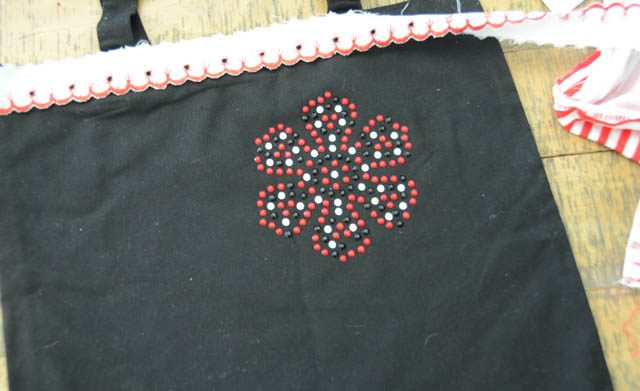
I am excited to play with this tote bag a LOT more – my rhinestone flower is just the start! My next step will be printing paper shapes with the scanncut and coming up with a basic design for my swirling wild design idea. I decided I wasn’t ready for trim or other elements just yet – but I’ll keep you posted on the progress as I continue on this project.
Wishing you all the best this holiday season!
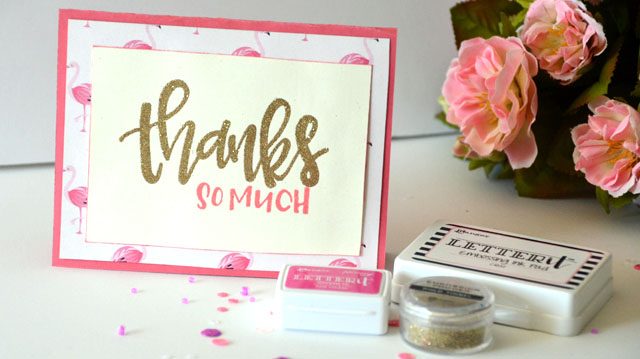
Recently my friends at Ranger Ink sent me a box of their new “letter it” line to test out. Some of these products are versions of long time Ranger favorites – and already I am a fan! Today I have a short video tutorial to show off one of my favorites (embossing powder!) and give you a simple Thank You card idea (’tis the season!)
It has been a wonderful year creating projects of all kinds – and once again my ScanNCut has been a vital tool to allowing me to do more with my crafty time! the usual disclaimer – I am a paid consultant for Brother, but all ideas & opinions are always my own!
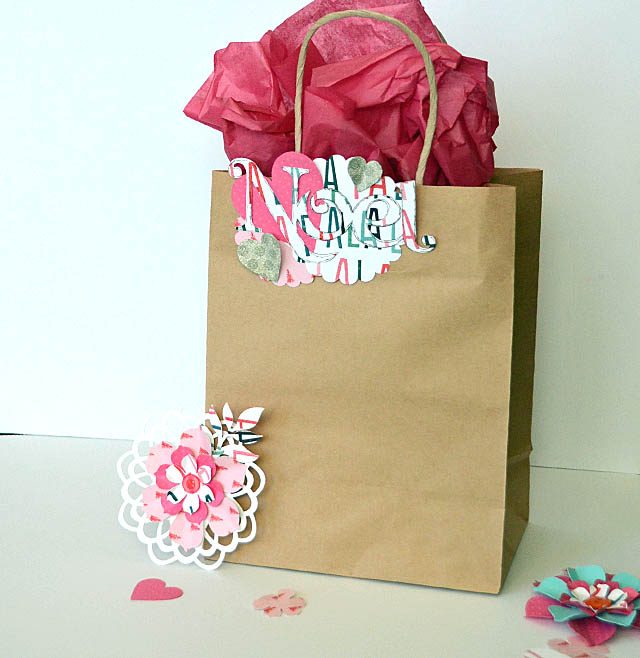
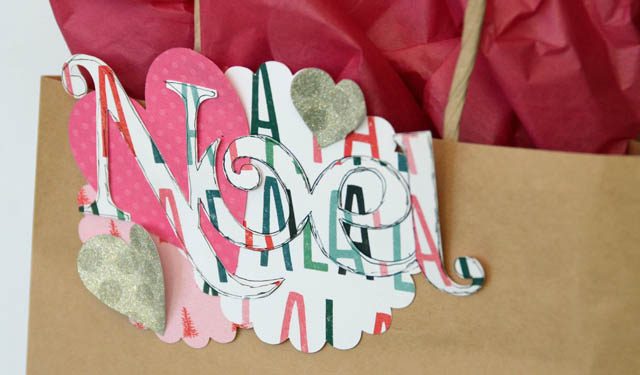
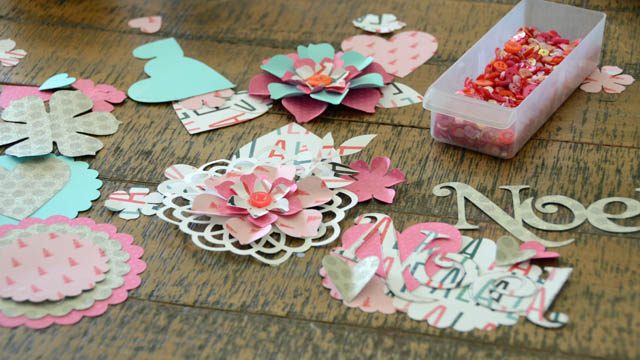
One of my latest passions? Using cut designs from the ScanNCut to whip up gift toppers! From packaged gifts to bags, topping a bottle of wine to dressing up a gift card – it’s quick, easy, and a lot of fun!
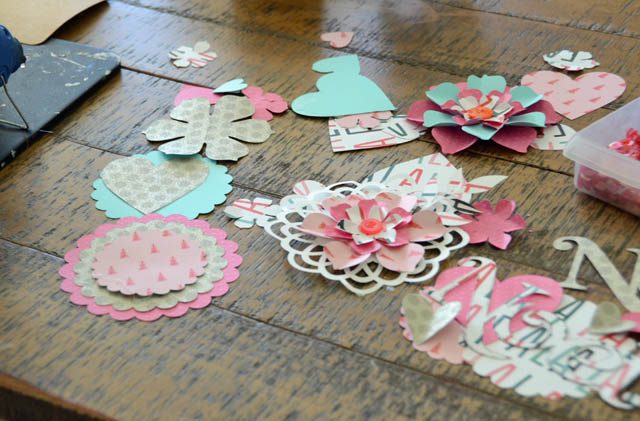
Step 1: Cut out full papers full of shapes. Circles, doilies, stars, hearts, flowers, words – no rules! Just make sure you’ve got a wide variety of sizes. I usually range from 1/2″ up to about 5″.

Then it’s layer time! I often use hot glue since these need to be sturdy but temporary and that’s the quickest.
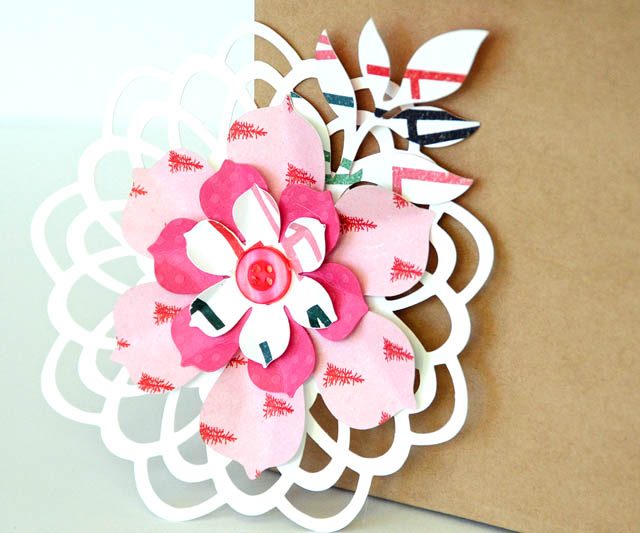
As a general rule, I try to mix up sizes, layer 3-6 items, and make sure there’s a variety of patterns, colors, and textures.
During the holiday season I make sure to cut extra basic shapes like these so I can play and add handmade touches to every gift I give. From boxes of candy for teachers to topping a special gift for my husband – I love combining the hustle and gifting of the season with my crafting.
I hope that your December has been Merry & Bright! I have a few more posts and ideas to share with you over the next week… stay tuned!
When it comes to customizing things – the ScanNCut is my best friend!
disclaimer- I am a paid consultant for Brother, but all ideas and opinions shared by me are always my own.
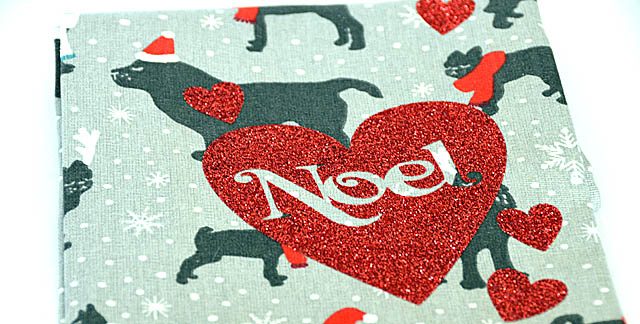
Around this time of year I really love to add details to my projects and one of my favorite things to do any day of the year is adding Brother’s glitter iron-on material to things!
The process is always simple:
Seriously easy – and fun on everything from towels like this to tote bags to Tshirts! I made a quick YouTube video to show the process as well.
While my towel is going to be more as a hand towel – not for heavy duty scrubbing – you can find a lot of uses for glitter-ified stuff!
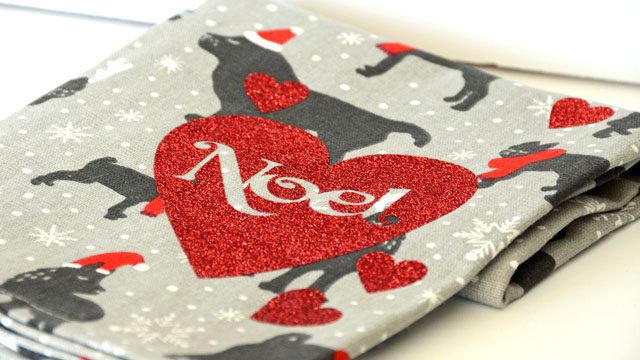
I am going to be gifting this to a friend along with some other dog themed goodies – what fun stuff have you been making to gift this year? I’d love to hear about your projects!