Anything goes!

DSC_2582 copy

I wanted to try and see what happened if I used cardstock that I cut this bird out from as a stencil… I like it! But what to do with it? With a scrap of doily and a few embellishments I had myself a card! So very simple – but a lot of fun. I will definitely be trying to use more of my bits of paper left over from die cutting as stencils!

DSC_2584

Supplies Used:

50dollar_voucher_600px

This week “anything goes” – so create something and join us! Simon is offering a generous $50 voucher that will be randomly drawn from the eligible entries each week. Join the fun by creating a project this week – and for your chance to win a $50 voucher you should hop on over and join in the challenge here.

May in NYC: Day 2

After spending a solid twelve hours inside my hotel room re-charging, I was ready to get back out into the great city! Here’s a link to part 1 if you missed my first day of adventuring.

nyc_mayflaum

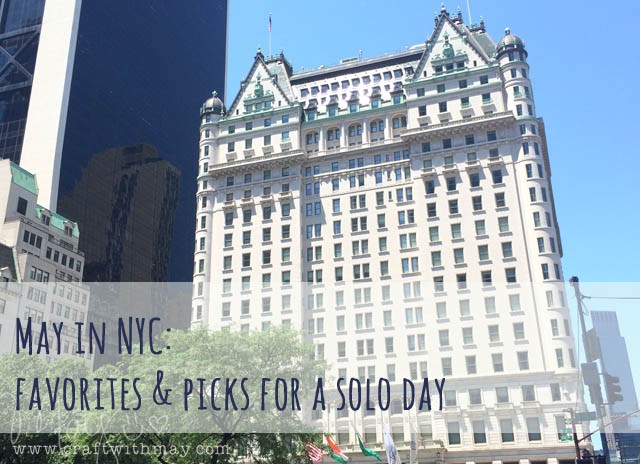
This city was made for the solo visitor. Don’t get me wrong a group is great – but every place I went I did not feel odd or at all out of place. I was a bit… bright and sparkly and more on the Buddy the Elf meets Gisele from Enchanted side though. I seriously just LOVE exploring a place, and a place with so much history, art, texture, color, and detail? My brain was exploding with inspiration and ideas!

My #1 favorite thing (and it is absolutely free!) is to get up and go walking around Central Park early in the morning. Before the stroller brigade. Before the tourists and horses. Before the hoards. Most importantly: before the heat of the day strikes you down! Afterwards I wanted to seek out a coffee shop or café but instead went for my go-to, my #1 favorite thing to start a day with.

Levain Bakery Valrhona Chocolate Roll

nyc_levain copy

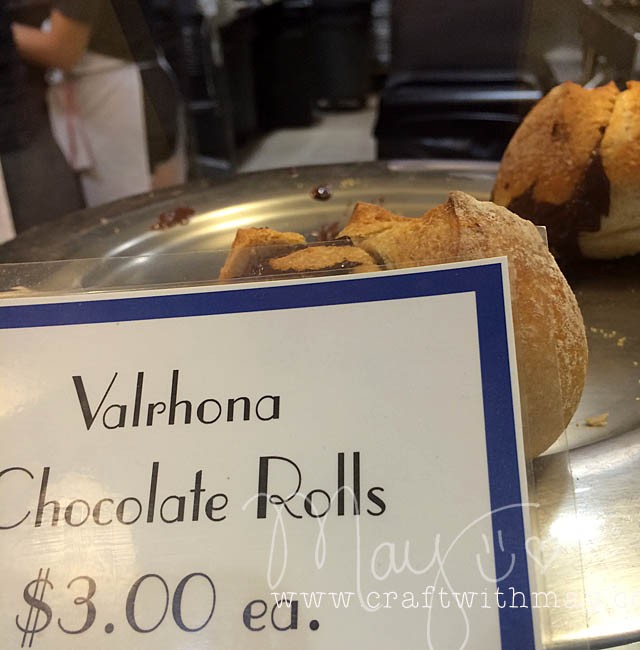
Something tells me you can’t go wrong in the tiny bakery, but I’m not budging from my pick. This crusty roll has rich melted chocolate goodness inside. You can try to put some chocolate and bread under a broiler at home to get the general idea… but nothing matches this. It is the stuff of dreams and I knew getting one on this trip was non-negotiable!

Thinking logistics especially when traveling solo is super important. In my case I had to carry around my nice shoes (for lunch) and some “touch myself up” supplies as I wandered around the city this quickly heating up day. I also had to get my suitcases all packed up in the way I wanted them for my business meetings the next day as I wouldn’t be getting to my hotel in New Jersey until after 10pm. A little planning can go a LONG way, is what I’m trying to say!

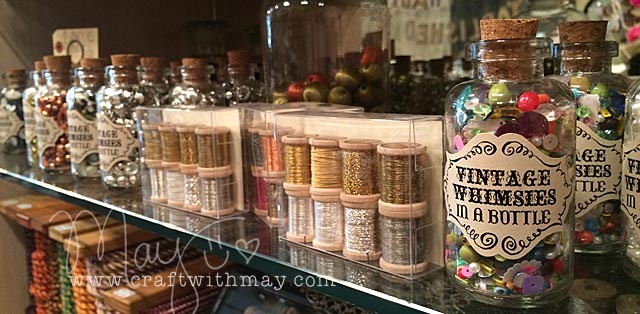
Vintage trims and creative inspiration: Tinsel Trading Company

nyc_tinsel2

Continue reading “May in NYC: Day 2”

How the ScanNCut is rocking my stamping world

Scanning stamps with a simple outline using the ScanNCut is not only quick – it’s super easy! As much as I love doing this, I have long wished for a way to cut just part of an intricate image, or find a way to trick this machine into doing hard work for me.

DSC_2631

You see what once would have taken either a craft knife and a good amount of time not to mention little nicks and imperfections all over- now takes three things:

  • Transparency/clear plastic medium
  • black or bright pen thick enough to be picked up by scanner
  • A little tape

This is really game changing for me – and not only do I have a card to share with you today but I video taped the whole process/how-to. It’s a 15 minute or so video – longer than my usual YouTube but hey, that’s what it took! The thing is this took me oh, somewhere in the range of 8-10 hours to test, test, and test some more before I could get stuff just right. So much so that the original pen I had been using died I used it so much!

DSC_2632

Here is my full video tutorial explaining the process of getting your ScanNCut machine to recognize and cut just a part of your design (or a whole intricate design).


Link to YouTube

Here’s my finished card-

DSC_2624

How-to notes on the card:

  • white background is just dye ink applied to textured brayer and rolled on. Splatters of gold mist onto finished card
  • The stamped (colored) image is just multiple colors of ink applied and stamped onto watercolor paper
  • The angel is black embossed on watercolor paper. Colored with watercolor.

So much possibility – and now when I reference my “partial stamp cutting” you’ll know exactly how I did it!


Disclosure: I am a paid consultant for Brother International Corporation and have received a ScanNCut from Brother to evaluate. However, the opinions expressed are entirely my own and based on my use of the product.