Inspired Barn: A class with Cathe Holden

ch1

One of my big goals for 2015 was to say yes to little creative happenings and classes when able. Last weekend I was able to go play at Cathe Holden’s incredible Inspired Barn. Check her out (and her workshops) if you live in Northern California here!

ch2

Our project was making a mason jar luminary cloche. Such fun!

ch3

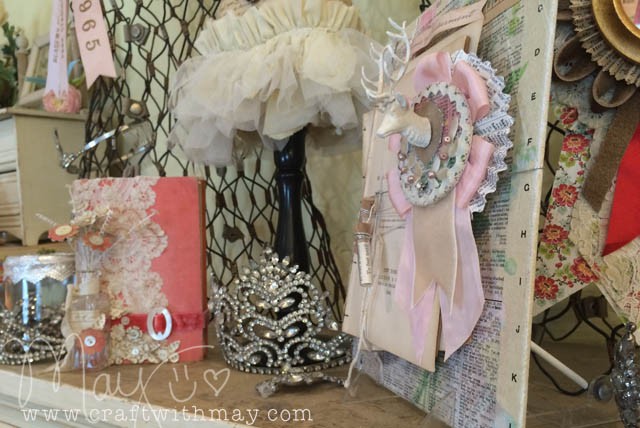
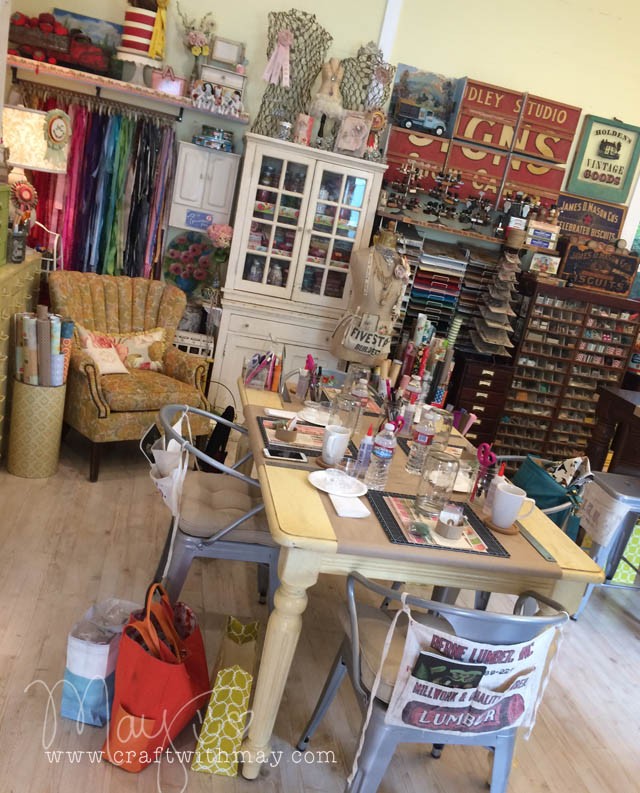
Speaking of fun – looking around this space? My mind was blown! I’ve never seen anything like it.  ch4 copy

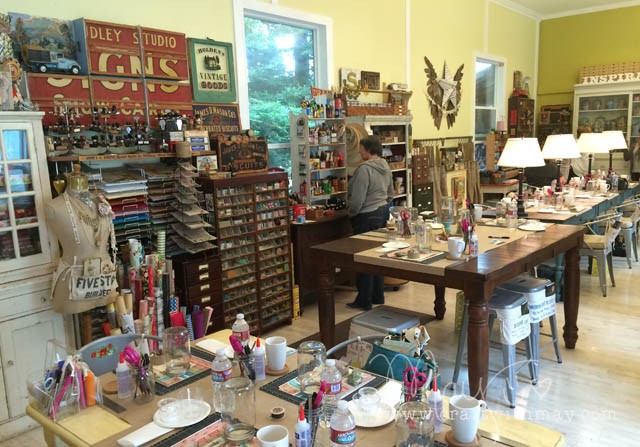
The artful mix of vintage storage and goods with supplies being readily accessible and visible? Amazing. The detail extended to the class kits too – how welcoming!

ch5

Having a bottle of water and little goodies ready for me? Lovely! But every time I looked up I got distracted by something I was seeing, and I was so inspired! I mean really – this place!

ch6

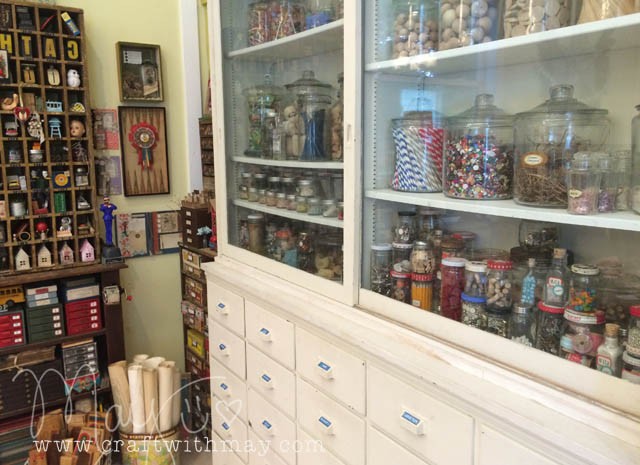
Here’s a photo looking back towards the entrance… never wanted to leave this space!

ch7

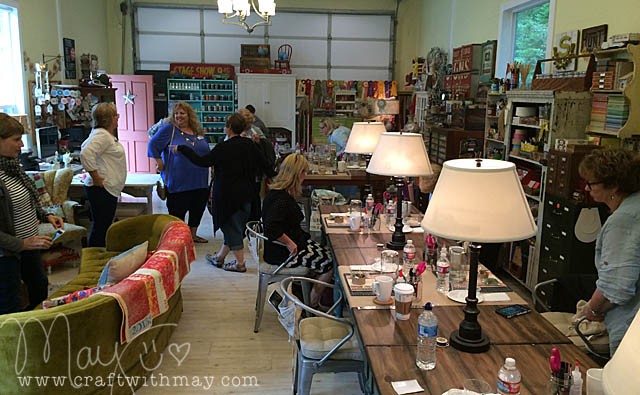
I have so many ideas brewing – I had to come home and write them down! Also inspired? The lovely ladies who shared a table with me.

ch8

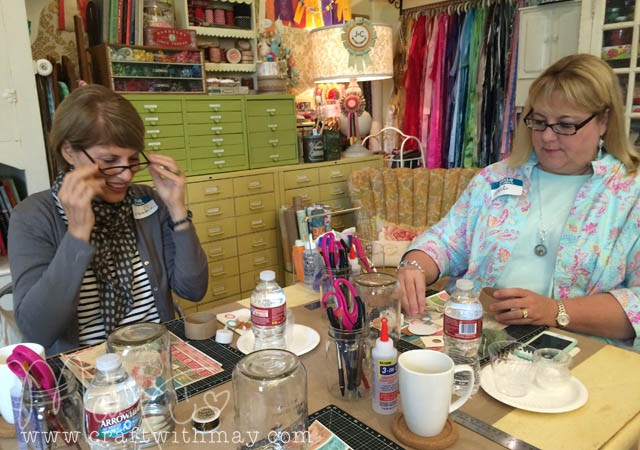
I was so glad my friend Wanda could come – and she thought to invite and come with the lovely Brenda Walton. Spending time with them was a blast – I have a feeling they would be fun to hang out with ANYWHERE! I had such a good time playing alongside these wonderful and talented ladies. Two thumbs way up to Cathe for not just cultivating such an inspiring space, but also for teaching such a great workshop! She balanced the learning with the space to explore/think so very well.

ch9

As promised, she really delivered a space where creativity was nurtured and supported. All the ladies in this class created unique things and I look forward to making more of these, and also playing more with home décor in general. What a lovely way to spend a morning – I am sure I’ll be back!

“The Camping Album” update

DSC_2932 copy

I don’t scrapbook 99% of our camping adventures. Well, not in the traditional sense. Last year when we dove into the adventure of trailer ownership and campground fun I got a 6×8 Simple Stories Album, some Project Life and other journaling cards, and I also take a pen or two on the road. The cards are right there blank in the page protectors – I just pull out an empty page protector + cards of my choice and work!

DSC_2937 copy

While out camping I write out journaling cards and tuck ephemera in here and there.

DSC_2939 copy

Back at home I add printed photos (just print 4×6 and crop if needed), and embellish if spaces are left over.  In addition to divided pages, there are also simple (so you can make a 6×8 page) protectors too. Those I don’t use too often, unless I want a title page of sorts.

DSC_2943 copy

What works great about this system for me is that it’s quick (I caught up on a 10 day trip once home in less than an hour!), it lets met tell stories of each day and get a TON of detail – everything from our campsite #s to our meals made to stops we enjoyed, and it takes all pressure off to “scrapbook” these adventures.

DSC_2945 copy

Once in a while a page gets made for the annual album, but it’s only if inspired + I have a lot of photos. Otherwise, we just look at and enjoy the simple and functional scrapbook that has also become a resource for referencing past successes (and fails!).

ScanNCut: Page template

Disclosure: I am a paid consultant for Brother International Corporation and have received a ScanNCut from Brother to evaluate. However, the opinions expressed are entirely my own and based on my use of the product.

DSC_3046

I was asked by my youngest if she could help make a scrapbook layout. This prompted me to think about my process, and how I could make a space for her to organize and set up photos, as well as place the embellishments as she wished while still making a page that was mine.

Tricky stuff!

Ultimately what I decided for a collaboration was that I would want to create a page template, then it was a matter of fill in the holes and decorate around the edge. Something simple does not mean something easy, sadly! Luckily my Brother ScanNCut was up to the task.

3

There were MANY trials. What did NOT work was drawing out all of the lines because obviously (to me, after having spent so much time working on it!) it would want to cut every single line! It *is* absolutely possible to do this using the wonderful Canvas program software (from Brother) – but for me to have pieces of paper I can move around and visualize was really a great way to approach this for the first time. For my brain and process- having something physical to work with really helped me work out the kinks! I will be trying this with the program as well and will report back.

I found that I didn’t like a thin border. I really wanted a thicker border around my photos for stability, and a good 2″ at least around the outside.

2

The best method I found to create my template was to lay pieces of black or very dark cardstock down onto a piece of white paper in the exact positions I wanted. I then scanned in the paper (see  below on right) and saved the design. I envision making a few designs like these! I made my photo holes 3 1/2 x 5 1/2″ at the maximum so that the photos could fit nicely.

Untitled-1

Once my design was scanned and saved? Well now I can cut it out as many times as I like!

DSC_3018 copy

Here you can see the photos behind my new page template. I love it! But I think a bit of stitching would be good…

DSC_3021 copy

With stitching and photos done, and journaling added it was once again time for kiddie fun! Miss Rebecca grabbed the glue and sequins and some epoxy accents and went to town.

DSC_3048

The finished result? A blend of her ideas and mine, and a layout we’ll treasure about the time we met our new dog!

DSC_3044

I am really excited by the idea that I can use my ScanNCut to crank out page templates for my kids so they can pick photos, place, and have an easy time figuring out where to put things. Some of these blocks could have been used for journaling as well. The only thing I will change for next time is I would have liked a thinner edge in the center between the photo columns. I didn’t need that to be quite so wide.

Overall though I’m really excited with how I can use paper scraps and do this. My final tip is to use a (unlikely to be used/wild color or pattern) piece of paper to mount your photos on for added stability for this kind of a page. In my case it was lime green 8 1/2 x 11″ cardstock and the difference was a lot of added strength for adhering things.

May’s picks: Summer 2015

It isn’t often that I do recommendations/lists. However I’ve got a few great ones and I want to share.

affiliate links used when possible in this post, at no additional cost to you – it just helps keep the blog running…

#1 + #2: Secret Garden Postcards & Enchanted Forest

DSC_2952 copy

Huge love for these new books of coloring fun! The original Secret Garden book kept me company when I was recovering from surgery a few years back – and it is so much fun. Intricate detailed nature images some complex some simple – the perfect way to practice your coloring! I really like the postcards because it is single sided and would be great for mailing off!  Both of these are available at Amazon. The Postcards are available also at Simon Says Stamp.


#3: Spy Movie

This movie wasn’t just good. It was fantastic. It didn’t slow down for even one second, and Melissa McCarthy was so sharp, and her character so amazing and talented (just lacking some self esteem/confidence issues!) and I loved that. She was strong, capable, amazing. Not to mention the funniest and sharpest! Combine this with my love of spy movies/shows anyhow (and Jason Statham… he was so good) and this was a winner for me. I strongly recommend if you watch the trailer and think it looks good!

#4: ILNP nail polish

Thanks to Kristina Werner for being the kind of friend who enables me.

DSC_2927 copy

These polishes are so smooth to apply, and they have such a GREAT sparkle! You know I love sparkle- glad to have found these! I got them direct and the company had them to me in 2 days, free shipping, and super cute tissue wrapping too. Love that!

Sadly, no books to recommend at this time! Here’s hoping for some great reads this month…

Kit feature: August 2015 Simon Says Stamp kit

note: kit provided free and affiliate links used when possible in this post, at no additional cost to you – it just helps keep the blog running…

August-2015-Card-Kit-600

New feature! Each month I am going to feature and highlight a different paper crafting kit with project tutorials and features. To kick things off, here is the just released Simon Says Stamp August card kit! Here’s a link to the kit if you want to check it out in detail. I love that anybody can buy a kit, they have exclusives each month, and I enjoy working this “card kit” into all kinds of paper craft projects!

I created a video where I make a card + walk through the kit.

link to YouTube

Here’s my first card:

mayf_1

I just love how it turned out! Just a few dots of mist and such a playful feel to it. I will be back next week with project #2 – stay tuned!