I had an absolutely amazing time chatting with Nichol Magouirk and Noell Hyman on this week’s Paperclipping Roundtable podcast. We’re chatting Christmas and holiday prep/crafting/etc. and I think it was one of my favorite podcasts I’ve done with them. I need more Nichol Magouirk in my life. You can find the episode here.
One of the things that came up in our chat was an epic card vs May battle that I just completed (and I think I won – but you can be the judge!) and how projects do NOT always come smoothly or easily to me. So, because I have nothing else to do at the moment (haha!) I decided to edit the photos and write up this rather long post. Here we go…
I would love to tell you that this card was a piece of cake. That my usual 30 minutes or less style worked wonderfully. The truth is I spent probably six or seven hours figuring out how to make this card. There are a couple of reasons why, and so I thought I’d take this opportunity to talk a bit about the process, why it took so dang long, and why that is a good thing.
First of all, a co-worker of my husband reached out to me to ask if I could maybe make her a homemade Hanukkah card that she could then give to someone special. Immediately I thought “I have nothing Hanukkah in my supplies. I’ve never done this…” and while I could have said “sorry, launching a new website here and can’t” my mind wouldn’t let go of the idea and possibilities. Once I googled “Hanukkah cards” and was shocked by how few there were, then searched pinterest and found almost no homemade cards I decided I simply had to accept this challenge. My brain demanded it!
Challenge accepted.
The first place I started was figuring out what kinds of elements might be appropriate. Menorahs, candles in general, the six-point star – these are all things I saw a lot of. I also determined that blue + silver would not only delight me color wise, but also be really appropriate. But… how to make them?
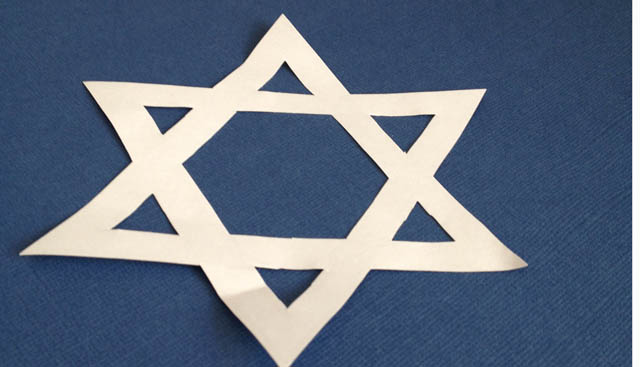
The star was easier. I figured out two triangles = 1 six pointed star.
Right off the bat I started looking around and seeing what do I have right here, what can help me make these shapes? Yes a Menorah or a star are specific shapes, but the thing you’ve got to do if you are going to build something from absolute scratch is think smaller. What shapes are those shapes made of? What looks similar to just one part? What basic thing could be used to build this?
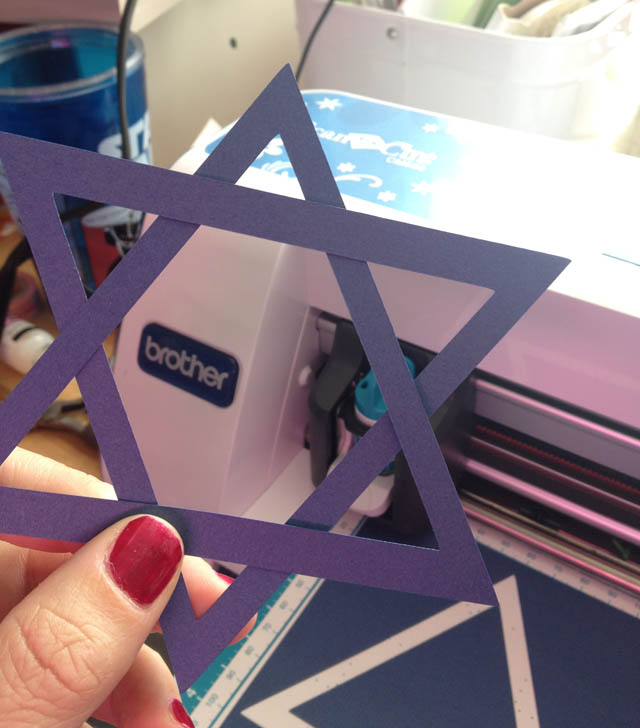
I whipped out my Brother(Tm) ScanNCut machine and started playing with cutting out triangles that were layered inside of each other to create these triangle ‘frames’. That I liked. WAY too big – but I liked it. Then I moved onto a Menorah.
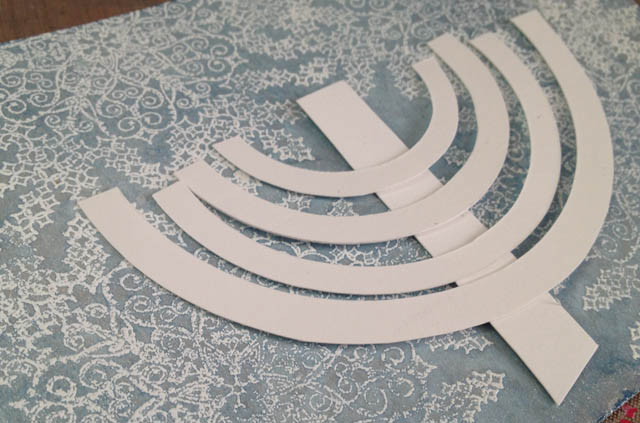
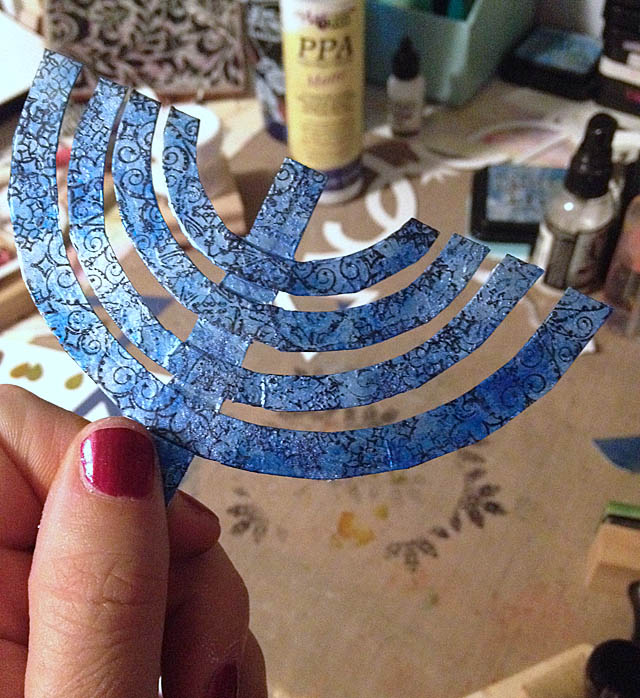
Thanks to my searches I learned that this circular type shape is actually quite popular in cards and such so that is the way I went. First off I used the “layer shapes inside of each other then cut” lesson I’d learned from my triangles here. I layered LOADS of circles inside each other, cut those out, then cut those into pieces and removed some circles to create spaces between the layers.
Sounds easy, right? This part took 2-3hrs alone. Getting the sizes, shapes, and widths right? Not so easy.
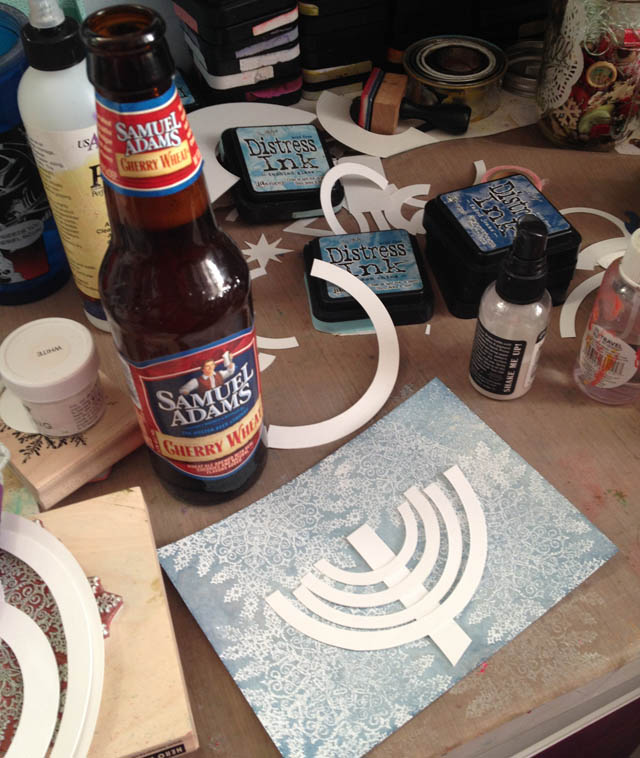
At this point I treated myself to a rare indulgence – a Sam Adams Cherry Wheat beer. Sometimes you just need a break! At this point I also had to decide HOW I was going to take these paper 1/2 circle strips and make it work/be awesome.
Answer: foil.
Originally I was going to use the paper strips as a template and hand cut into chipboard to make more dimension… yeah NO. Too much work, not enough payoff, and this is like hour 4/5 at this point so my unlimited patience? Not so much.
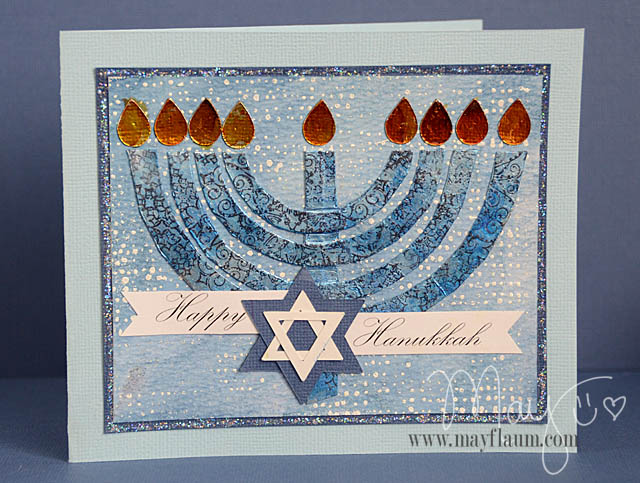
One big thing that happened on this project was that I had some AWESOME ideas, but then once I started shrinking things down to an actual card size… there wasn’t space. It was too much for too little a space and I know from my struggles in card making that this is BAD. Simple is good. This Menorah is a very simple version- originally I wanted something with leaves and branches and flourishes and… yeah. no. too much.
moving on.
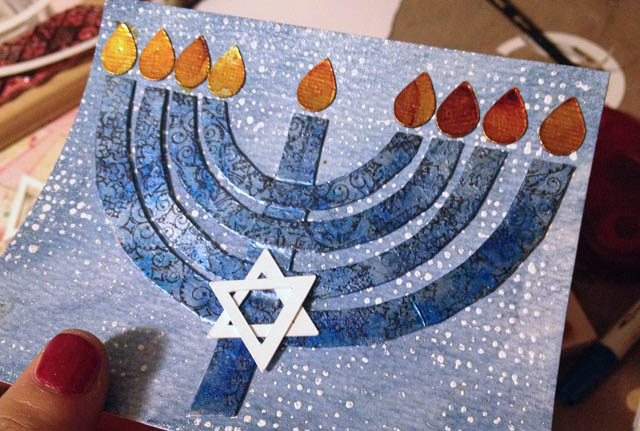
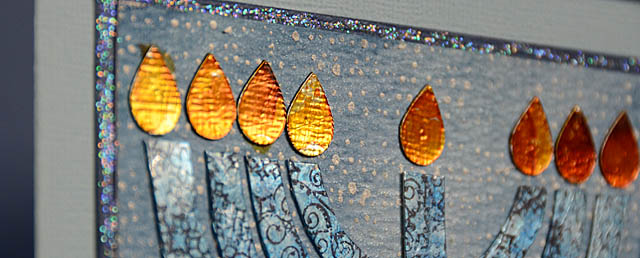
I taped the Menorah together, then took a sheet of Ranger sticky-back foil and just slapped it on top. Then I cut in between and used a little rub-on applicator stick thing to fold over the edges. I LOVE this foil. It is very flexible and forgiving and before I knew it, I had myself a Menorah!
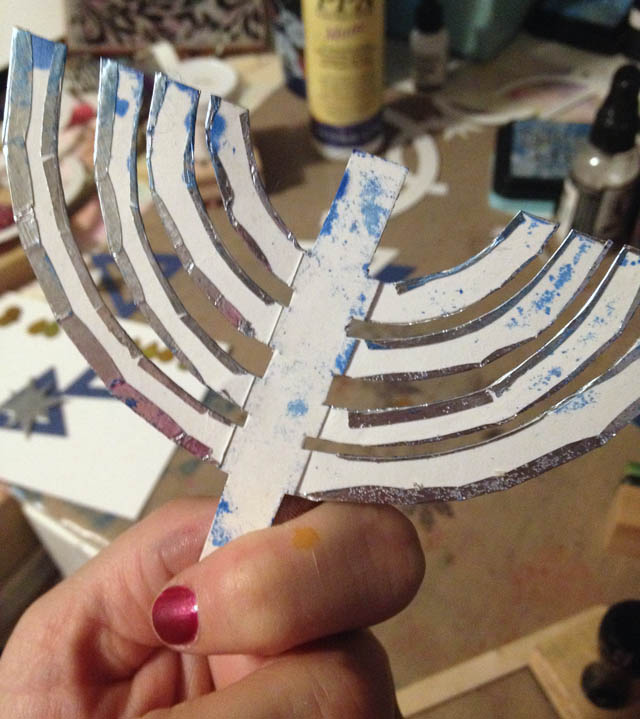
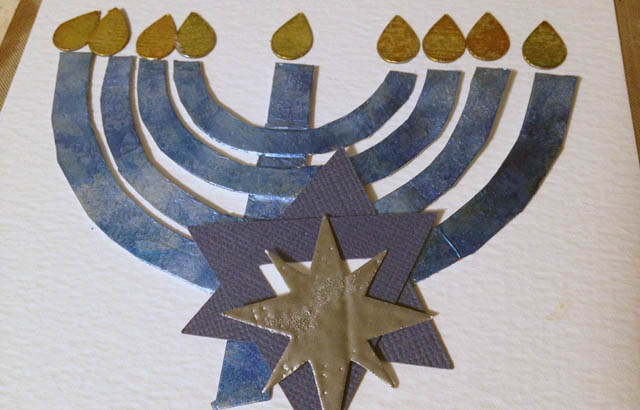
So then I tried some clear embossing but that didn’t show/work like I thought. NO big deal! Next up, coloring and I already knew this one. Alcohol inks! I just dripped some pearl and blue, blended it in, and bam! instant color that still shows the metallic foil. Loving the foil + alcohol inks I cut out some teardrop shapes (aka my candle flames) and dabbed them with a yellow alcohol ink. Below you see a “ok… it is coming together now what?!” moment.
To finish off the decorating I took an ornate snowflake stamp and stamped it all over.
Progress! I really like what the stamping adds, and I’m happy. That’s good. Now let me take a moment to be silly.
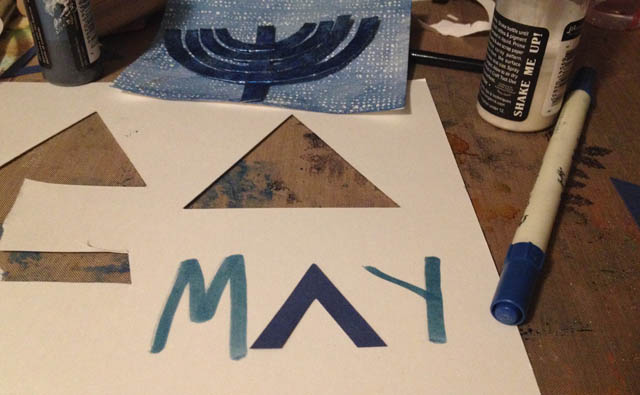
aka when I take a triangle failed piece and text my friend Melissa my name “hey look, like Stargate! I made Stargate letter A!” I think at this point I’m amusing myself too much and maybe getting a bit nuts on account of so much time on this card. But it is OK! I’m challenging my brain, stretching what I think I can do, and really exercising creativity. This is all good stuff.
So speaking of good stuff, I decided my original card base was WAY too busy. So, I faded jeans distress stained a new piece of paper. Then I used a Hero Arts dot stamp all over it + white embossing for more subtle texture. And then, it was time to glue down that Menorah!
Crap. Now what?!
Well I’d been focused on getting a Menorah + background for SO LONG that I hadn’t thought about greeting, finishing touches, etc…
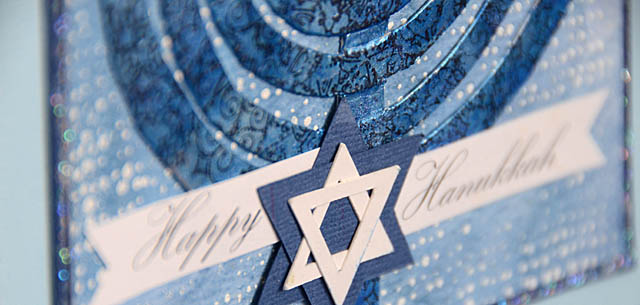
I re-visited my star concept and worked on sizing it down/how to make that all work for a while. Then I decided I would mount this card onto dark blue AND light blue to add more detail. Finishing touches? Some stickles and some printed (hand cut) banners with Happy Hanukkah.
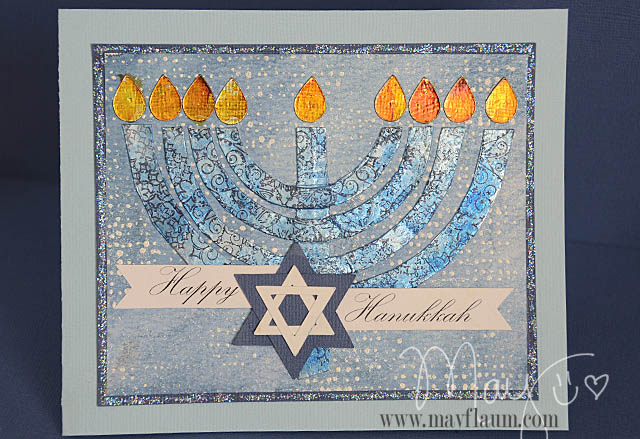
PHEW! then it was done. I love that in the right light the candle flames glow more – the foil really did make this great for me.
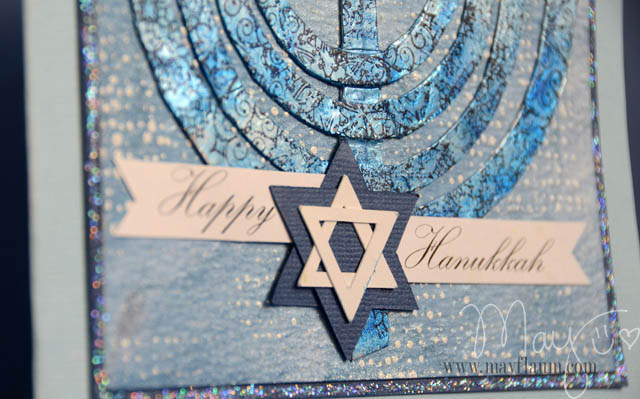
I also like how I ended up using two solid triangles + two open center triangles for my star.
So now my brain has been challenged greatly and it is back to crafts that are more in my usual realm. There are a couple of reasons I think this – or any challenging – project is a great thing to do.
- Stretch your imagination, don’t just go running to pre-made.
- Learn new skills
- Try new techniques out of necessity, add new tricks!
- Next time, you have this knowledge at your disposal to make things easier
I hope you’ve enjoyed this lengthy post, photos, and a bit more about this project!
key supplies used:
|
|
 |
 |
 |
 |
|
 |
 |
 |
 |
 |