day 5 | semi-homemade gift topper

While I don’t make my own holiday cards, I do like to stamp cute things onto the backs of the sealed envelopes. This is my collection (all hero arts designs) – love the stamp/postal ones as well as that cute reindeer. Stamping envelopes will likely be an Elizabeth job this year – she’s ready for it.

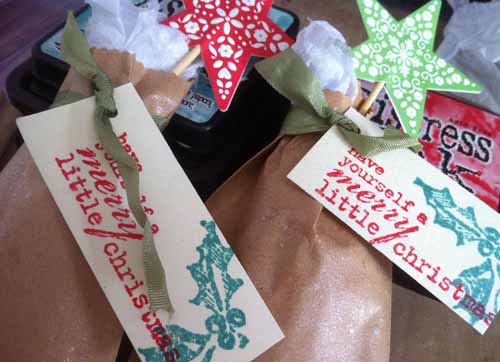
Today though – what I really want to share is a quick & easy ‘semi-homemade’ gift topper idea. Grab a wooden unfinished ornament (I got a bunch from Michael’s this weekend for about 50 cents a piece!) and coat with liquid adhesive. I used multi-medium – that’s fine too! Then coat in glitter, let dry, and attach to a bow.

My gift? A plain white box. To spruce this up a bit more I stamped a snowman (as seen above in my holiday stamps for this year!) that has to and from on the back.

Bam! It’s done and it’s one of a kind. How easy was that?


day 4 | holiday photo

We’ve never done a newsletter, but we’ve always done a photo.

Some years it’s been a pet photo, other years J & myself on vacation someplace fun, in recent years the kiddos have taken over the duty of being the annual photo that gets tucked into our Christmas cards. I’ve done the photo card, but mostly I do a traditional card + tuck photo into that. Reason? Not really. You can get amazing photo cards. I was tempted by some at www.persnicketyprints.com except I’ve already got plenty of holiday cards here and needing to be used.

So – if you don’t already have a photo to use (and you want one) here’s my advice:

  • Good natural light is a must
  • simple background
  • take loads of photos. Just keep snapping away
  • try a few angles/poses
  • if working with kids (or pets) work QUICK. Be set up first, test out your spot before you call them in! 
  • consider taking separate photos of each individual, then make a collage of sorts if you can’t get a group shot

Here’s some from holiday photo session (wearing holiday 2011 dresses) 2011:

I often print and use some of the goofy shots in a scrapbook layout about the holiday photo, that year in general, etc. The one I use in the card isn’t always my favorite either. One of the things I *LOVE* about doing this each year is seeing how the girls grow and change, and what their idea of smiling is. Becca is in a toothy phase… and Elizabeth – oh I love seeing those adult teeth coming in!!!

While I love the idea of a photo with our Christmas tree in the background, using it for our card means waiting until after Thanksgiving weekend to take the photo, it’s almost NEVER good natural light in front of the tree, and the images if including enough of the tree also mean less of the girls being featured. Mostly though, I don’t like the delay. I’d rather have a nice photo featuring the girls in their holiday dresses taken, ordered, in my cards ready to go before things get too crazy and I feel pressure to do it vs enjoy the experience.


day 3 | simple + inexpensive idea

Day 3: Let’s look at a little idea. Put some effort into decorating a tiny gift (this could be ANYTHING) and make it special.

[youtube=http://www.youtube.com/watch?v=3vONMcD9BxQ]

note – scrapbook.com has these Martha Stewart food picks only has a few left – and they’re on clearance!

supplies:

day 2 | holiday mood

What gets me in the mood for holiday craftiness? Quite often it’s music or movies that play an important role in making things feel a bit more festive. Today I want to share some favorites.

Movies:

    • White Christmas – the original, classic, good any time of year and always makes me feel warm & fuzzy. My sister and I watched this together… maybe a hundred times. possibly more.
    • Elf – family favorite + most quoted holiday movie around here. Who doesn’t adore Buddy?
    • Love Actually – a personal favorite but WATCH OUT! It’s rated “R” due to some rather random nudity… so don’t watch when kids are up!


Music:

 There are other single songs I love – like Mariah Carey’s version of “All I Want for Christmas is You” , and I’m a sucker for Sleigh Ride, Winter Wonderland, White Christmas… oh a number of songs. I haven’t named everything here – and obviously there are a ton of movies I enjoy having on as I work this time of year including some of the cartoon specials, cheesy ABC Family made for TV movies, Christmas Story… so many… What are your favorites?


day 1 | snow globe + polar bear tag

Let’s get some holiday crafting STARTED!!

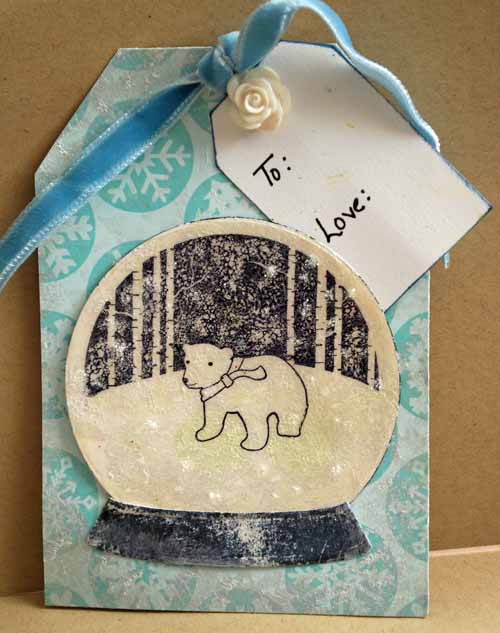
While at Stampers Corner last weekend teaching I fell in love with the Polar Bear stamps + the snow globe die cut from Memory Box. I’ve been a fan of the company for a long time, and I couldn’t say no to them… even with my long history of not actually using adorable animal stamps. I’m determined though – and here’s my first project with them.

enabler note: simonsaysstamp.com has the snow globes (there are a few sizes!) + the polar bear stamps in stock!

After I die cut the snow globe pieces onto manila paper I used pearl dabber paint on the circle, then once dry stamped with black archival ink. The result was a “textured” look to the stamped image. LOVE! The base is stamped with black archival ink lightly – so it’s not even and has an aged look.

Here’s a video of the rest of the process:

[youtube=http://www.youtube.com/watch?v=hA2-Ix2SIPQ]

and more detail shots…

LOVE how the paint adds that texture! Then how the glossy accents on top adds, well, glossiness! Also? Applying distress stickles before glossy accents is dry = great subtle “snowflakes” in my globe. So fun.

To finish it I just threw on a little tag (edged in ink) and topped with a brad + ribbon.

Supply info/links:


now I just have to decide…
 

Which gift gets this tag? AND… what will I make with this die cut next? I am just starting to warm up – and I’m loving every minute.