Distress Bird Tag

DSC_2304

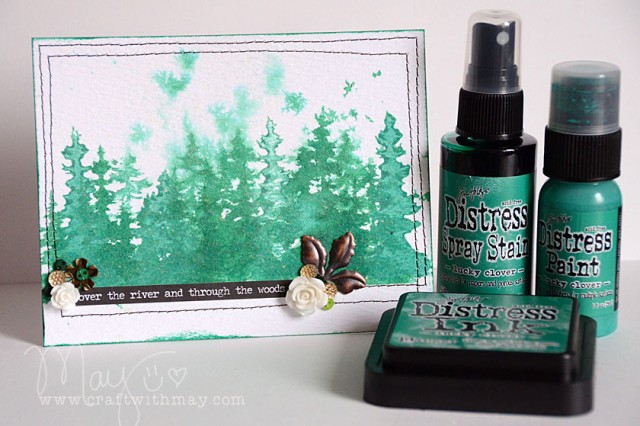
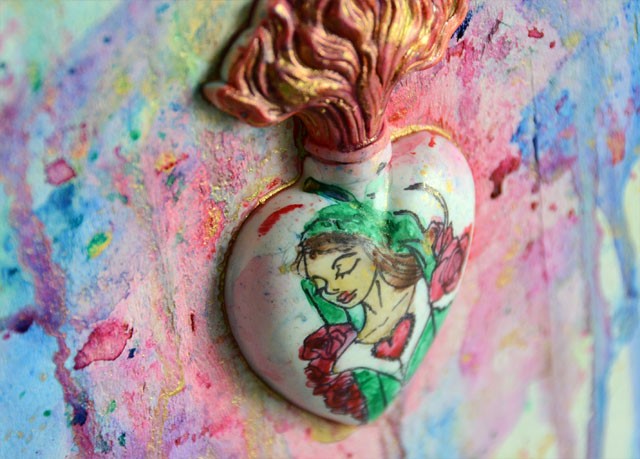
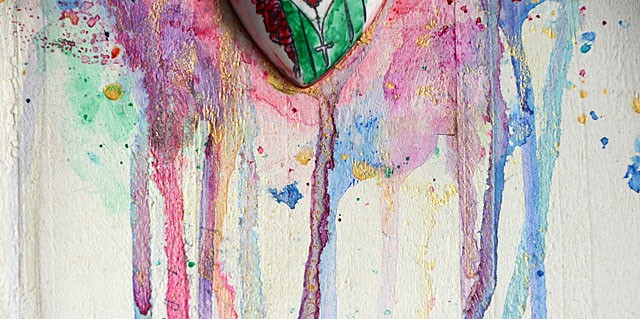
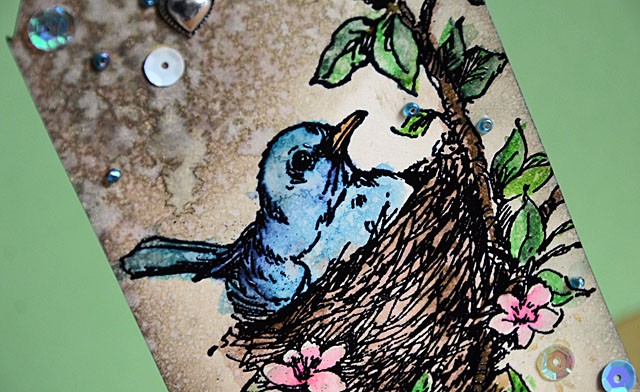
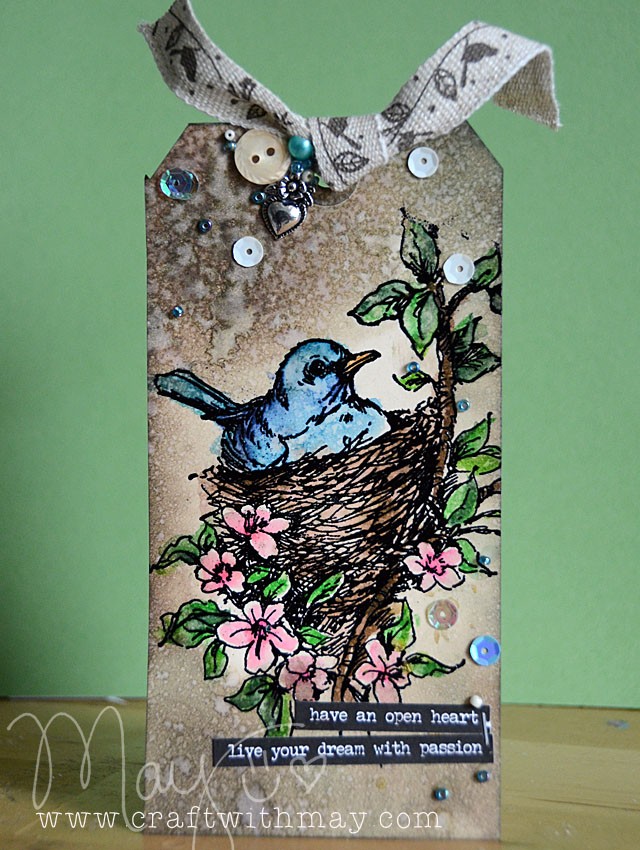
True story: This was one of my favorite projects to make lately, and it took less than 10 minutes. Crazy when that happens! From the bird stamp (one I found on clearance at Michael’s) to how fun it was to add bits and pieces from my new embellishment line – this simple formula for a tag is easy to do and a lot of fun!

DSC_2316 copy

To make a tag like mine:

  1. Stamp an image with clear embossing ink, then heat set with black embossing powder.
  2. Color with distress ink and a water brush
  3. Use a brown distress ink and blending tool around the entire image. Then spritz with water
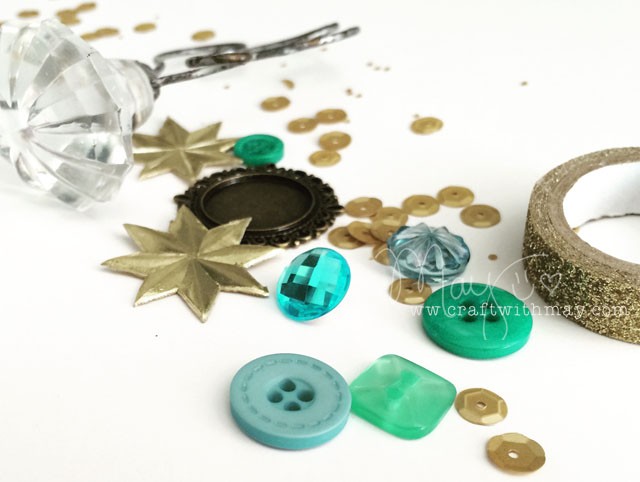
  4. Add embellishments (I used Attic Findings and New Leaf- 28 Lilac Lane kits), gold mist, and stickers to complete the tag

DSC_2320

28 Lilac Lane is now available in stores! On-line (affiliate link) the full set can be found at Ellen Hutson here.

Lucky Clover

DSC_0693 copy

The November Ranger & Tim Holtz Distres color? Lucky Clover! I’ve created a video showing this beauty in action, and how I layer the different forms to create a simple card in this video. (link to YouTube)

If you’re looking for this color of distress it is available online – I’m using affiliate links here (thank you for the support!!) in this blog post.

Simon Says Stamp and Blue Moon Scrapbooking have this color (in all forms) in stock.

Here’s a link to Simon and the trees stamp set I used in the video as well.

Mixed Media Canvas with Prima Pastels

DSC_9954 copy

This was an intensely fantastic piece to make. I used Prima oil pastels and resin shapes- two products of theirs I can’t recommend enough. I also used  one of their new stamps to create this. Very little else was needed! I’ll add affiliate links (should you choose to use them they help keep the blog running at no cost to you- so thanks!) at the end of this post if you’re looking for these supplies.
Link to YouTube video

After the initial resin was adhered (days prior to making) this piece was created in a single day, over a period of about 8 hours with about 2 hours actual working time.

DSC_9964 copy

Supplies Used:

Prima Oil Pastels [Ellen Hutson, Blue Moon]
Prima Carte Blanche (wood) base [Simon Says Stamp]
Prima Water Brush [Blue Moon]
Prima Mary stamp [Blue Moon]
Artifacts & Relics set [Blue Moon, Simon Says Stamp]
PPA adhesive [Ellen Hutson]
Prima Color Bloom in Cobalt, Boysenberry
Heidi Swapp gold mist [Ellen Hutson]
Ranger cracked pistachio mist
DSC_9965copy

Color inspiration: Minty golden goodness

mayf_blog3

This was a mess on my desk that I captured and can’t get enough of. shades of mint, aqua, and of course all the gold. You know I don’t wear gold often – almost never. But I adore gold in crafting. I decided it is because while I love the cool silver for jewelry and in clothes, I prefer the warmer feeling gold with crafty things.

The holidays certainly amplify it – but year round from glitter to sequins you’ll find me going through 100 times more gold than silver… isn’t it funny how your style can be so very different in creating vs what you wear?

What colors are inspiring you these days? For me anything from jade to mint to aqua is remaining way on top – in part because these colors all go amazing with purple and you know I love shades of purple. And gold. And antique copper. And…

it’s all about colors around here right now…

Dia de los Muertos

Well, technically not a canvas this is actually a wood shallow frame that I turned around to use the back. The results? LOVE this piece!

dia

You can check out the whole how-to for this surprisingly easy background here is my YouTube video.

DSC_5521
Affiliate links used

BlueMoonScrapbooking and Scrapbook.com   carry most of the supplies I used, you can also use the affiliate links below to Simon Says Stamp.

Supplies Used:

I love these cameos so much – this one inspired my canvas.

DSC_5498

From the rosette (I used the snowflake design!) to the alcohol ink colored roses I just love how this turned out! It was surprisingly quick and easy too – which is always a bonus!
DSC_5546

I hope you enjoyed this tutorial and project. I’ll be doing more with stencils in the new class I’m just starting to develop (don’t hold your breath -it’s gonna be a while!) and you can bet the turn the stencil + use it more than once to get a design like this will be used.