As the days shorten and get colder I can’t help but think of tropical fun! Today I’ve got a super bright and cheery tutorial – this project is easy! You can apply this idea to many project types as well. I have really fallen in love with using my ScanNCut to make my own custom stencils! It is super easy (just cut stencil material vs paper!) and lets me add my own twist to any project.
To start with, you’ll cut out a design using the ScanNCut. Use an in-machine pattern or scan in your clip art as I did here. Cut it out (Brother sells stencil material!) of stencil material and set it onto your journal cover. Note that I wouldn’t recommend leaving it overnight – it is adhesive backed and mine stuck a bit (my OWN fault!) now it isn’t very sticky – but it’s sticky enough that when I went to remove it I had to pull just a little too much. NO problem – just something to avoid!
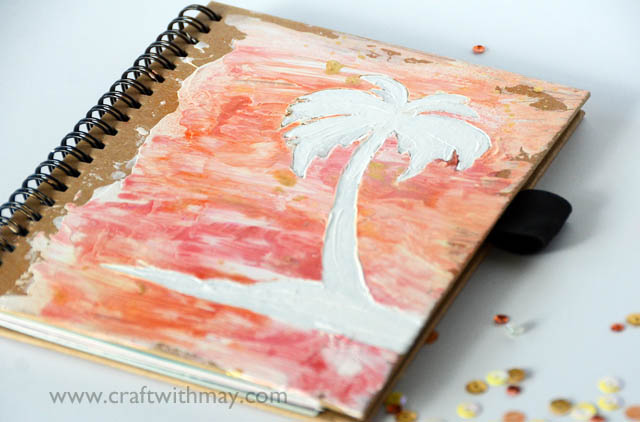
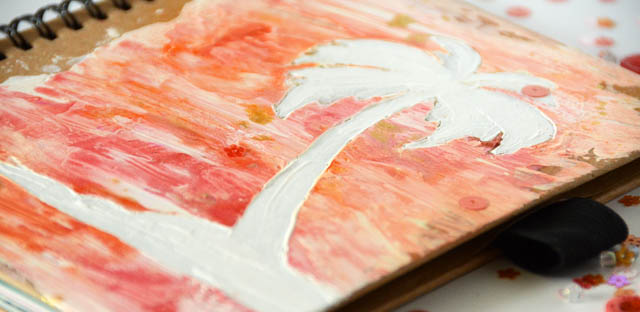
Here is my tutorial video- since I have plenty of videos showing how to cut out with the ScanNCut I focused just on the making of the journal. What I have discovered in this technique of stencil application is that it creates a marvelous marbled effect!
If you’ve seen the videos of marble-like painting this could be a great substitute for a lot less mess and waste. I will share another example of this next month – it’s so addictive!
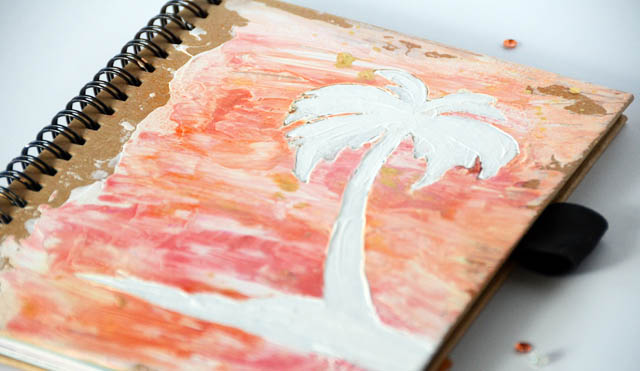
I just love how simple this is and that it needs no further embellishing. The orange, pink, and coral colors blend so nicely and I love the stencil material from Brother for projects like this. It sticks – but isn’t TOO sticky so it means you don’t get paint slipping underneath – and it really is fun to make custom stencils.
Oh yes- and the usual disclaimer here I am a paid consultant for Brother, but all ideas and opinions are my own. The ScanNCut
Just love that