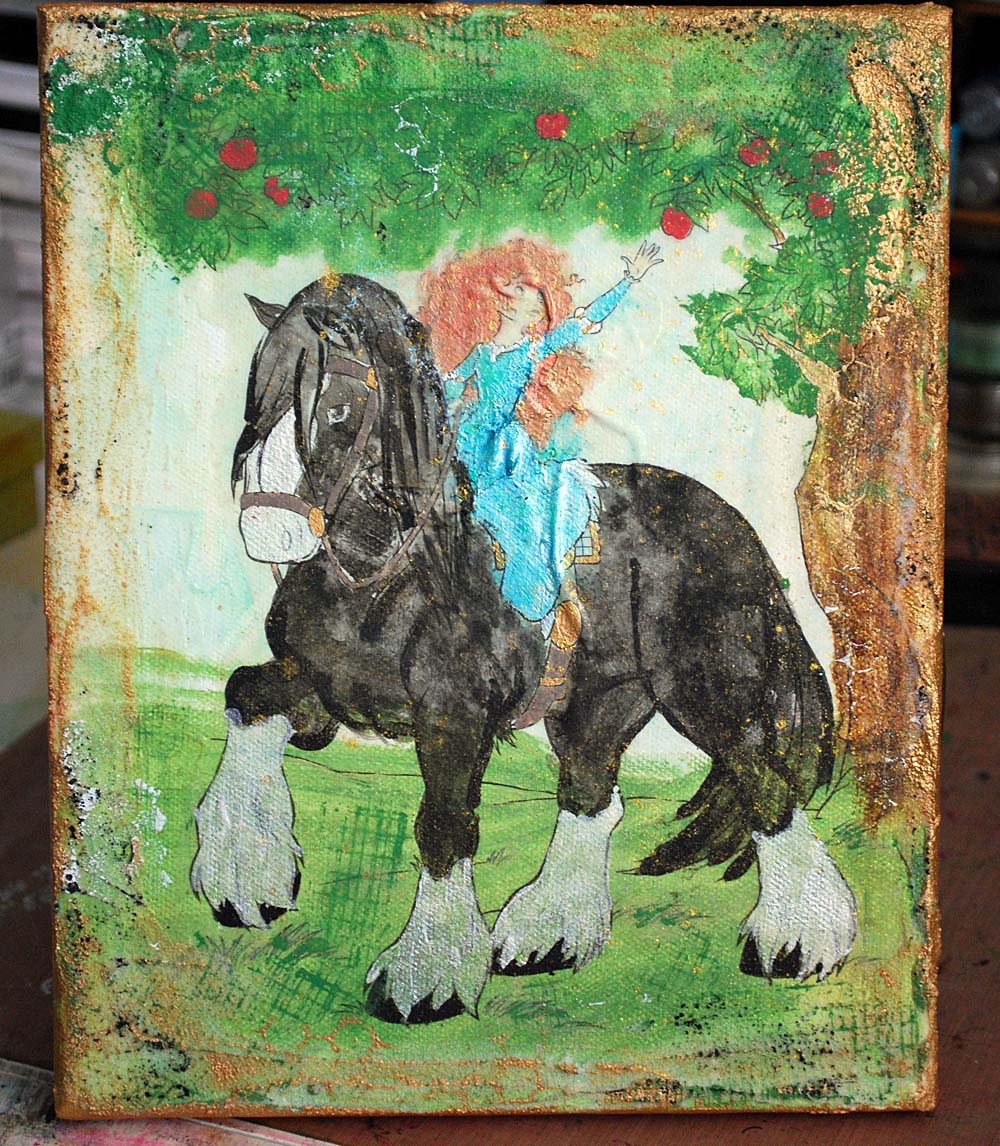
Things get a bit wild when I have assignment and I am told “no rules”… That is the challenge this week at Simon Says Stamp and Show, and oh yes I’m up for it. Here’s what I made:

Uh, did I really use a coloring book page to create my project?
OH YES, YES I DID!
Let me tell you something – this is a project I’ve been trying to figure out logistics for – and finally did. It is SO EASY. I can’t believe it. If you’ve got some paint, ink, and you have to use Claudine Hellmuth multi medium in matte finish – you can do this project. I have a lot of plans for future installments too. More on those later. Right now to tell you how to do a image transfer I made a video:
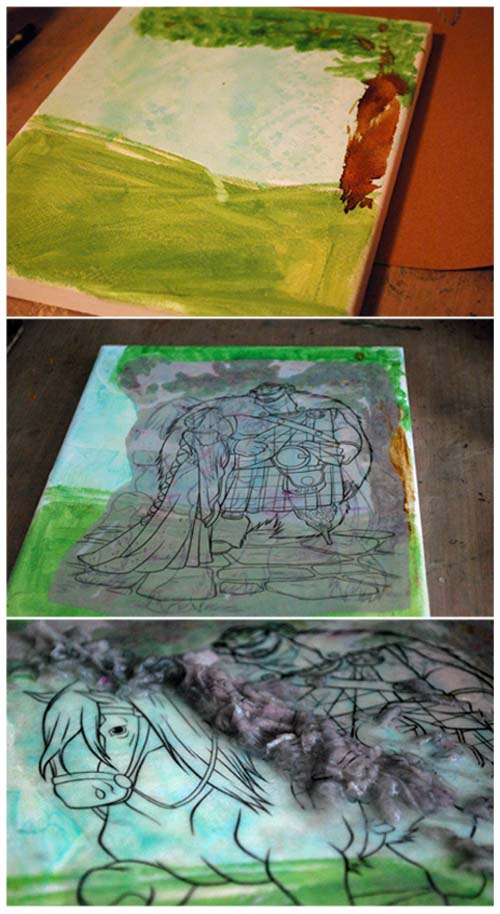
LET IT DRY OVERNIGHT. Honestly. Just wait. Ok, so here are some “in process” photos of my canvas…

Tips:
- Dab a tiny bit of paint onto your craft mat, then squirt with water, then apply to area with a small brush for a watercolor look.
- Don’t have the right color? Mix a bit of white paint + mist, ink, or other medium and make it!
- Work one color at a time, let it dry between colors
- don’t over think this. Just color it!
- You can always add layers. For me, texture and detail around the edge was my finishing touch.
- Did I mention that you need to let it dry overnight? Please do.
- Pick an image you want to color that looks like a scene and isn’t totally random.
- Do a bit of planning first. You could do some decorating of the canvas, then
- Think about water reactive product. I use acrylic paint as my base for almost all color on here because once dry it won’t react to getting wet again. Mixing a bit of distress reinker or stain in with the paint works by the way. Then you can use those colors without worry.
- If you want to add layers, use matte finish.

Honestly. once the hard part (doing the transfer, which really isn’t hard) is done… you could do ANYTHING here. My tips are just starting points. Actually, before you do the transfer you could layer on paper, paints, whatever! I can tell you that I had NO CLUE what I was doing, or if it would even work. Any depth or shading or anything I got was by putting paint on, wiping it off, putting other paint on, watering it down… and just, well, having fun!
Supplies used:

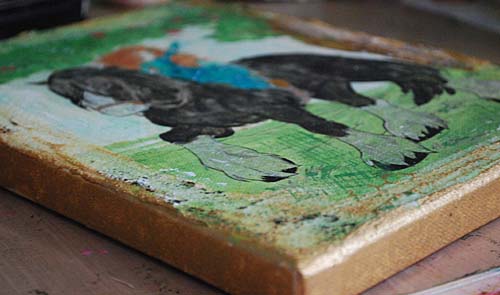
This is a no pressure project because if all else fails you can simply coat with a nice thick layer of gesso and completely start again from scratch. But if it does work, I think it’s fun to paint the edges (as you see above), but also to apply some type of texture or molding paste around the edges to add dimension and texture to the piece.

Once dry, you can stamp, paint, ink, or otherwise color over the paste. You can also add colorant while wet, but I prefer some of that white to show through.

As a final magical touch on my piece, I misted with perfect pearls mist so that in the right light, it shimmers and sparkles in places. LOVE that.
My favorite part? Definitely Angus the horse. For his varied color I just kept adding water to my black paint to make more of a wash – but also I used straight black paint to paint thin lines once that was done for definition. If things got too dark, I added water. too wet? just dab a paper towel on it. Here is a photo when it was still in progress…

I can’t express to you how much FUN this was to make. It is already hanging in my daughter’s room, and I hope to make more. I will also be doing a pair of images on totally blank canvases, that my daughters can then paint themselves and I can hang. How great will that be? A more long-term art project that will keep much better than if I’d left the coloring book page alone.
I hope you’ve liked my project and these looks at my “anything goes” for the Stamp and Show challenge. I challenge YOU to create absolutely ANYTHING and post it yourself this week. If you do? Be sure to hop on over and enter at www.simonsaysstampandshow.blogspot.com – because doing so could win you a $50 voucher to Simon Says Stamp!! Oh yes, they sponsor the challenge blog and they generously give away a prize to a randomly selected challenge entrant each and every week.
PS – if you’re wondering what happened with that tiny canvas from the video, this is the result:

I’m a bit stuck on Disney Princesses I admit, but soooo much possibility here!
Today’s post is sponsored by Simon Says Stamp– and they are offering up a discount code just for my readers here as a part of my Camp Scrap extravaganza as well.

They are offering 10% off any order valid today through 7/31/12. Just enter code: CSMF10 when you are checking out.
I am really excited to be working with Simon Says Stamp now as the coordinator of the Stamp & Show challenge blog, especially because it has been one of my absolute favorite sources for all things inky, and so many fantastic crafting treasures. Their shipping is fast and a great rate – and their service is awesome. They have a facebook page here, you can follow them on twitter, and of course you’ll want to visit the shop itself.


I still color in coloring books-I find it soothing.I love this idea and can’t wait to try it.
Exciting. Can’t wait to watch your video and give this a try.
That is so cool! I don’t think my daughter would appreciate me taking some of her princess drawings out of het coloring books but I do see myself trying this out someday! 🙂 Thank you for sharing!
May, this is a really cool way to use Claudine Hellmuth’s transfer technique. Love the idea! Thanks for sharing the video. <3 Candy
Such an awesome way to use that transfer technique! LOVE it!!!!
WOW!!! This is cool!!! Can you get Claudine Hellmuth’s multi-medium at Hobby lobby or Michael’s or is this an order on line product? I so want to try this!!
Have a Super Day ~~ dawn
Great idea May using a colouring book and the Multi Matt Medium. Great texture to your piece too. Great video. Tracy x
I love coloring books. I can’t wait to get started on
this technique. Thanks for the inspiration and the video.
I’m definitely going to try this!
Oh my – I’ve seen transfers done before but this is the first time I’ve seen something I want to try. Creating a background and using a coloring book image really got my creative juices flowing. Thank you for sharing your process and technique.
May,
This is fantastic! I just found Simon Says Stamp and Show through Anna Karin’s blog and what a ton of inspiration! I just may have to make something for the challenge. Thanks for the video.
Hi May, I really love your canvas. I never thought of using coloring books for an image transfer, but what a brilliant idea! Love it.
This is fabuluos May! Love the image you used, all the colours and textures. Great idea! TFS!
What a great idea! You’ve added amazing details and texture to that simple page… the canvas is beautiful!
I love this project. Plus it’s a great excuse to go get some new coloring books!
Wonderful! Thanks for a great video.
This is a super great way to kick off week six of CS. I am having fun doing the decorations for my niece’s bridal shower, but I shall be very happy when I am able to do CS and Dimensional Details. Thanks for the great Video.
Super job May!!! I love coloring books! they’re fun and magical! Tfs;)
I LOVE those pages! What a great idea! I will have to go out and get a few coloring books. The only ones I can get my hands on belong to my little nephews and feature ‘Spider Man’ :O.
Your canvas turned out so cool~ perfect for your girls~ and me… I loved “Brave”!
I just love the effect you created here and all from a coloring book! Love how you painted this and added that layer of texture on the canvas! I have to share this with my daughter so she can see how cool this is!
I LOVE this canvas. I have been wanting to do something like this but I can’t draw so I never went there. Well, hello…I’ll be buying some coloring books now 🙂
What a GREAT idea! Wish I thought of it when my daughter was younger! Although, she still does love her Disney princesses!
I can make a 4×5 greeting card or an ATC but give me a big canvas and I am intimidated. This is fabulous!
Great way to make art on a canvas 😉 Love it
xoxo Sioux
Thanks so much for the very informative youtube video, you answered so many questions I had about how to do this. Your canvas project from Brave is gorgeous, thanks so much for sharing.
Can’t wait to give this a try. Thanks for the awesome instructions. Using a coloring book is genius.
What a great idea to try!! The plus of it, you make it look so simple & easy that even I could do it!! Thanks for sharing this and inspiring me even MORE during your camp!!!!!
So cool and fun
What a great use of the transfer technique – itching to give it a go. Extraordinary result you achieved… so exciting!
Alison x
I’m so excited to see this, I’ve got a Mulan Disney book to try this out with..FUN!