Lynn Wigren – congrats you won the SSS kit and I’ve emailed you.
So I’ve admitted to having a BIG problem here. (studio) – and I’m doing a full series on the process of getting this re-done fully. correctly. inspired. for the long haul. Today, let’s get positive and active. Let’s start.
ALL of the photos in this post are from the past. 2007 – 2011 studio photos that I’ve uncovered from past blog archives. I found them interesting and helpful as I began my re-do plan – to see things that I’d done in past…
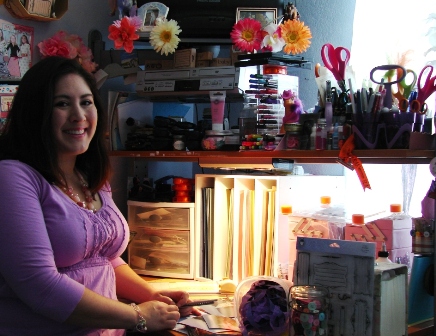
Where does one start? The temptation to utterly gut this space and begin with thousands of dollars and master carpenters is indeed a dream… one I do not have funds for. Let’s allow a moment to dream of custom cabinetry and perfect work surfaces and a room that is big enough to accommodate a whole gathering of friends, daybeds for lounging, perhaps a small kitchenette… an upstairs loft… fireplace… windows overlooking a meadow with wildflowers, deer, and a stream…
Ok back to reality. The only way that would happen would be for me to win the lotto and build myself a crafty cottage. Which could be nice, but it’s not happening at this time.
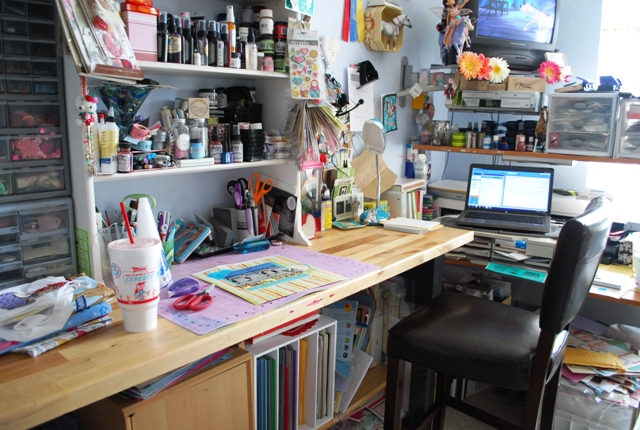
What IS happening here? Well, I need to take what I already have and ask myself a few questions:
- What works
- What stays
- What needs fixing
- What needs replacing
- What is not working
- Where am I wasting space
- What space do I have that I rarely or never get into
My answers will help me plan and figure out what to leave alone, what to change. After a few months of keeping the dream of fixing this alive, I had solid ideas. One thing that was absolutely clear was that the kids changing table (which, when I purchased, I did so knowing it’d be a fabulous crafting dresser) was being wasted. It’s drawers a mess of junk and in a position that i could never quite get into them anyhow. That had to move. Ah… but when we’re talking about a 9 x 11 room this means very careful thinking and envisioning the results very clearly before making a move. To move something in this room takes mad skills that I consider myself blessed to possess.
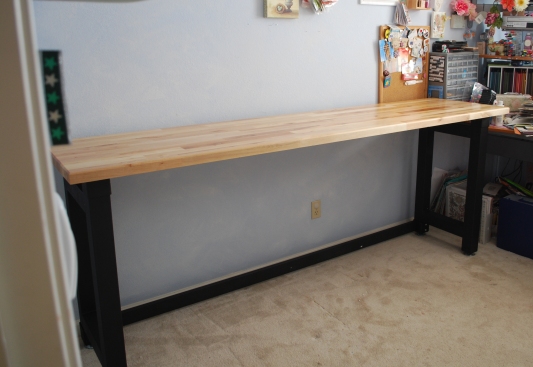
Phase 1: Pile everything up in the hall, closet, and under computer desk and then move the big 4 pieces of furniture.
I pulled out a piece of paper and cut it to the size of this room (scale being 1 inch = 1 foot). then I did the same for my 4 pieces of furniture and I moved those pieces around that paper for about a week. What if the desk goes under the window, what if the chair moves to the opposite corner, what if… and I played with those pieces and various configurations until I felt that I hit upon an ideal change. One that did not block the heater vent, took the TV into consideration, and seemed like it would make the most of each of the 4 pieces without leaving awkward gaps or unusable spaces.
I am getting the key players into place. Just like when I’m crafting: Get the “story” figured out before I go picking embellishments. The furniture has to work, has to be in good position. This will tell me what I have, what I need, what needs to go, and what space I have to fill.
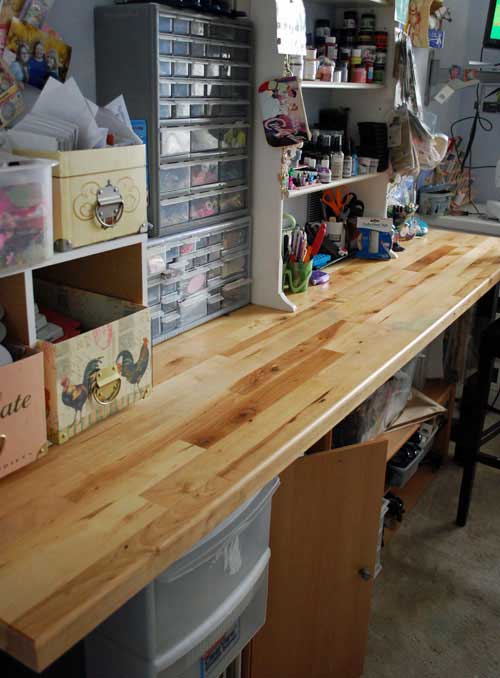
Phase 2: Taking a close, careful look at the pieces and figuring out a great way to put them back together. Like any craft project – there are an infinite number of ways a studio could be put together.
Some of the things in here that DO work:
- Having buttons and tiny embellishments as they are. I purchased at the hardware store for under $20 each two sets of small container storage meant for nails and screws and such. AWESOME. (you can see them on my workbench in above photo)
- Using the work bench as my main crafting station. I can stand or sit at a barstool.
- Having scissors and other essential tools in a cup right at edge of my craft station.
- Keeping cardstock in the vertical storage unit I have for it.
- Storing patterned paper by manufacturer
- Stamps and tapes being in layered ‘basket’ type storage
- alphabet stickers being kept out and easy to thumb through
- Ribbons by colors in jars. This works and ribbon is NEVER part of the mess…
- Keeping stencils on a ring (hung on wall)
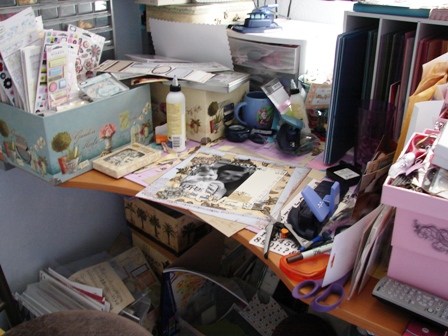
What isn’t working? A LOT.
- Sticker, rub-on, other misc. embellishment storage.
- patterend paper storage location and space
- punch storage
- die cut storage (there is not any)
- mist/paint/stickles storage
- computer desk – nothing about it working
- drawers for tags, tiny alphas, etc.
- tool storage
- under workbench storage – space being under used/utilized
- under desk storage – it’s just a catch all for anything
- the scary closet
- adhesive storage
- photos to be scrapped – such a mess
- sewing machine supplies
- Not having enough space for some things
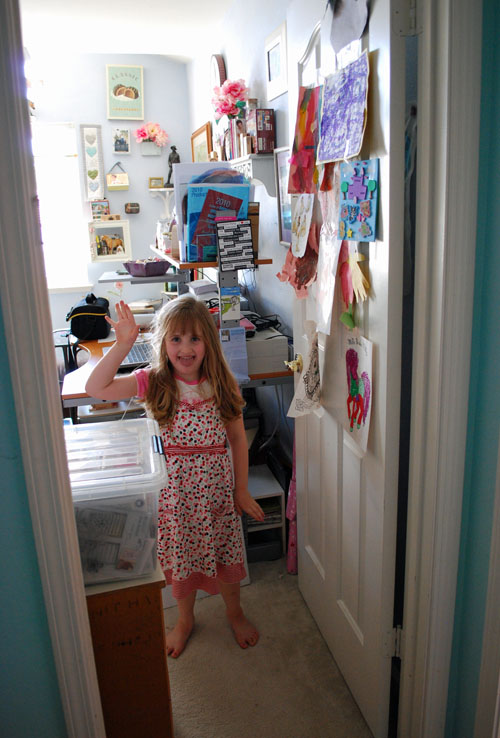
Let’s also talk about some things I like – because being positive has to be a BIG part of this:
- I like having a reading corner. A big cozy chair and my books that I’ve not read on a bookshelf next to them. A chair that can double as a kids art station (with TV tray), as blogging spot, to watch a movie, etc.
- I like that the kids art covers my door
- I love that this space is now fully MY domain. No guest bed, no sharing. Since the bed that was once in here became Becca’s bed, this space is now all mine. I could paint the walls peacock blue or electric pink. It’s my call.
- I love having some of my personal things, jewelry, and other bits in here too. It inspires me.
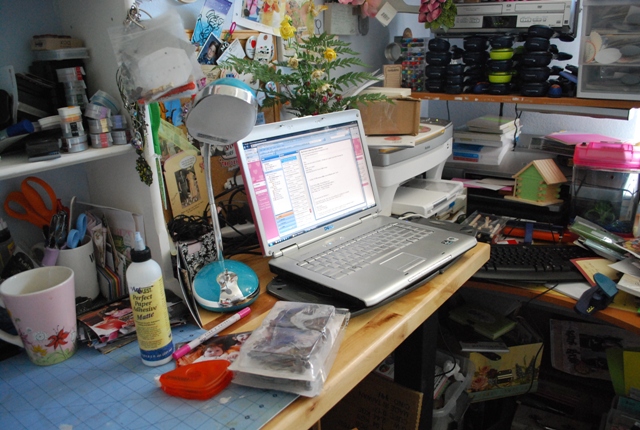
Now that I’ve looked at what I like and don’t like, as well as come up with a new plan for my furniture in here (and moved it) I have PILES of stuff waiting to get put back. I put the key elements back – gave things I use a home, made the studio usable all on that same day. But what I did not do was to make it pretty.
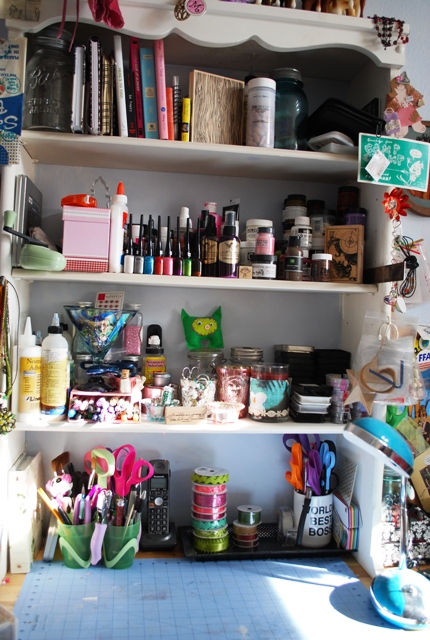
Does this surprise you? I have a few reasons:
- if it’s too pretty, I’ll quit and ignore remaining scary closet mess where I put as much as I could in effort to get studio in workable order fast
- I want to evaluate new positions and will likely continue tweaking positions of supplies.
- I still need to clean out each drawer, sort all my things. That’s not done!
Bottom line though, I’m putting everything to the test. It would waste time to make things just so, then un-do, then re-do, then… yeah. At the moment I’m evaluating switching the sewing machine and one of my embellishment drawer sets with my inks/wet mediums. I need to do more projects before I decide if my original plan was the way to go or not.
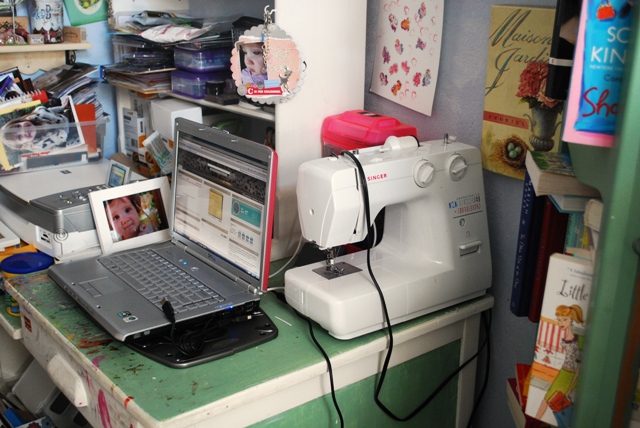
I’m not to the shopping part yet. No trips to Ikea or the antique shop for funky pieces to add either. NO. The mess has to be cleaned. That’s stage 2. I have to clear, clean, and put away what I have.
The NUMBER 1 mistake I’ve made in past is buying stuff I want – not realizing it’s not actually perfect. If I have everything just so, know exact sizes needed, that will lead to much more effective purchases and ultimately, my success in this crazy studio re-do.
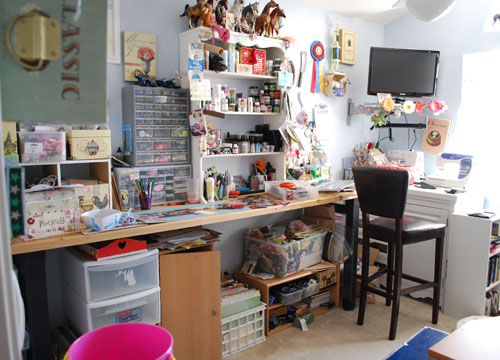
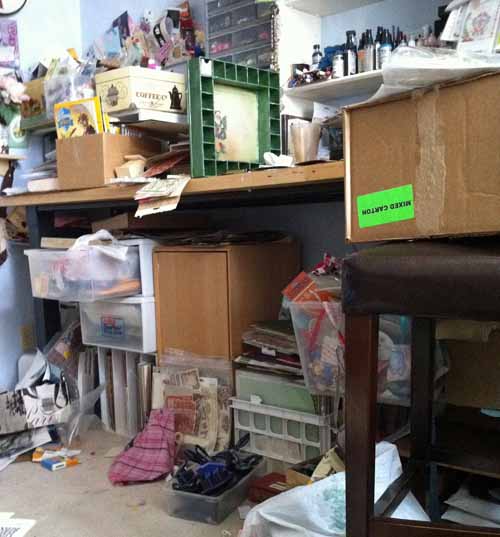
The photo above is the closest I have found to what I will call the “before”. This was right when I moved things around (and back in the corner behind that chair is the changing table). This is also before it became the Tsunami it now is. This is a long post I know – but I wanted to document my process for you and we’re getting to a good point now. Where we move from thinking to acting.
The hours and labor now begin.
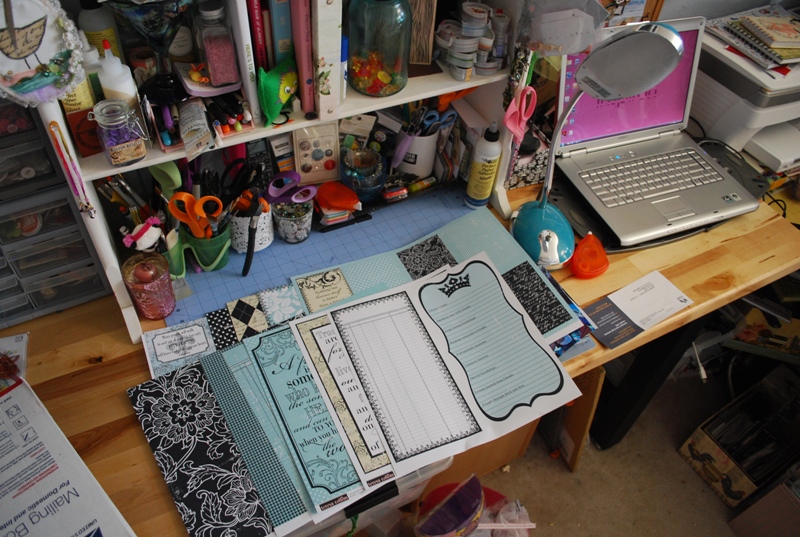
Watch for weekly updates on my progress, thoughts, and ideas. If you have questions, feel free to ask here.
You’ve inspired me to remove items, furniture, etc., that are useless and just take up room, thus breaking my concentration and frustrating me. Thank you.
Wow! Good Luck! I did this last year to my scrap room, but good night you have 100x more stuff than I could ever think about! I am interested to find out what you keep/store your alphabet letters in, plus what you decide to put your stickers, rub ons, etc in… these are my problem areas (among the few, Ha).
Good luck with your spring cleaning. I’ve just started doing my craft room.
Good luck with what can be an overwhelming but fun task. I am in a similar situation but my biggest issue is doing something with the walls. The old wallpaper was taken off and that is as far as it has gotten. Because of my spinal issues I need DH’s help, and he is a man who is truly stretched to the limit. Maybe if I make the purchase and he is unable to help, I can require assistance from my loving children. The walls absolutely need to be done so I can hang selves, etc. BYW May, I love your dream cottage and would join you any day.
All right May, I will absolutely start on my craft room tonight. Love your photos and looking forward to more posts on this subject.
WOW! Great post – so much fun to read! Can’t wait to see more!!!!!
Good Luck May!! I know mine needs it too but I am too busy with challenges. It seems like I clean it up ever 2-3 months but it gets right back to being a mess once I have been playing.
I’ve been weeding a lot of things that I no longer want/will use for my yard sale this spring. The rest I’ll give away. I’ll be in my craft room first thing in the morning to do some more work. Looking forward to seeing your transformation!
This is such a huge undertaking! I’m really impressed, and I know you’re right to resist the urge to go out an buy pretty containers/storage options until you know what really works. Good luck!
Good luck May! I’ve re-done my “studio” (or “closet” as I like to call it) several times and I know what an involved process it can be. My space is only about 7’x7′ and I have to leave room for my husbands computer and the family filing cabinet … if only I had that extra square footage … sigh …
I guarantee that you’ll love the results and will be more creative than ever. Is that even possible for you? 🙂 Can’t wait to see your progress!’
May the force be with you…I don’t know though-the problem could be that huge pink coffee cup you have in there. Move that thing out and you’d have much more room 🙂 Can’t wait to see the process!
I have found a couple things that help me keep my space organized. I keep two paper grocery bags out all the time. One for scrap paper that I don’t think I will use any longer. One for left over misc. embellishments, rub-ons, stickers, ribbons, etc. that I feel I will not use again. Both of these bags are destined to go to a group of moms I know that get together with their special needs kids to make art projects, cards. Items that are manageable for their skills and patience levels. Once in the bag, I do not go diving back in and I have never missed anything I put in there. This keeps after project clean up (which I do at the end of every project) pretty easy. All of us have children’s groups or schools near us that could benefit from our done with items. If I lived nearer to my grand daughter, I would give these items to her school. So in lieu of that I found a group closer to home that is happy to get my bags every couple of months. It also helps me be okay with letting go of things since I know they are appreciated and used in their new home. And it keeps my supplies fresh. When you only have so much room, you have to use your supplies or stop buying them. At least that’s what I have found for myself. I don’t work well in too over crowded an area. I find that I need some space and breathing room to do my best work. Love reading the comments about the process.
Very interesting. I was wondering if an island, like a butcher block table, maybe small, square, would be helpful in the center of the room…you could stand and work on it, hang things from its side..not sure if you have room. Also, if you remove the carpet, you could have drawers carts on wheels roam around. Hard work all the way around.
You are making me re-think some things in my own space, and that’s a good thing! Thanks for always being willing to honestly put yourself out there!
Love seeing the before, so we can appreciate the after! I’m figuring out my (probably temporary) craft space for now, while we work on getting the permanent space going (will be awhile). It’s HARD, but SO HELPFUL to have you list things like the ‘what’s working/what’s not’ type things! SO THANKS!!! Feels good to move it all about doesn’t it?
I’m loving your progress. The pictures are great.
May I cannot wait to see how this all comes together. I am currently stuck in the “what tools, etc do I need and where do I put them so I can create something without wasting time looking” phase. Thanks for the wonderful inspiration so far!
Love the organizational idea of the hardware bins.
Thanks for inspiring me to clean out my own space. I am happy with my furniture and am very limited with the space, so all I can do is clean out stuff and move things around. I was able to corral all my BPC handouts that had in five different places. Now if you could just inspire me to loose weight! 🙂
Wow, you have inspired me to deal with my space that is not working. I had given up a bit and started dragging stuff to the kitchen instead of dealing with the problems. Great post.
May – I always enjoy a good “re-do”. I moved about nine months ago and the “third-bedroom” in our new place became solely my scraproom (no room for a guest bed, so I know how much you are loving that the room is all yours). As others have posted, I have a very small cache of supplies so it’s pretty easy to manage, but I can’t wait to see how your room turns out. I was lucky enough to get new paint and carpet when we moved so I just need new closet and room doors to “finish” the job. All the best May – I really enjoy all you do.
This is great May! And for me, what I’m really loving about “Field Guide” is seeing which supplies I have but never use … and may not use – so maybe they need to go!