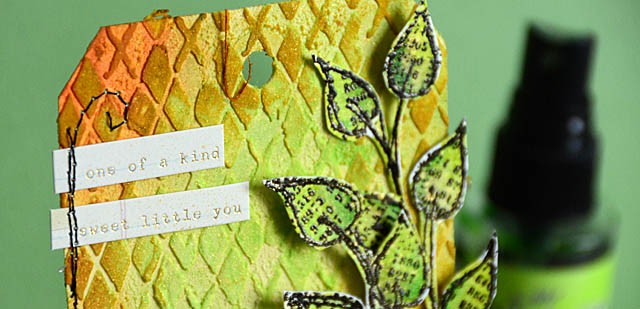
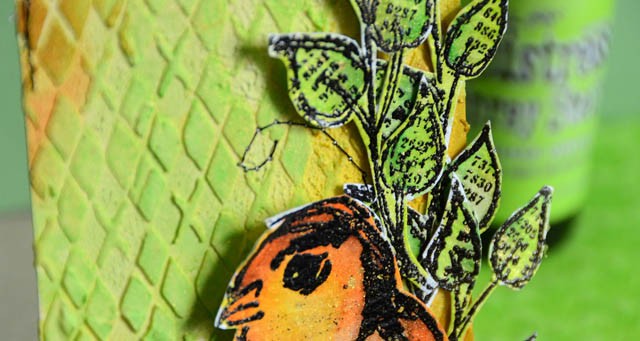
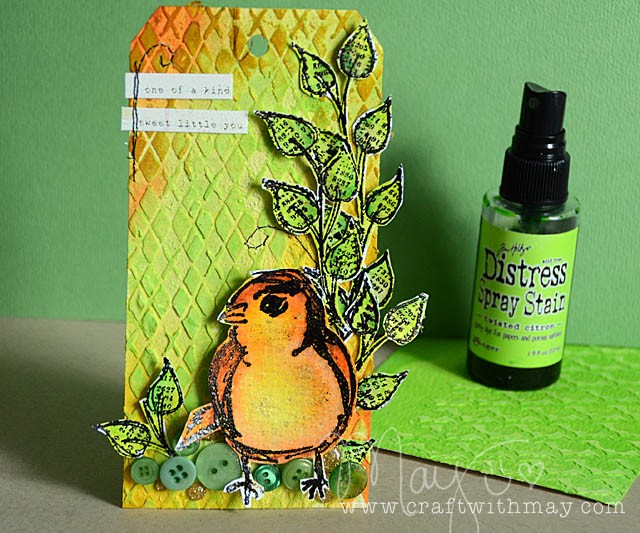
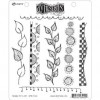
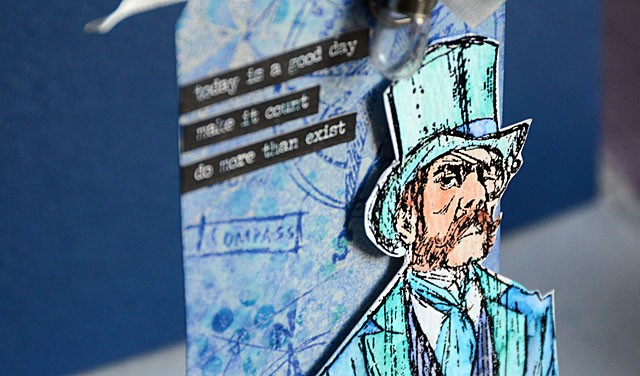
This week’s challenge was citrus – so I grabbed my orange, yellow, and of course “twisted citron” distress. I sprayed my tag down, then added paste and misted again! Loving the texture I got here in the background.
Then for my bird it was all about the watercolor paper and fluid colors (same with leaves) and what a good time I had getting crazy with a color palette I don’t normally use. Now I’m hungry for a good orange, tangerine, or maybe some lemon lime soda!
Now it is your turn! Simon is offering a generous $50 voucher that will be randomly drawn from the eligible entries each week. Join the fun by creating a project this week – and for your chance to win a $50 voucher you should hop on over and join in the challenge here.
affiliate links used when possible in this post, at no additional cost to you – it just helps keep the blog running…
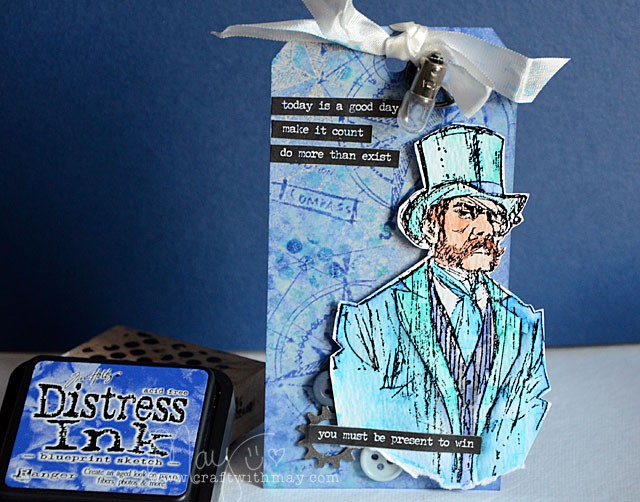
I have been SO EXCITED for Distress DIY Ink from day 1. Why? More use for re-inkers, the ability to do a custom blend, and make my own colors a reality like… ready? “May’s Jam” a blend of raspberry + seedless preserves
I can’t even with this color! It gives me all the heart emojis and oh my. I want to be a mad color scientist now! Oh but wait, you want more? I’ve got it! Let’s go back and look at my first attempt…
The stripes are definitely cool, and my third attempt is one where I just dotted colors at random, using mostly light but adding several darker shades (seen far left below). I will be doing more videos and definitely thinking outside the stripe for ways to make awesome and useful ink pads out of these. Custom colors, shapes or designs… you can do anything you can think of and I love that!
I am going to go get these three used & well loved on some upcoming inky goodness! Looking to get your own DIY blends going? Simon Says Stamp has everything you need including all the reinkers. Here is a link to the custom ink pad. More shopping options? Sure! Blue Moon Scrapbooking is also carrying the DIY pad (link), and many other shops (online and locally) will be getting it soon if they don’t already have it.
I’m going to have a hard time not making myself tons of these! For now I will do as I did with these three: experiment and think through the ideas and test with regular ink onto paper (for concepts) before actually committing to an ink pad design!
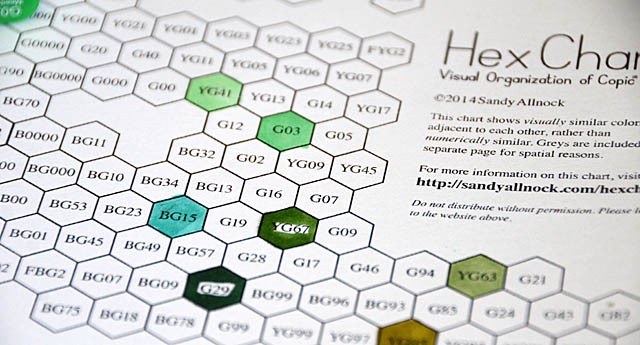
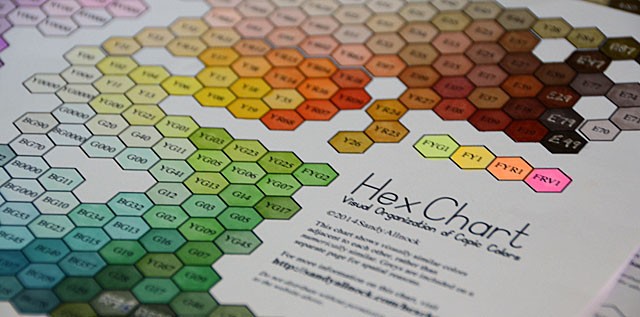
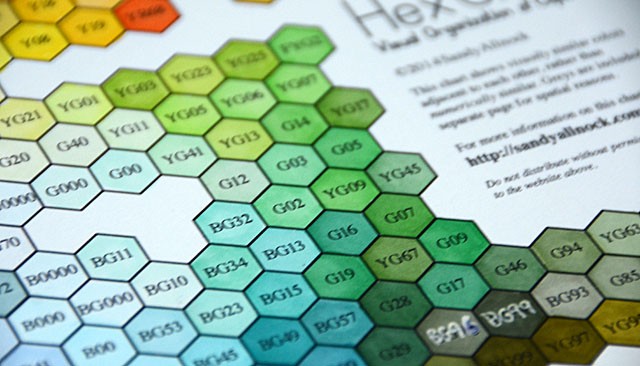
I am really excited to get started with these – I have some ideas brewing in my head. First up – I colored my Hex Chart (link) to see what I have. I’m VERY happy with my brown set. Greens I think I’m happy – but only time will tell!
To get started I took 3 greens and two browns and did some basic coloring, based off ideas I had learned in class.
I intend to do a lot of color blending and shading so I want to start with stamped images and testing out what works. NO pressure – just coloring and trying things. I’m a newbie here – so if you have requests for videos or things I’m doing let me know!
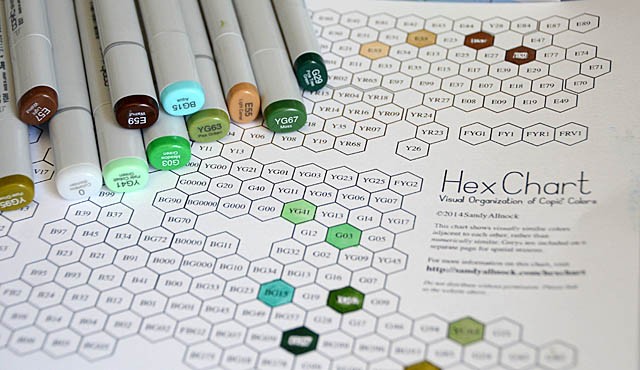
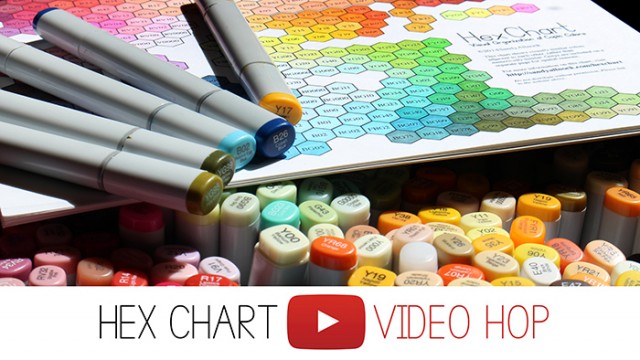
I don’t own Copic markers, mostly because I have no idea where I would even begin and because most of the time I can work with color mediums that I do have. The whole idea is so overwhelming. Where would you even start? My friend Sandy Allnock is not only a Copic master – but she also developed her own visual hex chart that is over the top amazing. Here is a link to her site/the hex chart. It is organized not by number, but by color so someone like me can clearly see the options in a way that is laid out in a much less overwhelming way. Today she’s got a blog hop going that I am happy to take part in – and I’m going to be sharing why I am in love with this chart as the new kid just trying to dip her toes in.
Where to start?
Before I pulled out the chart, I considered what kinds of things I most saw myself coloring with Copics. If simple coloring is all I want, Distress or watercolor (both of which I have plenty of) would be just fine. What colors and for what projects am I wishing for even more colors and options?
The answer for me was, green stuff. Trees, grass, flower stems, tree trunks… these are things I always wish I had more options color wise. Greens into browns on the visual chart sounds good to me, and that gives me a very clear and manageable place to begin a collection. Note that I am not picking out what colors are prettiest or my favorites- I will work from what colors I feel would be used the most. BIG and very important difference!
Here is a video (link to YouTube) where I take a closer look and explain more.
When it came time to pick my colors, I used the chart on my computer screen to do so. I then pulled out the hand colored chart Sandy had sent me to compare and guess what? I would have picked the same colors with it so that showed me that the colors here on my computer screen are true enough to use it as a color selector.
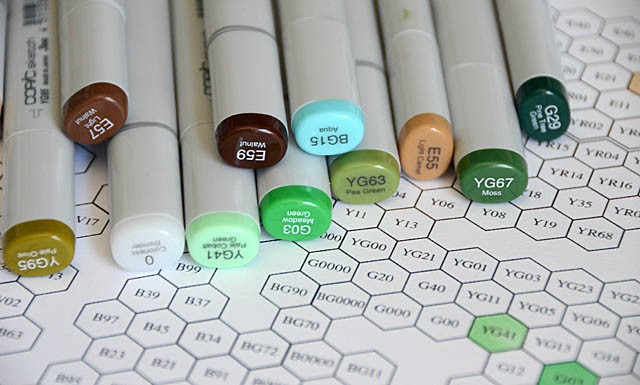
The eight greens I want to begin with are: yg07, yg41, g03, bg15, yg67, g29, yg63, yg95. I also know I want some good for Copics cardstock, the colorless blender pen. For browns, I was debating a bunch of 3-4 color ranges and then I noticed a set that is eg53,55,57, and 59. Now that sounds like they are right next to each other but 3 of those colors were in my top 10 brown picks, and they span a range of brown that I’m happy with so I think that will be a good place to start. Unlike most colors there aren’t many browns that I don’t want!
If you’ve got questions about my process I would be happy to answer them! Also, I’m the last stop in the hop so if you’re just joining in here and want more information you’ll want to head over to Sandy’s blog here. Of course for more information about her hex chart, to check out what other people are doing with this chart as experienced Copic users, and more you definitely want to click that link and enjoy the hop.
Many thanks to Sandy for including me – and for sharing this amazing chart with all of us! This is such a valuable resource and a really affordable price too.