Heidi Swapp Marquee Love tree (and how-to video)

DSC_9774

I went shopping last weekend at Michael’s (I do NOT shop the weekend after Thanksgiving ever!) and picked up a Heidi Swapp tree & multicolor lights… and some glitter. The total to make this project start to finish? 12 minutes. Crazy fast and easy!

The video (link to YouTube) doesn’t have words – it’s just a quick under two minutes to show you how this comes together. As I create for the holidays you’ll want to stay tuned – I’ll be sharing here on my blog (almost) daily!

DSC_9765 copy

For now I’m back to wrapping gifts and writing out holiday cards, and prepping my holiday album – all things I’ll check in and share with you in the coming weeks. I hope you have a weekend full of happy fun & crafting!

Making Holiday 2015 plans (notebook)

Disclaimer: I do work with Brother and they provided my ScanNCut2 machine featured in my video, however all opinions and ideas are my own.
DSC_9647 copy
When it comes to the holidays, making a plan and thinking ahead is key! I always have a notebook that holds absolutely everything from shopping lists to to-do lists to notes for things to mark in my scrapbook.
DSC_9649
This year, I’ve combined a few things and am cutting a number of images out with my ScanNCut2 as well as Here’s my YouTube video (link)

DSC_9651
I really love how this turned out! I’m ready to fill this up and get prepared… to get prepared. I’m a long way off but by cutting out a bunch of great shapes on my ScanNCut and decorating this cover so cute (and quick!) I’m feeling a bit more ready to face the season.
DSC_9654

Looking for a ScanNCut2 for yourself? The model I use can be found at local Brother retailers, or you can get the other new model (lot less expensive, a few less bells and whistles) from retailers like Amazon (affiliate link) – right now Amazon is offering it with the rhinestone starter kit – super cool.

Tim Holtz Paper Mosaic Kit: Christmas Ornament

DSC_9415
Recently Tim Holtz released a paper mosaic kit. When I saw this kit online I knew I had to buy one immediately and check it out. Upon receiving it I realized there were good directions inside so I decided to give it a shot and see how I did without online videos or tutorials – and I’m super impressed all around. The kit (containing grout, glue, and gloss) worked great and you’re not limited to any specific style of paper either.
DSC_9416
As I had hoped, Tim did not disappoint. This kit was super easy to use, and I see so many wonderful (fun!) applications for paper mosaic creating in my future.
DSC_9430 copy
Want to see my full review and tutorial for this project? Here’s a link to my YouTube video

Looking for this kit? If shopping online (note: affiliate links used) Blue Moon Scrapbooking, Ellen Hutson, and Simon Says Stamp all have it online, as well as many local retailers.
DSC_9399 copy

You’ll be seeing more creations from me utilizing the paper mosaic kit for sure – I’ve got a ton of ideas and am only just getting started.

Distress Ink Watercolor Holiday Card with Simon Says Stamp

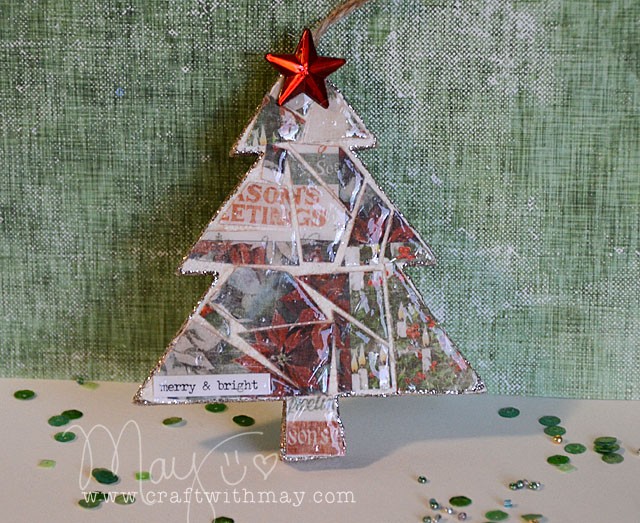
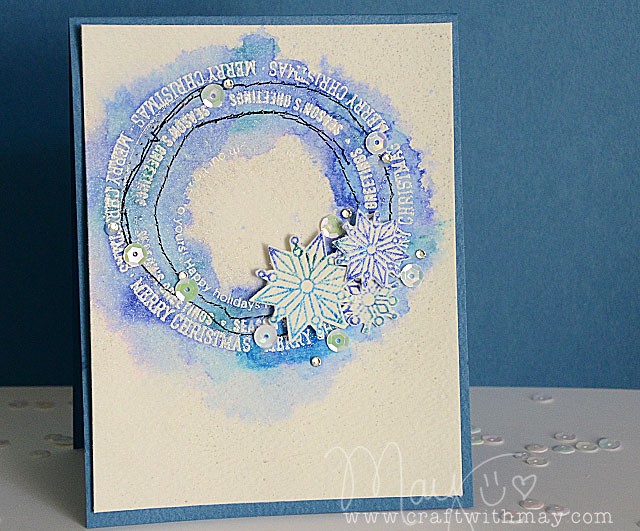
My friends at Simon Says Stamp sent me (affiliate links used)  this new stamp set – and immediately my head was filled with visions of ‘wreath’ type designs.

DSC_9222 copy

If you’re in my Tried & True cards class you’ll be treated to a video explaining this very soon- if you’re not be sure to check it out and register here! Class is packed with inspiration and live now.

To make this card you’ll need some distress ink (or watercolor medium), white and clear embossing powders, sequins and rhinestones, watercolor paper, and of course the stamp set. The black stitching is optional – I just like the pop it gives! steps1

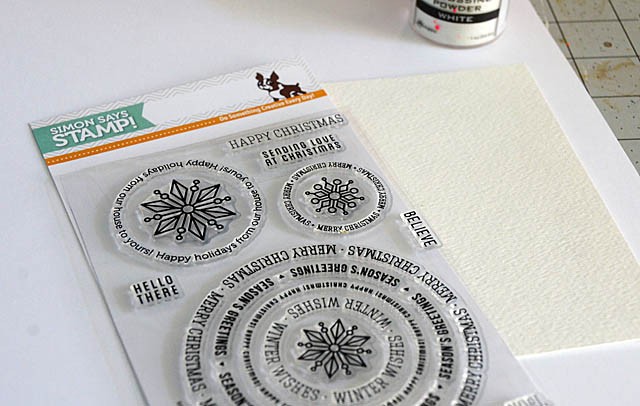
Step 1: Stamp 3 of the circles at the top center of your card in watermark or embossing ink. Then coat and heat set with white embossing powder. This will give you your base, and create the circle form to work with.

Step 2: Next you’re going to dab some distress ink onto a piece of plastic or non-stick surface and pick it up with a water brush or damp paint brush. With the watercolor paper gently misted with water prior, now just dab the colors on as you please.

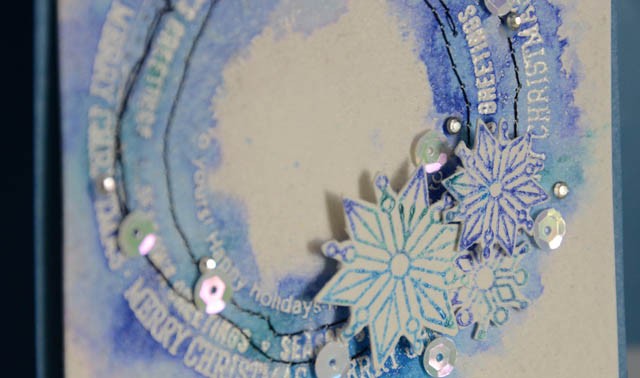
optional: at this point you could stitch around a bit in black as I have here – I just did this to add contrast and add to the ‘messy’ look. It is totally optional.

steps2

Step 3: The final step is my favorite! Stamp the snowflakes in one or multiple distress ink colors and coat with clear embossing powder. Heat set then cut out and place on foam adhesive. Mount as a trio onto your card and add sequins and rhinestones around the circle as desired.

DSC_9233

I just love how this came out! I mounted my card onto a blue card base (5 1/2 x 4 1/4 is finished closed size) and I love it. The circle stamp set I used is available here exclusively at Simon Says Stamp. I used Peacock Feathers, Salty Ocean, and Blueprint Sketch Distress ink colors.

Thank you again to my friends at Simon for getting my holiday crafting kicked off with this stamp set. I love that it’s  perfect for a winter blues type card – it was such fun to make!

Candy is my favorite.

DSC_5424

When I saw this stamp set I knew I HAD TO HAVE IT. If you know me at all you know I adore all things Elf (movie) and regularly quote Buddy. So the chance to make a swirly twirly gumdrop of a card was too much to resist – even if it is only September!

DSC_5426

My technique for the card was simple:

  1. Stamp sentiment in white, then emboss with white powder.
  2. Stamp everything else with embossing ink + use black powder and heat set.
  3. Use Clean Color (Zig) pens or any watercolor really and color it up
  4. Heidi Swapp Gold mist + some rhinestones and do-dads to finish things up
  5. Stitch to red cardstock and it’s done!

elf1

I had so much fun with this one – I want to make a lot more projects with the wee elf + his candy stash. I couldn’t resist the early (out of season) share! With the way my schedule is though, the holidays will be here before we know it and all us crafters know it’s best to spread out the making season so it stays fun and doesn’t overwhelm our December!