First of all, we’re on count down to adventures in scrapbooking: using kits. Seriously? Could NOT be more excited for class to kick off Thursday!! Something that’s important in class – and in kit use for anyone really – is to remember that a kit = supplies. While it’s beautiful and makes your choosing supplies much faster and easier, if you take the kit apart it is still just craft supplies. So don’t get hung up or worry about the right thing to do with it – just have fun!
related: since it is supplies, that means you don’t have to just do layouts with it – you could do anything you like. Me? I usually stick to layouts but sometimes another paper craft project tickles my fancy and I take off in a new direction. Like when I got the Scarlet Lime project kit (November) and there was the cutest little red box containing flowers in the kit. I dumped those flowers right out and grabbed the box.

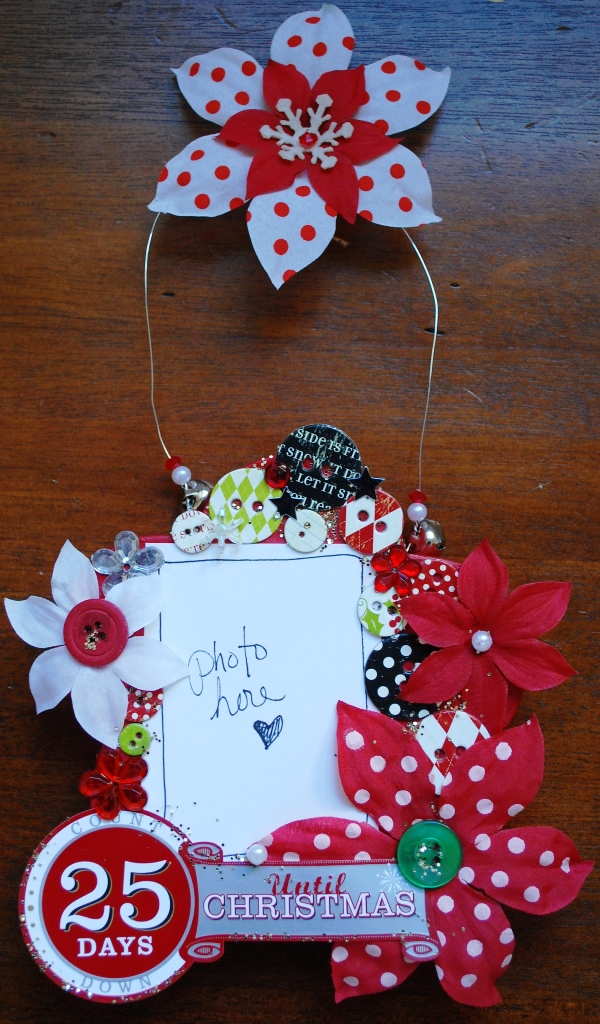
Why? Well looking at all the flowers and buttons in this festive kit, and determined to use some of the wire in it, I hatched a plan for something decorative to add to my hallway.

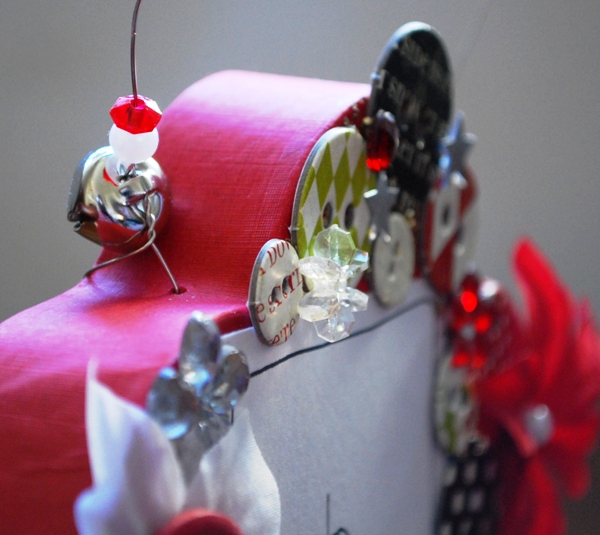
Re-using a container is a great way to reduce waste but also make something inexpensive too. To start, I punched two holes at the top (I used a thick needle) and strung wire through. I put six beads (three for each side) before wrapping and tying off the wire. My piece was about 8″ long (then wrapped/cut) but you could go shorter or longer.

Next I cut a piece of 3 3/4 x 2 3/4 white cardstock and adhered to the front. I made it this size so that a 2 x 3 – 2 1/2 x 3 1/2″ photo would fit after I’m finished. Then comes the easy part – just slather the front with liquid adhesive (area not covered by paper) and stick flowers, buttons, and rhinestones all over until covered fully. When you are done, sprinkle with gold glitter – it’ll stick a little here & there and I just really like the effect. I also used a big sticker at the bottom – the portion that hangs off was of course still sticky. To take care of that I rubbed a bit of liquid adhesive on the sticky part. That sounds crazy – but what it does is when dry that exposed sticker will no longer be sticky – thanks to that liquid adhesive!

The final piece of the puzzle is the flower at the very top. I used a scrap of wire to thread the two flowers, snowflake, and bead through and looped around the top. The bead is essential – it keeps the wire from just falling back through the flowers.

This project is going to be home for the 2009 Santa photo – and I think it’ll be brought out and enjoyed every year from now on too. If you don’t have this red box, any box lid or shallow box that’s nice and sturdy could be substituted – just find a bit of wire or ribbon, some cute embellishments, and have some fun with your creating!

Miss R is soooo down with the jingle bells and their sweet chiming whenever I move this. She’s way happy with it – I can’t wait ’till she sees her cute face on it with Santa & her sister! {Note to self: buy more little jingle bells!}
I hope you enjoyed this project, and that when you next craft you ask yourself if there’s anything useful you can make with your leftover bits and pieces. I still have pieces from this kit – and I’ll be experimenting and sharing soon.
Love the idea. I’ll be scouting out an old box lid this week for sure.
What a great idea! So cute.
That is so very cute !
Can Curlylocks come visit me for a while. Every time I see that curly hair and ornery/sweet face, it makes me smile !
You are just awesome!
This would make a great gift! I am always on the lookout for cute Christmas ideas to make for the office staff at the school I work at. Thanks!
Oh Ms May you really outdid yourself on this one-absolute perfection.
This is A D O R A B L E