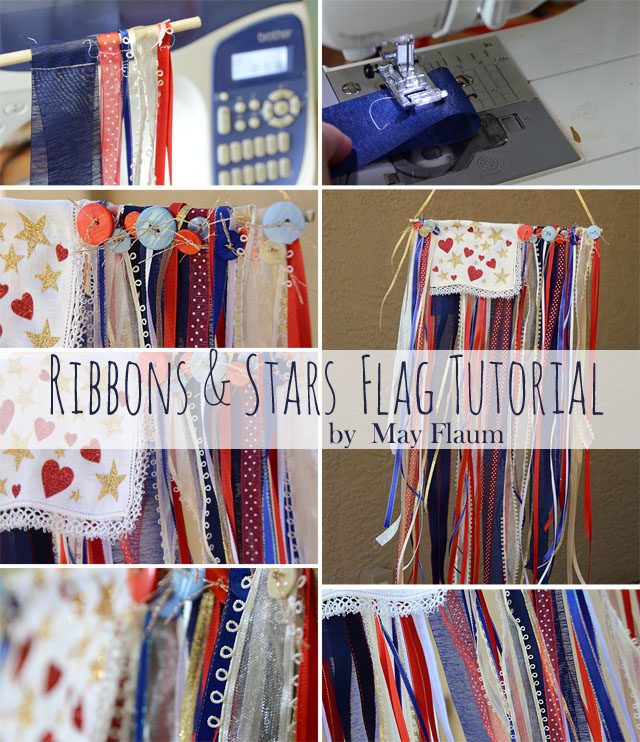
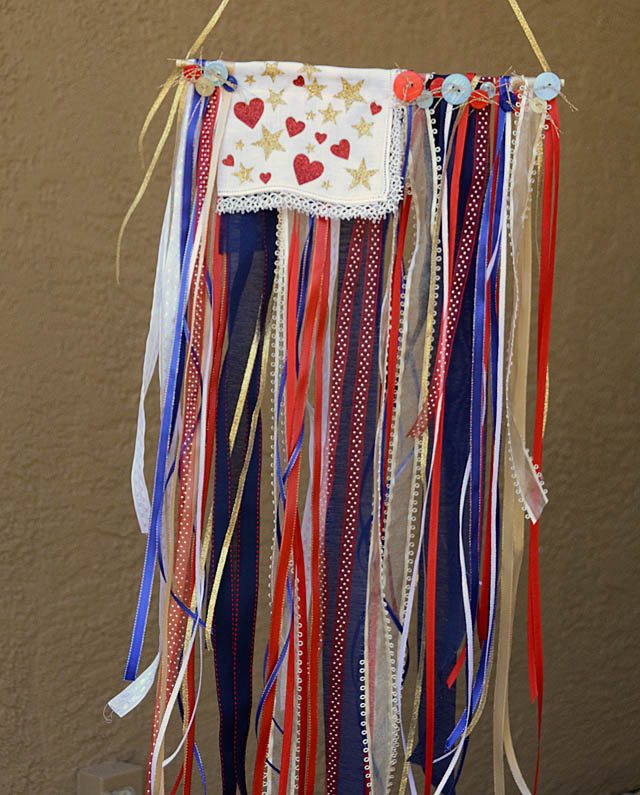
I forget when I first saw a ribbon flag years ago- but I’ve always wanted to make one! There is just one drawback to a project like this: it takes a LOT of ribbon. I think mine took somewhere around 20-25 yards and it is a small one! What got me thinking about this was that while cleaning I found a dozen of rolls of simple ribbon that I’d purchased and not used. What to do? Create, that’s what!
disclaimer: I am a paid consultant for Brother, but all ideas and opinions are my own.

The how-to is pretty simple:
- Get a wood dowel or pole
- Loop and attach ribbon over it
- Add your ‘flag’ element and designs
- Finish with some added ribbons or bonus details such as buttons
- Add a thin ribbon to hang (and hot glue onto ends to hold it all together) and go!
Note: If you don’t have a sewing machine this would be a simple project to hand stitch, or even tie a knot in the ribbons around the pole instead.
Here’s a link to my YouTube video.
Here is a photo of where my flag is hanging – as you can see no the prettiest place to photograph – but I’m all about sharing the real life stuff!
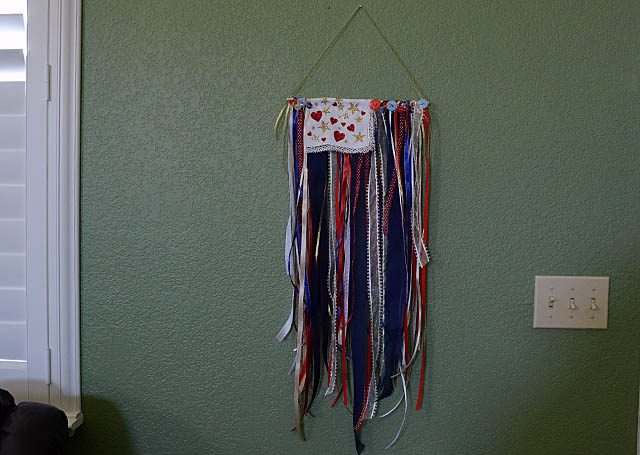
I took it outside to photograph (so often home décor projects don’t look best where they really live) as well.
All of these simple ribbons together – oh how I love this! I already have visions of using my ScanNCut to make wood leaves and creating a fall version – wouldn’t that be pretty? Ah but for now – and the rest of summer – this Fourth of July inspired flag will hang in my home. This project might have taken me all afternoon, but it was worth it!
Also of note: Tune in to HSN on July 6th to see Julie Fei-Fan Balzer rock the ScanNCut! You can check out hsn.com for exact times (or watch online!) if you want to see this machine in action some more!