ScanNCut Rhinestones: Dia de los Muertos inspired skull bag

Disclosure: I am a paid consultant for Brother International Corporation and have received a ScanNCut from Brother to evaluate. However, the opinions expressed are entirely my own and based on my use of the product.

I’ve been apprehensive about diving into the ScanNCut Rhinestone kit that I was sent. Would it be hard? What would I use it on? Did I really need this in my life?

Now that I’ve begun? I can’t get enough!

First of all, I cant recommend enough that you watch this video for a full and detailed how-to. Julie Fei-Fan Balzer walks you through the EXACT process. She does a fantastic job as always – and that really did answer all my start-up questions. Now you want to listen to her every word because what I learned with this first trial is:

  • Do NOT cut through the backing paper! This is vital as if you do, you’ll really truly never get those little circles out without hand doing each one.
  • Don’t be afraid to give your gems a bit more space! This is an option in the Canvas/online portion.
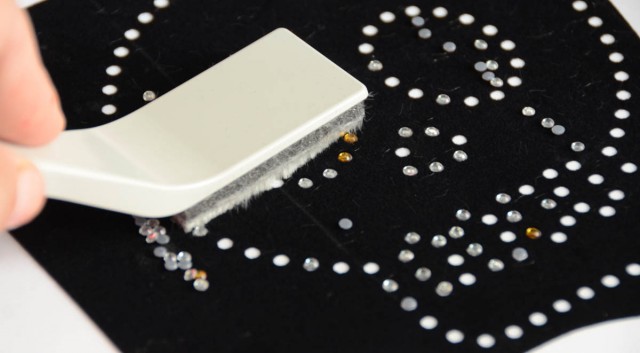
  • Put a LOT of rhinestones down. It worked best when a load to spread around and was much faster.
  • DO NOT wiggle, shake or tilt the box while you have the rhinestones in your pattern and loose. They will so fly everywhere and you’ll have to start over

rhine1

Most importantly: This is a TON of fun! For my design this was my process. Note you can start with any number of files – this is how I made mine:

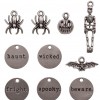
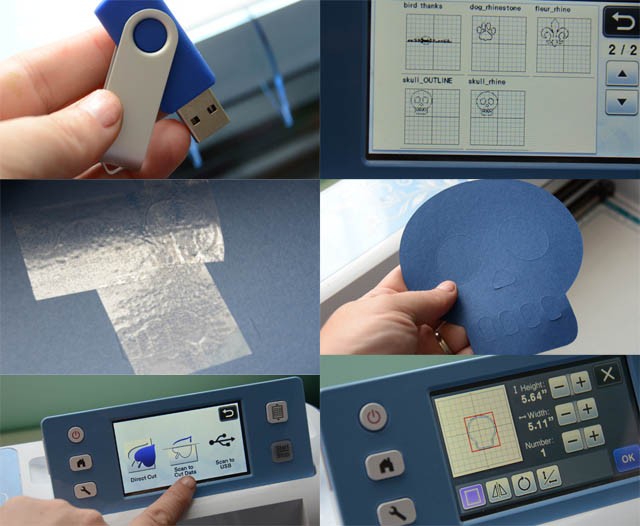
  1. Go in the ScanNCut machine and select the skull pattern. Save to USB drive. Eject it. Get to computer and open up Canvas.
  2. Re-size skull as desired and save as “outline” to USB. This will give you the outline exactly the same size as your rhinestone outline that you make in the next step.
  3. Use the rhinestone function and size as desired. Save pattern.
  4. Head back to ScanNCut, cut from the black velvet-y material your “rhinestone outline” (USB drive)
  5. Do your rhinestone thing, get your rhinestones ready…

rhine2

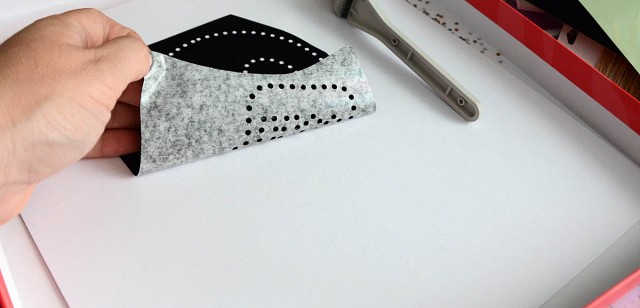
But wait! This is where I tried something funky. Remember how I said I saved the “outline”? Go into the ScanNCut and pull up and cut out that file. When you do this, put a bit of tape over the cut-out parts (eyes, teeth…) so it all sticks together. Scan this back in (so it shows as just one solid shape. Then cut out fabric using a seam allowance. (Steps shown below)

skull

Why do all this? Well first because I didn’t want the eyes and such cut out. Secondly because I wanted the pieces to match exactly, and finally now you have fabric cut out 1/4″ or so larger than your skull design, and the rhinestones will be the eyes, teeth, etc. and match up perfectly!

rhine3

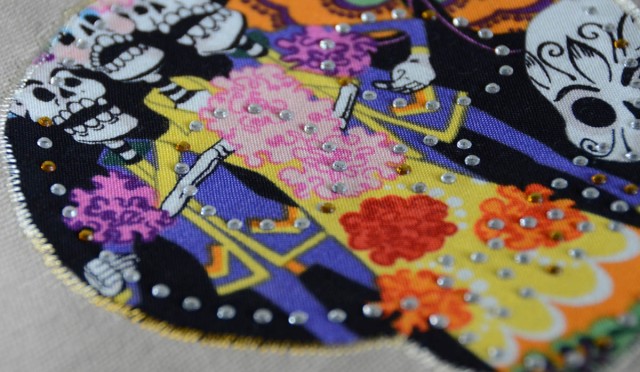
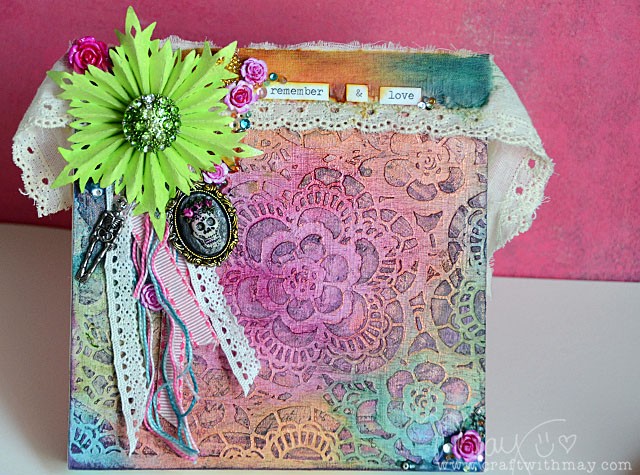
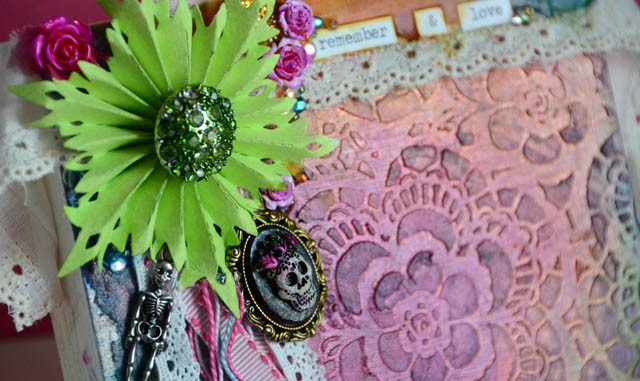
This definitely isn’t the perfect example – if I did it again I would not use a patterned fabric. The rhinestones would show up better on a solid. Oh well! It was still really fun.

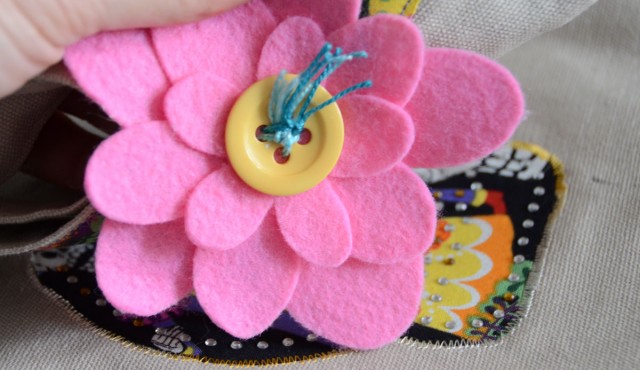
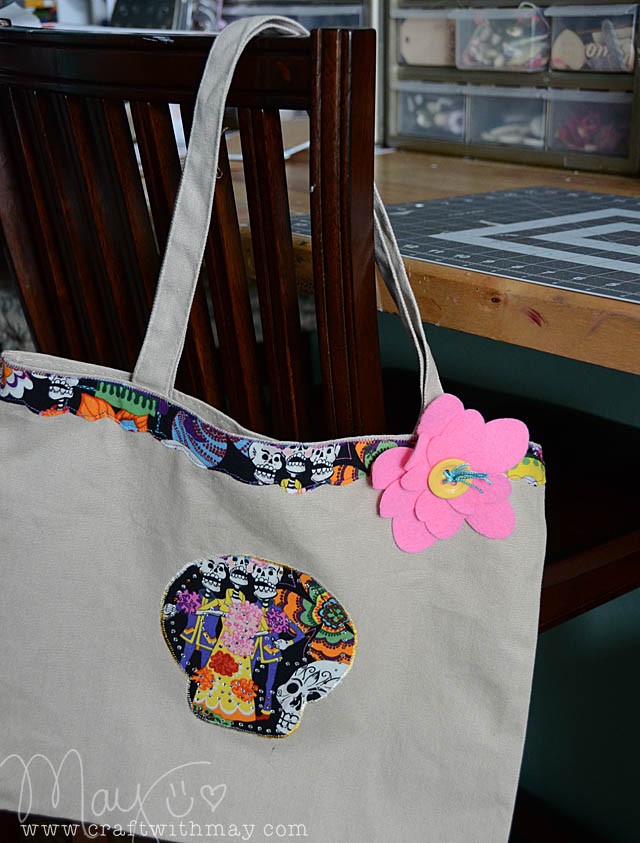
After I stitched my fabric down onto my tote bag and heat set my rhinestones (so easy!) I added some felt layered flowers cut out with ScanNCut, and I stitched the top with a strip of the same patterned fabric.

rhine5

I love learning and trying new things and I am REALLY impressed with the rhinestone kit. I will be sharing a video tutorial of a different project using this technique next month. Now that I see what I do (and don’t) like about the approach I took with this bag I know what I’ll adjust and that should make for an even better project – though I do quite like this one!

DSC_5739 copy

You can use any heat set rhinestones it says – so I’m eager to find more colors and play around with this tool even more. I’m really excited about how much it can add to my machine’s usefulness and that I can add some touches to fabric projects without getting a sewing machine involved if I just use the rhinestones. Or the rhinestones and the iron-on glitter sheets!

So many possibilities – I’ll have to dive in once again for more.

Note – The rhinestone kit is available at Brother retailers and online including amazon (affiliate link).

Guest post at Shimelle’s Blog

mayf_1

Hello there! I’m the guest today over at Shimelle’s blog (direct link) and I’m sharing a brand new layout featuring her True Stories line and a full video tutorial. I was inspired by one of her past layouts and I had  lot of fun translating it into something that works for me and my style. I hope you check out my post and enjoy! The timing of this is fantastic as I’m currently at work on a design/sketch scrapbook course now…

stay tuned!

View from the studio…

studio1

I will get into various organization ideas and tips in future posts – to cram it all in one would be madness! To start, let me show you what it looks like in here right now.

DSC_4682 copy

Trying to get a handle on the layout? Here’s a rough sketch of the studio + closet. I did one of these (many times!) when working out how to make the most of a 9×11 foot room + walk-in closet!

dc2 copy

Where it says “birds eye view” is the hallway… and where I took this photo from.

DSC_4674 copy

If you’re trying to get organized – from your tote bag to a whole space – the #1 key is to think about how you craft. What you use. What would make your life easier. And working within the space you’ve got.

Here’s a video (link to YouTube) – you can see my studio through the years, demolition, and well as loads of new studio photos!

The most important things I’ve figured out are:

  • Leave space for more. Don’t think you can fit a supply exactly. Your amount may increase or decrease.
  • Be realistic about how organized you will actually upkeep. A drawer for paint? Great! Specific slots/rainbow order? never gonna happen.
  • Have spot(s) for mess. What I mean is, have a box, bin, or other spot where “random/mess/in progress” can go. Not a ton of space – but someplace so messy bits in progress don’t have to cover other areas.
  • Think about how you work, what will be great in practice vs looks

DSC_4496 copy

For me, having cupboards and bigger bins is BAD. I just dump and shove. Having smaller areas, having things broken way down is much more useful and easier for me to keep clean.

For pens – I like having them all out and ready to work. I don’t have to go digging I can just sit down and color.

DSC_4510 copy

When it comes to bits and pieces from journaling cards to ephemera to epoxy to buttons? fully removable drawers so I can pull out what I’m digging through and then put the whole drawer back.

DSC_4526 copy

This fun little one is full of “for the kids” and random bits like party beads we didn’t use, sequins, bold and bright not likely to show up in my own projects items. Even better those whole drawers come out!

DSC_4529 copy

My latest? This “Supplies” tub for brand new things. I like having a spot for the brand new items so I can try to break them open before they get put into my stash.

supply

All items like the idea-ology charms will go into their general spots/drawers once opened or used. I love having this because once upon a time a single bin is where everything went!

What are you stumped on storing? That’s what I’ll be covering next…

Dia de los Muertos

Well, technically not a canvas this is actually a wood shallow frame that I turned around to use the back. The results? LOVE this piece!

dia

You can check out the whole how-to for this surprisingly easy background here is my YouTube video.

DSC_5521
Affiliate links used

BlueMoonScrapbooking and Scrapbook.com   carry most of the supplies I used, you can also use the affiliate links below to Simon Says Stamp.

Supplies Used:

I love these cameos so much – this one inspired my canvas.

DSC_5498

From the rosette (I used the snowflake design!) to the alcohol ink colored roses I just love how this turned out! It was surprisingly quick and easy too – which is always a bonus!
DSC_5546

I hope you enjoyed this tutorial and project. I’ll be doing more with stencils in the new class I’m just starting to develop (don’t hold your breath -it’s gonna be a while!) and you can bet the turn the stencil + use it more than once to get a design like this will be used.

Crafternoon by Hazel & Ruby: Crepe Paper Flowers

find all the info (and videos) on the Hazel & Ruby site here.

DSC_5503

Hazel & Ruby released a new line, perhaps the most brilliant of 2015. “Crafternoon” is now available at JoAnn fabrics (and I am guessing elsewhere after an exclusive time period…) that I have heard about via instagram where the various designers are chatting it up and sharing photos. Why is it brilliant?

DSC_5465

  • Kit including instructions and all supplies (outside basics like glue and scissors) included.
  • It’s like taking a craft class in a little pouch
  • Videos available on-line so you can check them out before or after you buy the product! In other words you can preview what you’ll make before you buy
  • Quality projects and great DIY kits
  • Great for novice or seasoned crafters
  • Interesting designs you can be inspired by for future

The idea that this will take you not much time (or at most just a few hours) is so inspiring! To me, it sparked my love of learning and getting a mini class part online (Video) and a kit ready to rock. The other thing that makes me love this so very much is that they have all different crafters participating. In other words, you’re getting a wide variety of talented bloggers who are sharing things they excel in – love that!

DSC_5471

I picked out three different DIY kits at my local JoAnn fabrics and I’m starting with the one I wanted to test out WITHOUT video to see how I did with their written instruction. I did ok… but I think the way to approach these is to watch the video then begin the craft project and use the written instructions as a reminder. I think it’s a really great touch that they did both written and video!

DSC_5468

The written instructions are well done but enough detail is missing that if you’re brand new to the craft it could make for less than stellar results.  I was ok with my finished flower but after watching the video I had major “AHA!” Moments that I’ll take into the future flowers I can make from this kit.

DSC_5462

This was just one flower (of many) I can make, and now armed with additional information and having seen the video I know my next will turn out even better. I’m so very impressed with these kits I just had to share right away! I will be back next week with #2 (A embroidery hoop!) and this time I’m watching the video first.

For more about this line you can find all the info (and videos) on the Hazel & Ruby site here.