Kraft challenge!

mayf2

Today I’ve got a video tutorial up over at www.simonsaysstampandshow.blogspot.com for the “kraft” challenge. In that video I explain how I use embossing + distress paint to make colors show up beautifully on a kraft tag.

journey

As promised in that video – here is a second project using the same technique.

Supplies used: 


I hope you’re inspired to get KRAFTY and post it to enter the challenge this week. It’s WIDE open – be sure to visit the blog to see all of the other creations and to enter. This week’s prize (as always) is a $50 voucher to Simon Says Stamp! The winner is randomly drawn – you can enter by posting to your blog, flickr, or other site too. See the blog for entry details and rules as usual.

Neon + Grey

049
Yes, you’re reading my blog and yes, I’m saying in moderation and in the right circumstance I like a little neon. It’s growing on me. So much so, that today’s post is inspired by neon + grey. I’ve noted a disturbing amount of neon sneaking onto my grey clothes lately… and you know what? I think it works. I told my friend Melissa this, and she thought that we ought to coordinate a neon crafty day on our blogs. Fun!

First – let me mention the Hero Arts neon daubers… oh my. LOVE these! I will have to do a video soon but basically it is inky goodness you can use neatly, or with a bit of pressure make a big SPLAT! like I did here.

Untitled-1
I had a tiny bit of fun with this… aaaand there are splats all over the desk now. All the neon is pretty much contained to those splats, and I countered it with a white cardstock base and lots of stamping with my beloved shadow ink pad.

Supplies used:

I seriously love Hero Arts – but truly this new release is just MADE for my kind of scrapbooking. That splatter/stain stamp might be my favorite all time! Oh and all the great arrows and words… trust me you’ll be seeing more from me soon with all this goodness! But back to today’s layout.
052

The texture/pattern you see faintly is because I did this on a white cardstock that is embossed (that wasn’t intentional) – but I like the look! You will also note this has kind of an art journal feel and that there are no embellishments! That’s because for whatever reason… when I do my pages for my “about me” album they tend to get messy/artsy and not need much embellishing.

neon1

As for the story… well I *finally* earned new gym shoes and these grey ones with hints of neon pink were just perfect. Today I type this about 15lbs lighter than when I was typing this day last year… and THAT is something to celebrate indeed!! It might not be a huge or impressive or fast transformation – but I’m just a little healthier every day and that is all that really matters. For this kind of story and of course because it matched the shoes – neon + grey was the perfect choice.

I challenge you to try grey + neon and see how you like it! Oh yeah, and you’ll also want to go visit www.scrappyjedi.com because Melissa is also rockin’ the neon today!!

Vegetable Lasagna

I *love* lasagna, and I really miss it. I love the flavors but if I’m having some grains, it is so NOT going to be on lasagna pasta sheets. But I got to thinking… what if I made it and just skipped the pasta part? Guess what – it is FANTASTIC and you really don’t miss the pasta at all.

veg

Here’s what you’ll need:

  • 4-6 zucchinis *raw* sliced into strips (mandolin is a great tool to get this done)
  • 1 jar favorite marinara/pasta sauce
  • 1-2lbs ground meat seasoned with salt, etc. to taste and cooked (turkey, pork, beef – whatever!) ground sausage works too – and is seasoned for you!
  • chopped grilled onions (mix with meat, this is optional)
  • chopped spinach (mix in with onions/meat and let cook a bit, get any water to evaporate)
  • 1 large container of ricotta cheese – add a teaspoon of salt, 1/2 t pepper, 1t onion powder, and 1t garlic powder to this
  • 2-3 eggs (mix with ricotta cheese)
  • 2-3 cups of shredded mozzarella cheese to taste
  • 1 tomato, sliced
  • a few teaspoons of olive oil

To assemble you just lightly put a bit of olive oil and about 1/3 of the sauce in the bottom. Then a layer of the zucchini, ricotta cheese mixture, and meat mixture. Then repeat again. On top of the second layer of meat pour the rest of the sauce. Then, top with the zucchini, mozzarella cheese, and slices of tomato. Adding in a sprinkle of parmesan would be nice too – I forgot. Bake at 375 for about 45 minutes and you are set!

The amount of cheese per serving can be minimal – it’s mostly just veggies + meat in there. The really cool part to me is it tastes just as good if not better – we don’t miss the pasta at all. Which is awesome because I’m totally questing to replace a lot of grains in my house and eat more unprocessed foods, veggies, and good stuff. You could sub in other squash and veggies that you like in here too – I sneak the spinach in as a bonus because my kids don’t notice it.

Happy (healthy) eating!

Harry Potter party: menu sign

With a little typing, and just a few things from my craft stash I was able to make a centerpiece for our party that I talked about yesterday. If you are a crafter and you have some cardstock, there is an amazing amount you can do with just a bit of imagination and a few minutes. I’m reminded to use my crafty skills more often, and for the good of my family!

072 copy
How-to:

  • Figure out some clever menu names. I just took details and names from the book and matched them up to plain food we were going to eat anyhow. “apple potion” is apple juice + a dash of sprite. Everything else is just stuff from the fridge that I knew we’d enjoy nibbling on for dinner as we watched the movie.
  • Once typed up (dafont.com has a Harry Potter font free), print out onto (I used kraft) 8 1/2 x 11 cardstock.
  • Use a pencil to help you curl the top and bottom of the paper up TIGHT. when you release it you can then relax it into more of a light curl.
  • Use a hole punch to pop TWO holes in the top and bottom. This will hold the curl + be how you attach the menu onto a stick.

hp
Hmm… plain kraft doesn’t look magic or old though. So I used some brown ink and distressed the edges. I also sprinkled gold and black embossing powder (and heat set from underneath) on my menu for a magical touch. I also cut notches to make the paper look old and worn.

hp2

For the branch – well I went out in the yard and found a straight twig the right size from a random plant! Super easy and the girls are still talking about it.

Harry Potter: movie #1 party

We read Harry Potter book #1 over the last few weeks, with the promise that when we finished it we’d watch the movie version. Then, deciding to add a bit of fun we stopped and grabbed Harry Potter chocolate frogs and jelly bellies at the store.

053

That was going to be the extent of our theming… until I got an idea to see if I could make our table into more of a Hogwarts feast and bring some themed goodness into our girl’s night. My rules were simple: No buying anything new, everything has to be found in my house and/or in my yard. Challenge, accepted!

067

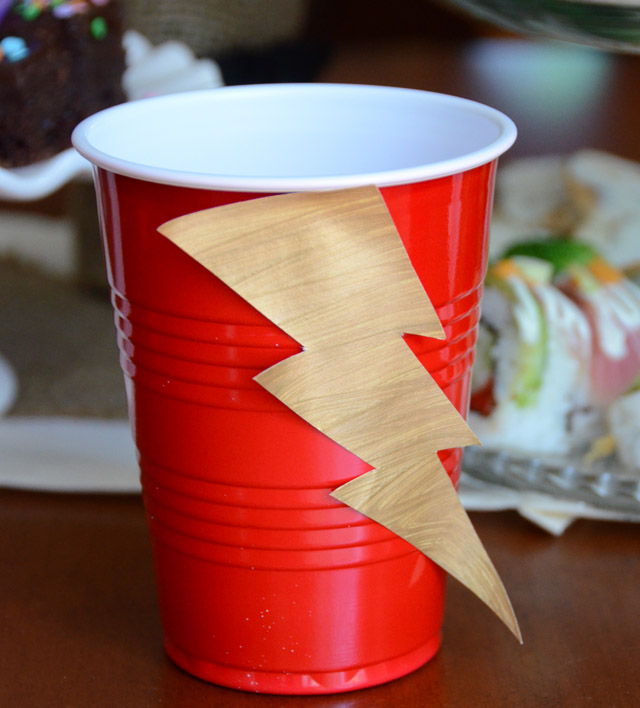
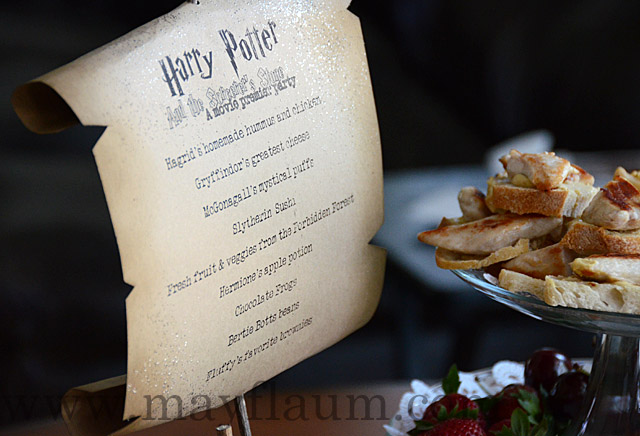
There were whispers upstairs in the girl’s room that Hedwig the owl might be dropping a Hogwarts package of wizardry and fun… that our movie night might be more of a fancy feast… well if you call cutting out + painting paper lightning bolts onto plastic cups fancy, well then this is the place.

069 copy

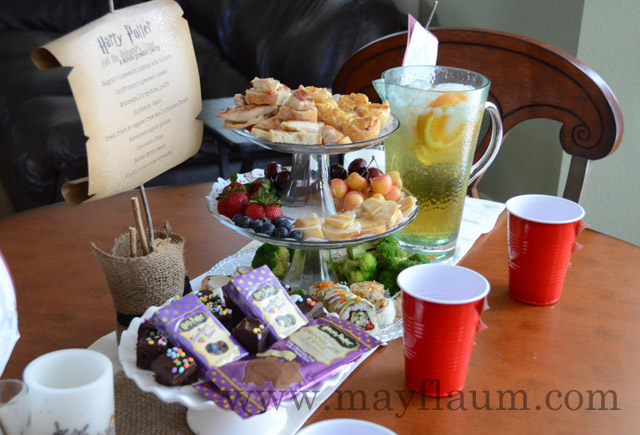
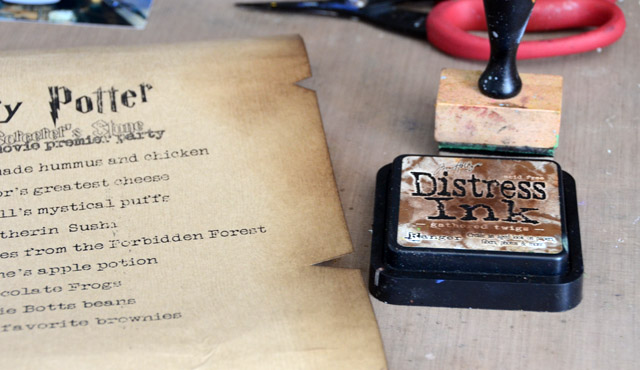
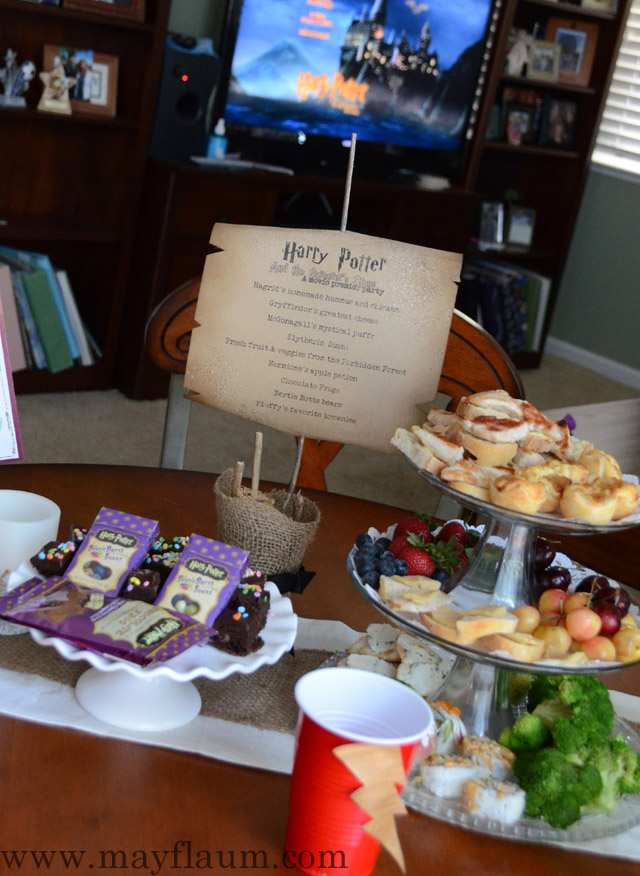
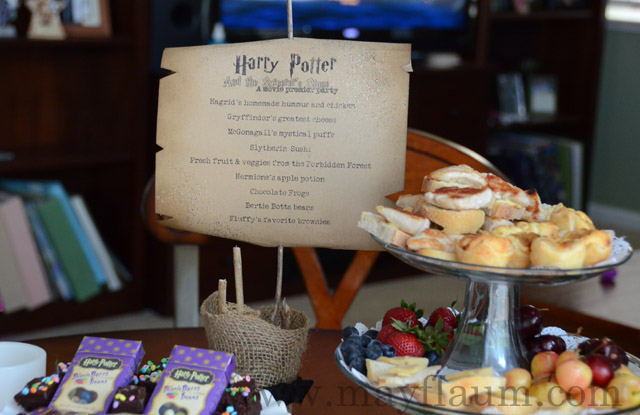
The food – it is simply food we were going to have for a snacks/small bites style dinner. The runner on the table is just some fabric I have (and in fact used last Thanksgiving!) I named the food and made a fancy menu – I’ll give the how-to for that tomorrow.

077 copy

The one thing I had wanted was a bunch of candles… but I couldn’t find my box of LED (aka no flame!) tea lights so I just let that go. I did have two LED snowflake faux candles – we rolled with those. I spent about 40 minutes total making my menu, digging up the few details I could come up with, and setting up the table. Time in the kitchen? 30min max. it was a HOT day and we already had planned to not cook really.

081 copy

When I was ready I turned the music (on the menu of the DVD) way up and the girls knew it was time for some food + fun. The thing that really struck me in doing this was a) it really wasn’t that much effort or time b) it didn’t cost me extra, we just used food (except the jelly beans) we already had and c) it really made a simple Sunday evening movie night FUN.

We have more themed movie and in general personal little ‘party’ themes in mind – I’ll be sharing them here all summer long.