By Craft-ographer I mean of course the crafter who has need to photograph their work. What once was an entirely optional skill now seems absolutely vital if you have any interest in sharing your work on-line. If you want to work with companies or be on design teams of course you’re going to have to work on this – but even if you simply want to share your creations with friends and family who live far away via your own blog, facebook, or on-line galleries this is something to work on!
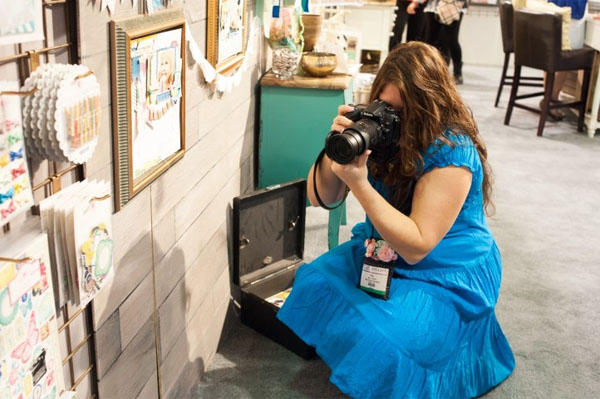
picture of me taking a picture at CHA, taken by Melissa Stinson
While having a really great camera can help things, even people with the most expensive camera in the world could take horrible photos that don’t do their project justice if they aren’t setting up a good photo spot in the first place. So here today I thought I’d share my ten rules for craft project photography. You know I’m not real big on rules with crafting, but here’s the thing. There are some seriously simple but fatal mistakes people make that could be avoided, and really help their projects to shine! Here they are in no particular order:
1. Never, for any reason use a flash. Ever. EVER. [unless you are a professional photographer with professional equipment and have won major awards with flash photography or some such thing that otherwise indicates that you definitely know what you’re doing.]
2. Never, for any reason, photograph your project in direct sunlight. Indirect natural light is always the goal. Play with different spots around your house to find your ideal project photo spots- including time of day, how much light, etc. Outside on a cloudy/rainy day can work great too! If you have to photograph early morning or after dark – then invest in a light box type set up.
3. Take no less than a dozen photos of your project. minimum. These are digital photos, it isn’t costing you to take more. Some are going to be blurry. Some sharper than others. True story: At CHA I took two photos every time I went to photograph something – never a single shot. If I moved a bit? another two shots. Different angle? 2 more shots. Slighltly more zoomed in? You got it, 2 shots. If you go through my CHA photos you’ll see one is always slightly sharper, slightly brighter, slightly BETTER than the other. ALWAYS. And those are photos where I didn’t move or change a thing. Point? Take a LOT of photos
4. Stop trying to photograph stuff on pure white backgrounds unless you really know your stuff. It usually shows up with a blue tint, and unless you know your way around manual mode of your fancy camera + photo editing software and are really good at color correction, just don’t.
5. DO look at your project and consider if a light/dark/soft/bright background is best and will contrast well with it. Don’t underestimate how much difference your background can make if this is a card, tag, or altered project that will have background showing.
6. If you have a point & shoot camera and there is a little flower icon – try that. I used to find with my former cameras that having that on (vs not) helped capture my tiny details better.
7. Slight changes matter. A tilt to the left, slightly above, a little too low. All of this matters which is why #3 is a rule.
8. Set the camera down if your hand isn’t rock steady or your light isn’t perfect. Have you ever seen a person move the whole camera when they go to take a photo? True story we were out to dinner and I have a bunch of lovely pics of my family. Except the one of us as a group. Why? Because the person I handed it to was all wiggly and DUDE – the camera can only do so much with that. I often rest my camera on the back of a chair when taking project photos in less than perfect light – makes a huge difference!
9. Know how to use at least some basic photo editing program that is in your computer or phone. A bit of sharpening, cropping, or even just auto-correct can help really make your picture improve and compensate for imperfect lighting or a basic camera on auto mode.
10. Finally, do look at people who do photograph projects beautifully, and ask yourself what you like about their pictures! I think it helps build your own craft photo style AND you can identify things that you want to do better in your own photos.
I can have photos on my iPhone that are nearly as good as my fancy DSLR camera *if* I’m following these rules! When I didn’t have a camera for a few weeks I was able to use my iPhone and nobody really noticed the difference because by doing all of these things I set myself up for better, sharper, clearer photos.
The bottom line is, whether you want to sell items via etsy or make it onto design teams for companies, be a craft blogger or just want to share your latest creation with your crafty friend across the country it doesn’t take much to make sure you’re getting your best possible photos from your camera. And it doesn’t take a fancy or expensive camera to get nice photos either.
Yep. I’m a craftographer. And I’m in that huge learning curve, having just started a blog. These tips are incredibly helpful. I thank you!
I’m right there struggling to get better photos. Great tips. Thanks so much.
Great tips! That’s an interesting bit about the background. I always photograph against a white background with the thought that it will keep everything (in my Etsy shop) looking cohesive. Sometimes it’s really tricky though if I’m photographing something white. The blue devil can definitely be a problem.
Thanks May!! I’ve been struggling with this and your tips are so helpful!! 🙂 Evie
Thanks so much for this posting. These are great tips!
Terrific tips May. Thanks so much. I do have a camera that I can fiddle with the settings but often ignore them. I call it my PHD Camera…”point-here-dummy”, LOL. Fortunately the camera is a lot smarter than I am and Aperture is my best editing friend.
I didn’t know not to photograph on a white background. In fact, I’ve been seeking that out. Oops.
Picking a complimentary background color every time sounds really tough though.
Thanks for the great tips.
I absolutely love this entry! I laughed at your comments about flash photography! I often get comments about my holiday photos of my daughters which I take at around sunset and after hundreds of shots taken, my friends think I am a fantastic photographer! What they do not know is that I am revisiting the scene possibly for two or three days, it certainly pays off, NO FLASH EVER!!! Take care.
All great advice May…if only I could remember it at the right time.
thanks for this. I only have a rather simple P&S and these tips are great. I just need to get over being afraid and practice, practice and then practice some more!
Thanks for all of the great tips!
Super great tips May! Just shared them with my Creative Team. I would love to keep this on file and continue to share with other future team members too, is that OK? Thanks! – Darcy
Thanks for all the tips, May. I’m learning so much from you. Thank you!
I don’t even have words to say thank you for all this very useful info. I’m never happy with the pics of my projects and now I know it’s becuase I do many no-no things, for example I always use flash, thnaks sooooo much, and please keep the tips coming, I love learning from people that know what they are talking about. Thanks again.
Thank you for the wonderful tipss.
Thanks May for the great tips!
So very thoughtful and kind of you to share your tips and encouragement! I tend to follow most of these “rules” because I’ve heard some of them from others, but it’s always a good reminder that what I’m doing is the right way to go. Thanks for all you do!!!
This is really helpful information that I am already using. Thank you!
Love these tips – thanks May. And great pic of you too!