day 4: Decor houses

In contrast to other projects I am doing these days, decorating little wooden houses isn’t exactly the fastest of tasks. That said – it’s a LOT faster than you might think – you can easily build yourself one in under an hour! This particular house was done over three days in little five-minute bits of stolen time here and there. I will guess it took about 2-2 1/2 hours of actual crafting. Often for a project like this it is the best way to tackle it!
I make a plan:
1. Pick the papers/colors I want to decorate with. Come up with a general ‘look’.
2. Do any/all painting of roof, walls, etc.
3. Adhere patterned paper to surfaces as needed, use strong double sided tape so liquid adhesive isn’t required.

The big rule is this: there are no rules. Think about the look you want to achieve, and what you have that can make that work. For me, I wanted it to be a very simple house. Oh, You see I have plenty of little accents but I wanted the PROCESS to not take 94 hours and I didn’t want a ton of paper cutting or detail fussiness. I’ll share the how-to of what I did here on mine.

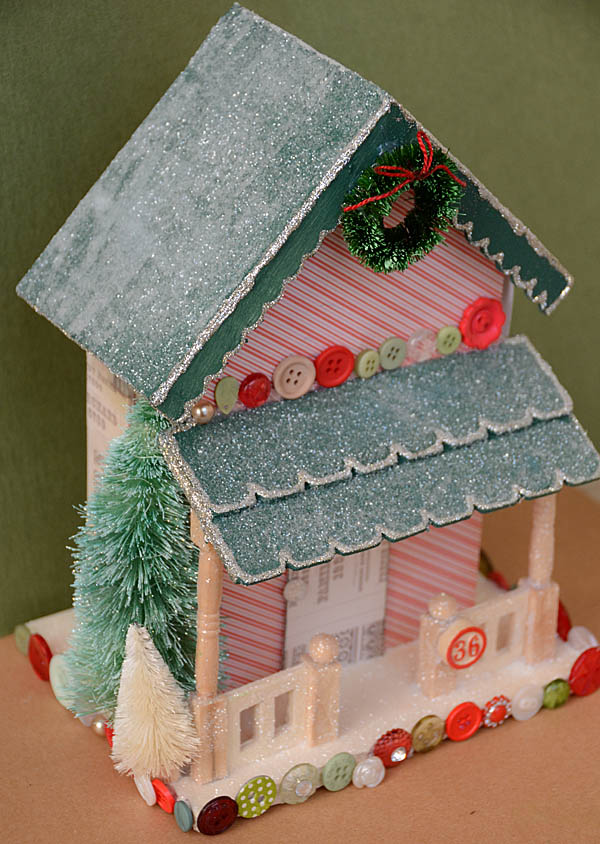
Roof: painted with green paint. Edged (using glossy accents) and glittered (white gold) and allowed to dry. Then coated with PPA adhesive (see supply list) and covered with clear glitter for sparkle.

walls: nothing! Just covered in paper with exception of front, where I added a front door.

greenery: used Tim Holtz new trees and colored with distress stains. Once dry, used hot glue to adhere. On big tree, also edged with white paint + added white gold glitter while wet for sparkle.

the base: this is always a BIG question mark. There’s tons you could do – what to choose? For me, I decided SIMPLE. Coated all visible wood surfaces with liquid adhesive, coated in glitter that is clear/sparkly. Insta-snow!!

the edge: I LOVE grabbing my bucket ‘o buttons and throwing random buttons on the edge. It’s silly I know, but I just always LOVE the effects. Hotglue was used for speed on this. My favorite detail is that #36 on the front porch.

Indeed – welcome #36 Holly Lane to my collection! I’m glad to have a new creation to add to my growing set of altered wooden houses. Personally, I love grabbing a CHEAP wooden birdhouse at a craft store (or any cheap wood item!) and covering with paper and bits of fun stuff. I hope you enjoyed this upclose look at my little house.

Supplies Used:


This house is also my entry for this week’s challenge over at Simon Says Stamp & Show. I encourage you to head over to visit Simon Says Stamp & Show to see all of the other creations and for entry details and rules.


Camp Scrap Day 3: do distress!

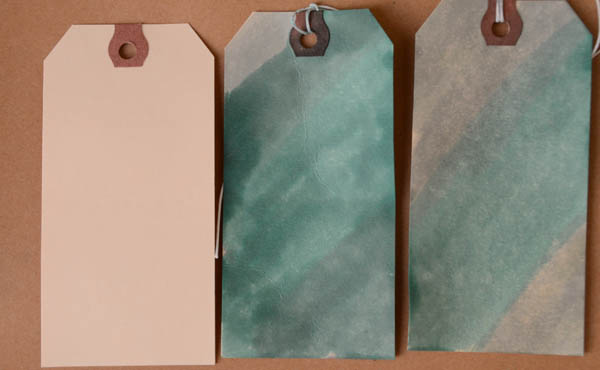
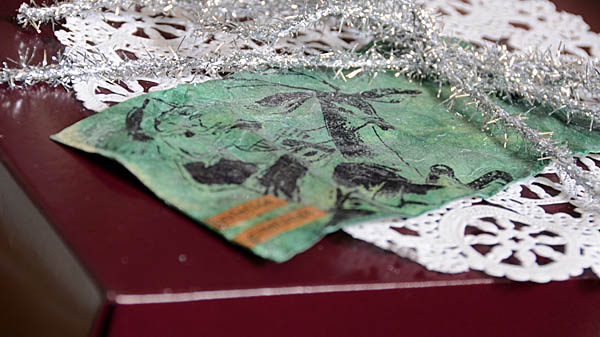
Day 3 of Camp Scrap and I’m back with a quick idea for gift tags. I am a HUGE fan of distress stains. I’m also so in love with the fact that they are now available in the fabulous seasonal colors! But time is really short right now. What’s a girl to do? Make some quick tags, of course!

1. coat with distress stain (or generous amount of distress inks)

2. spritz a few times with water

3. rub some metallic distress stain on the tag

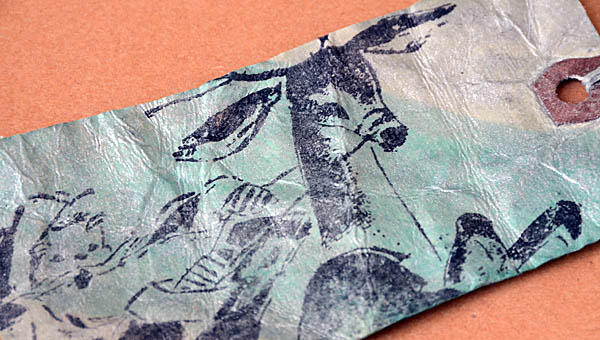
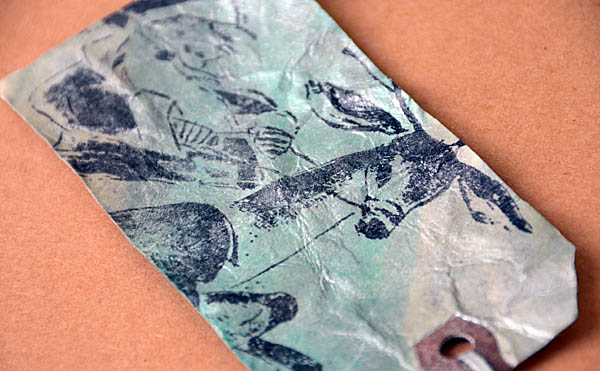
4. spray again – generously – with water and crumple. Flatten back out, let it dry.

5. Stamp with a holiday image

If you use a heat tool this takes a total of 4 minutes.

Don’t have a heat tool or craft iron? Then just set aside, let dry while you run around doing all the other stuff on your to-do. The combo of stains and water on this tag – I just LOVE it. It’s become my “I want my hands inky like NOW but don’t have much time” go-to this week. Can’t get enough!

Want to take it a step further?

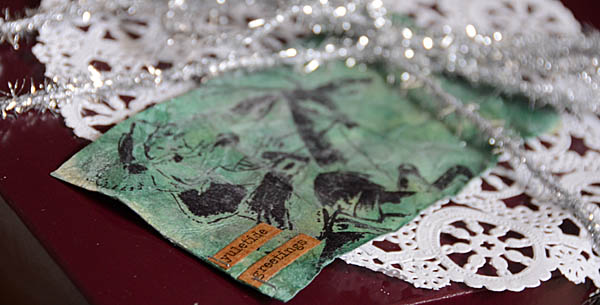
Add sentiment stickers + staples once dry. Then rub entire thing down with an embossing ink pad. I mean REALLY get that covered. Then, coat with clear embossing powder and heat set. This will give the whole thing a shiny glazed look that rocks! It was difficult to photograph the shine (without glare) – but trust me it is there and while that doubles the amount of time the tag takes, it’s a great look as well.

You can see this here with tinsel + doily, adorning a package ready to hit the USPS so it can go to its final destination. Before you ‘distress’ about quick ways to add hand crafted love to your packages this year – whip out some metallic + colored distress stains! Here are the supplies I used today:

Speaking of the holiday season – don’t forget my friends at Simon Says Stamp are sponsoring Camp Scrap: Holiday Edition and have a special discount code to share! Simon Says Stamp is offering 10% off your entire purchase. Use code CSCRAP2 when you check out. Please note that the code is case sensitive and it will expire at 11:59 PM on 12/11/12 eastern standard time.

Have a project you’d like to share? feel free to link to your gallery/blog/flickr/etc. right here so we all can see! (Note: the inlinkz link list is only viewable directly on my blog www.mayflaum.com)


Camp Scrap day 2: doily + die cut for giftwrap

First off, as promised here (above) is the photo of my December box. Inside I just leave Christmas-y things that I’d gathered for projects and feel will be needed again soon. If it gets too full, I’ll just put some things away. I just find this is incredibly helpful when I’ve decided “quick! Wrap this with something clever!” or am otherwise in need of some holiday craft supplies for journaling, scrapbooking, or other holiday projects.

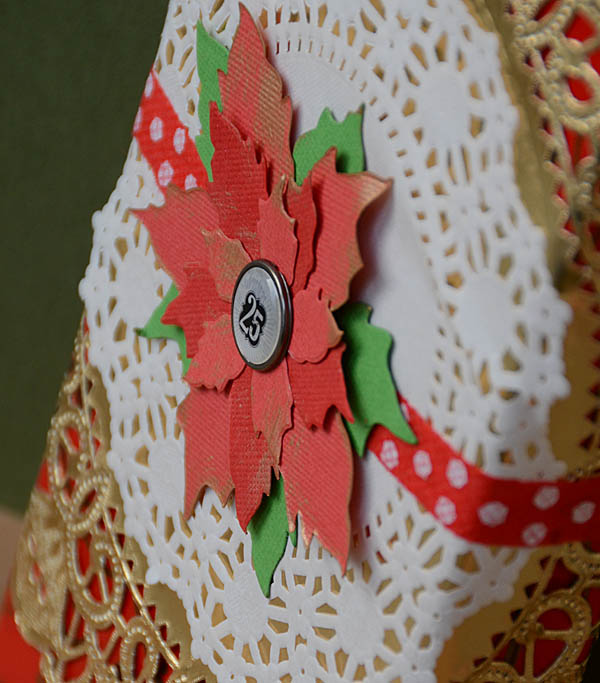
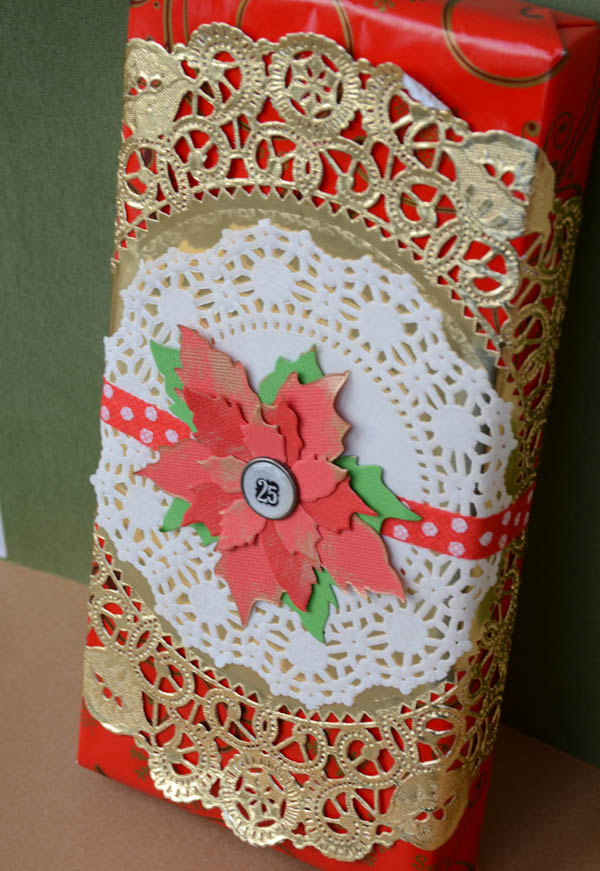
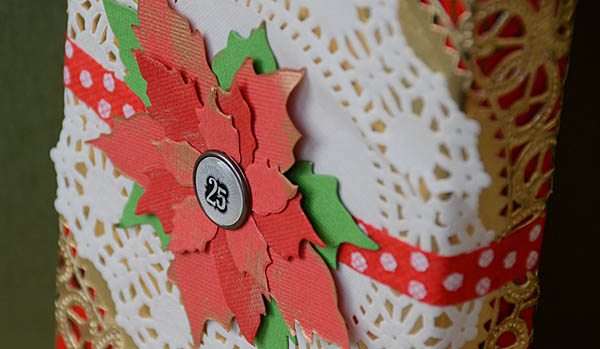
Here’s a “for example” – I had some extra die cut poinsettias in the box, the brad and paper ribbon you see above too. So when I went to gift wrap, these things were just there waiting to be used up!

Fun fact: Every year I buy a 1lb box of See’s chocolates as an extra gift. Because honestly they’re amazing and I’d give them to just about anyone… but every year some random person (a teacher, a friend who showed up unexpectedly with gifts in hand, etc) ends up being a person I need a last minute gift for and guess what? I can smile, walk over to the tree, and pick up my carefully wrapped box of chocolates for them without anyone being the wiser. Only once in the last decade has it happened that I didn’t need the box, and oh DARN, we had to eat them ourselves.

Oh wait, but I just told you all my trick! Well, if you come over to my house and get see’s – don’t think I forgot you! I actually gift chocolates to quite a few people. Anyhow, as I purchased my customary extra 1lb of chocolate, I decided to go ahead and get it dressed up in one of my favorite fashions – doiles + die cuts.

If you have an electronic die cutting machine you could just cut various sizes of a similar shape (flowers/foliage is great, circles work too) – or you could do this with layered punched shapes or perhaps various layered items in general. The point is – I just painted a bit on my paper, stuck a brad through it all, and used nice strong tape to adhere the ribbon around the box as well as the flower down to the center.

supplies used:

The doilies I used are just from the cake section of the craft store and are the kind I keep around for all kinds of random uses. Any would do – and if you just make the basic formula of  doily (or doilies, if you want them layered) + ribbon around middle + “thing” front and center you can make any number of fabulously decorated packages in all shapes and sizes! It’s a simple idea and yet one that gives such wow factor I can’t help but use it again and again.

I hope you’ve enjoyed today’s project – I’d love to hear and see what you’re up to this holiday season.

Speaking of the holiday season – don’t forget my friends at Simon Says Stamp are sponsoring Camp Scrap: Holiday Edition and have a special discount code to share! Simon Says Stamp is offering 10% off your entire purchase. Use code CSCRAP2 when you check out. Please note that the code is case sensitive and it will expire at 11:59 PM on 12/11/12 eastern standard time.

Have a project you’d like to share? feel free to link to your gallery/blog/flickr/etc. right here so we all can see! (Note: the inlinkz link list is only viewable directly on my blog www.mayflaum.com)


Camp Scrap Day 1: Make the most of 30 minutes and a give-away!

First of all, welcome to Camp Scrap: Holiday 2012 Edition! Every day from now through November 9th I will be posting a “Camp Scrap” post. These are tutorials, articles, videos, and more designed to be quick reads, and hopefully helpful for holiday crafting as well! Everything you see will be 100% authentic stuff I’m making for my own holiday prep! So you know there won’t be 5 hour gift tags or 3 day process posts. We’ll dabble in all kinds of fun stuff – thanks for joining me! There will be a few other fun posts done on my blog during this time, but all the Camp Scrap ones will be labeled and also archived here for future reference.

Alrighty then, let’s jump in. To kick things off today I’m calling it the “make the most of 30 minutes” post. You could also say ten minutes, five minutes – whatever you’ve got! The point is, instead of surfing the internet, watching a TV show, or otherwise zoning out, take a few moments out today to do something crafty that you can share with someone else. To kick things off, and to keep things speedy, I broke out my Simon Says Stamp December kit and just played!

First, I cut a sheet of 8 1/2 x 11 cardstock into four equal pieces, giving me four card fronts. Why just the front? A) I can make a mess without messing up a card and B) If I don’t want to use it as a card, I can use it in giftwrapping (more on that another day!)

Card #1: One of my classic card go-to designs, I went for a rosette and kept it real easy. I layered some punched paper, edged with distress stickles, and set it aside to dry.

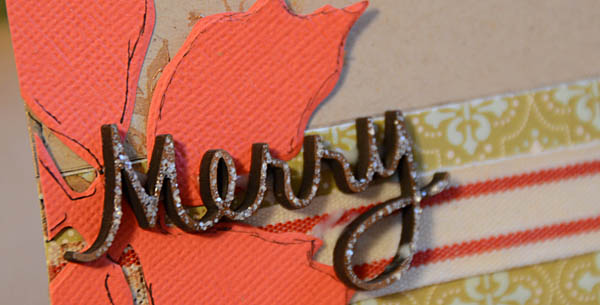
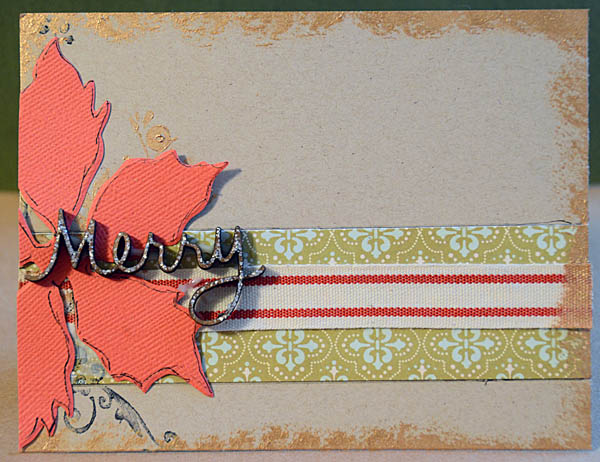
Card #2: Layered ribbon + paper, edged in gold, stamped some flourishes (that didn’t quite work out so I covered the whoops part), then finished with a die cut poinsettia + wooden “merry” topped with distress stickles.

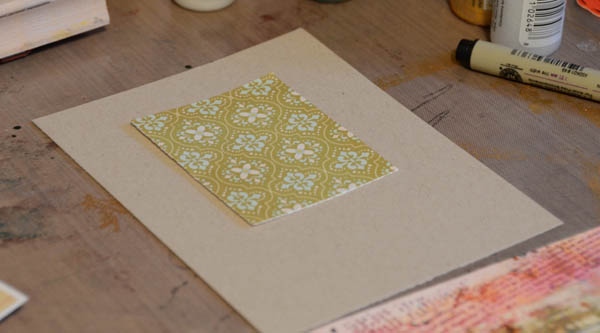
Card #3: I wanted to get a bit more inky, so I taped (lightly!) a rectangle down onto my card front, then I inked with a blending tool all around and up against the edges too with distress inks (winter seasonal colors).

When done, I pulled the paper off gently, added my sentiment, perfect pearls, and some glossy accents over the letters to make them pop.

Tag #1: Finally, I knew I wanted this santa paper on a tag. I made sure his head wouldn’t be chopped into when I positioned, then I just edged, added the sentiment, and topped with ribbon.

Supplies Used:

In less time than it would have taken to watch an episode of Dr. Who, I’ve got four homemade accents ready to add in my giving this holiday season!

A big part of my quick creating today was of course having a kit of supplies I worked with. This kept me focused, saved me from endless digging, and made me work with what I had in front of me. I strongly suggest gathering supplies for a kit of your own – you can mix & match and keep it small – or let it grow! I’ll be sharing my December go-to box tomorrow, as well as a fresh project or two as well.

Sponsoring Camp Scrap is a company I have the pleasure of working with – Simon Says Stamp! Over at Simon you’ll find all kinds of crafty treasure from stamps to glitter and everything in between. It gets better though. First of all,  They’re giving away TWO December card kits that I just showed in use above! To be entered for a chance to win leave a comment (on my blog, if you’re reading this via email) and 2 winners will be randomly drawn on Friday the 7th of December.

The winners have been drawn! Congrats to Susan Golan and Marianne B – I have emailed you!

Secondly, just for my lovely blog readers, I’ve got a special discount code! That’s right, Simon Says Stamp is offering 10% off your entire purchase. Use code CSCRAP2 when you check out. Please note that the code is case sensitive and it will expire at 11:59 PM on 12/11/12 eastern standard time.

My final note that I’ll leave you with, is that if you’d like to share a project inspired by today’s post please feel free to link up below. I’ll add an inlinkz list at the end of each Camp Scrap post so that you can share with all of us holiday crafters. If you read my blog via email or otherwise are not directly on my site, you just need to hop on over to www.mayflaum.com and you’ll see the list and can also of course leave your comment to be entered for the prize drawing!