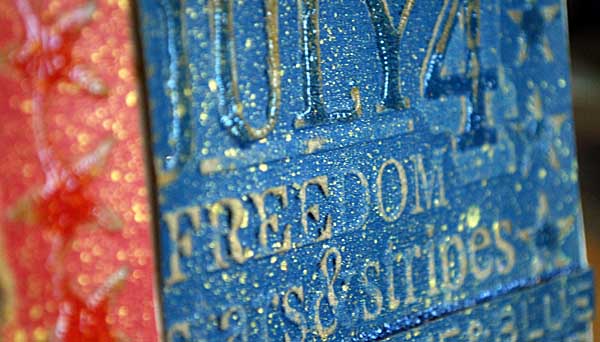
Embossed card for the 4th

I wish all of my fellow Americans a very patriotic 4th – and a big THANK YOU to all those who are (or have) served in the military, as well as a big hug and thank you to you amazing military family members.

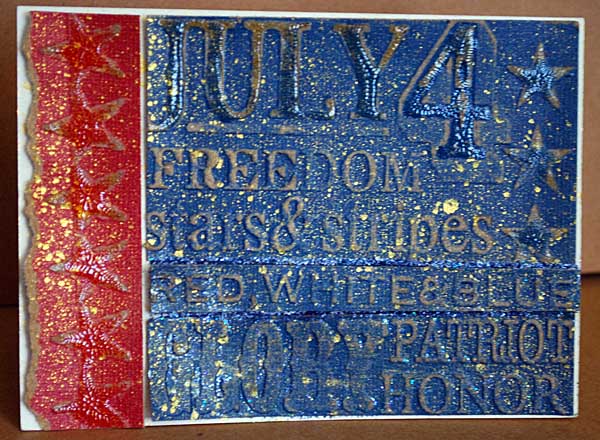
It seemed only fitting to share a patriotic project today. I have just the thing! I created a card for someone special, someone that loves the 4th of July more than any other holiday.

How-to? That’s just Core’dinations cardstock (the good stuff that is already trimmed down to sizzix size!) embossed, cut apart, and then sanded. I added a bit of clear crackle accents here and there, as well as a generous squirt of mist and a bit of distress stickles to accent as well. It was so easy – but I really like the look.

I’ll be trying this with more of Tim’s texture fades for future holiday cards. Here are the supplies used:


Today’s post is sponsored by 2peas. Be sure to check out the special offer they are running right now:

frameable | a photo card

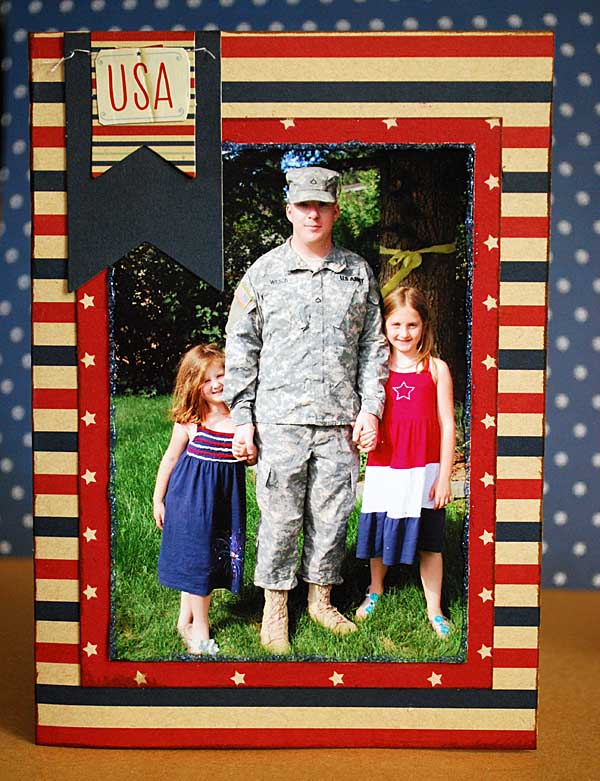
So I had this idea on how to “scrapbook” a photo of my girls and send it off to their favorite soldier (and cousin) at his new Army base. The problem is, I don’t want to saddle him with a big picture, or a frame, or a whole scrapbook album that he needs to find a place for in his small quarters or store in his storage unit. I just want to send something little, something easy to pin on a wall or set on a desk.

But could I make something that could also be (if he so desires) frame-able?

YES!

I used the Pebbles let Freedom Ring collection [LOVE it!!!] – and inked the edges of the paper with brushed corduroy distress ink. The banner embellishment at the top had a different sentiment on it, I just cut it off and put the “USA” sticker over that spot. The card is 5×7, the photo is 3 1/2″ x 5. If he wanted to frame it, he could pop it right in!

By making a photo size (vs a standard card size) card, I’ve made this into something that could become home decor! I am really excited about that  – I’ll be trying my hand at more frameable ‘cards’ in future for sure.


You can find the Pebbles Let Freedom Ring collection at Scrapbook.com

love | mists

So in the middle of planning Camp Scrap, taking a vacation, and working on my next on-line class something really cool happened. An opportunity I simply couldn’t say no to. Simon Says Stamp asked me to head up their vintage inspired challenge blog – aka Simon Says Stamp and Show. Each week there is a challenge and the design team shows their takes on the challenge as inspiration. So you can get inspired and join in – and if you share your project guess what? You get entered for the chance to win a $50 gift voucher to Simon Says Stamp! Pretty cool, right?  All the details are over at the blog – where this week the challenge was ‘spritz, spray, or stencil’.

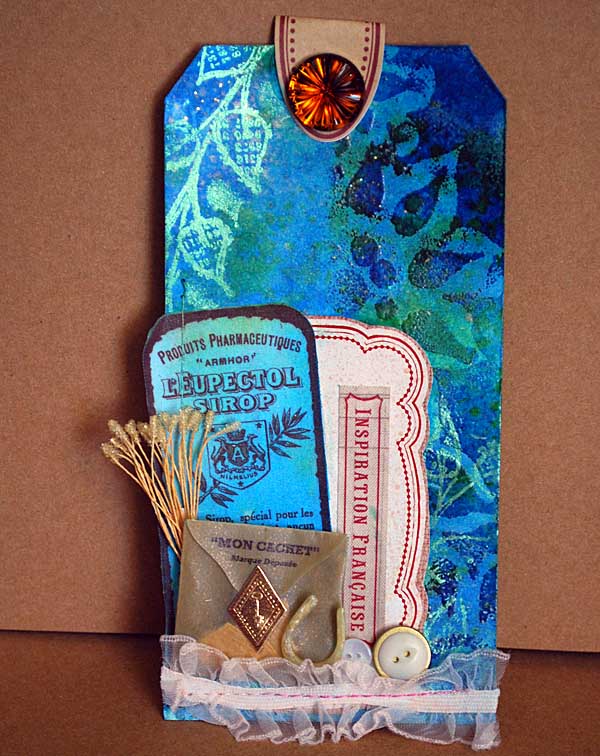
I couldn’t help but jump right in. Here’s the tag I created:
Ok, so first speaking of stencils and mists. Here is a link to my youtube video I did on Crafter’s Workshop stencils. Here’s another if you want to know more about things you can do with stencils. What about mists?

Things I do with mists:

* squirt directly onto project

* open bottle and use with paintbrush to apply

* squirt onto craft mat, then “stamp” into puddle and ink up my stamp then stamp with it!

* mix with paint, gel medium, or texture paste to colorize

* use with stencils

* put dylusions or mister huey in water brush for a juicy pen

I love and heavily use three kinds of mist:

Mister Huey for semi-opaque colors in (usually) muted tones

Perfect Pearls mists for NO color. Just droplets of pearly sparkle that doesn’t re-color your project

and, the kind featured today, Dylusions mists for color that is vibrant, sheer, blends, and reacts with water too.
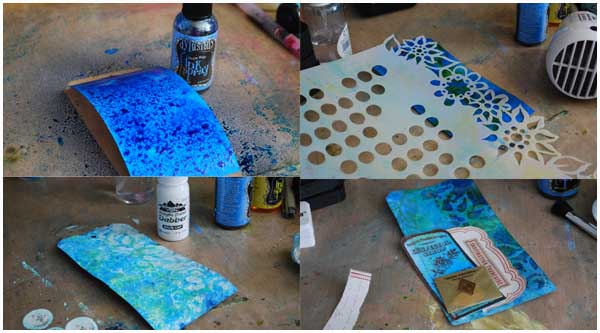
1. Saturate tag with mist. Use stencil + other mist color. Spray whole thing with water to blend. DRY. I used yellow, which of course turned into green spots. (that was the idea!)

2.  Place floral stencil at edge, rub embossing ink all along it until tag exposed is coated. Then apply embossing powder and heat set.

3. Apply white paint over the entire tag, working quickly. The dylusions mist will react with it and turn into a light blue/green. Rub off excess paint, especially on embossed area. The original vivid color will shine through those areas.

4. Apply perfect medium to leaf stamp, stamp around tag. Come back through and brush perfect pearls powder over stamped areas. Brush off excess.

5. Finish by adding embellishments, and misting of course with a bit of perfect pearls mist.

When looking at this tag, the embossing powder is the real trick here. It creates so much more depth by allowing me to have both very vivid and more soft color.

I wondered if it would work, combining my love of French General with that bold blue – but I think it does! Toning it down a lot with white paint really helps. Oh, and I ADORE the misted sprinkles of sparkle that my final step left all over my tag.

Here’s a supply list:

I hope you enjoyed my look at mists – if you have any questions please feel free to ask in the comments. I’ll be sharing more videos here in future on specific mist types, techniques, and more. I do love ’em! [and stencils, don’t even get me started I love them so much!]

Last thing – don’t forget to pop by Simon Says Stamp & Show to see the work of the amazing design team, and to get all the info on entering the challenge and all that good stuff!!


In the mood to shop? Long time favorite [and now a company I officially work with!] Simon Says Stamp always has a huge selection and loads of the latest and greatest paper crafting goodies.

week 4: round up

Here we are, entering week #4 of Camp Scrap! So, what’s in store? Well it is a big time event + party week here in the USA, what with July 4th being our national holiday and all! So I’m keeping it pretty light since I know I’ll be out and about a lot as will many of you guys. Still – I have some super fun stuff in store!


Now let’s talk Camp sightings! Remember, if you blog about Camp [or share a project!] I’d love to hear about it. feel free to link up in a comment. Let’s see what I’ve found this week…

Connie did a great Lawn Fawn stamp trio of cards inspired by an earlier Camp Scrap post. You can check it out here.

A lot of you got in on some stamp play time – good for you! 🙂 Emily shared her stamp play results on her blog here.

  Most of the time, at some point, when I read a Soap House Mama post, I think “she’s lost her ever.lovin.mind”. Then, somehow, someway, EVERY time she takes the project from “what is she thinking?!” to “holy cow… that girl has mad skillz.” Check out what she did with sequins here.

It has been one HECK of a week! I’m hoping to get some reading and relaxing time here this week – I think it might be possible. And that just about wraps it up, as well as sets you up for the upcoming week! Oh wait… you probably want some winner names, don’t you? Since we didn’t have staggered give-aways and all was straight forward this week I’ll include the info! Here you are – if your name is on the list email mflaum @ comcast . net and let me know what you won, as well as where to send it!

LauraC-Michigan [Tim Holtz prize]

Gina Torres [BPC ‘dimensional details’ class]

Kate @thescrapyard [Webster’s Pages]

Happy Crafting everyone!!

kit | part 3

Back for my third and final installment working with the July Studio Calico kit, and this time I am going to incorporate more of my own stash into my layout.

I really like to start out with a kit and try to keep things simple and kit-focused. I do this for a few reasons, the main one being it stretches my imagination on what I can do with paper. How I can die cut, tear, punch, or otherwise alter paper instead of reaching for an embellishment or sticker. I can keep things simpler too, by just not letting myself think outside the kit.

That said, after a few projects I like to have the kit in front of me, and go grab whatever else I see that will make things work for what I want to do. Yes, the next stage of kit use for me is to bring in outside help from my stash.

Step 1: evaluate what you still have in the kit. Are you hoarding anything? Do you see any new color palettes emerging or by lining up the papers do you notice anything? I noticed a few netural and aqua toned papers which made me think of the beach which reminded me I had yet to make a title page for our Hawaii vacation trip…

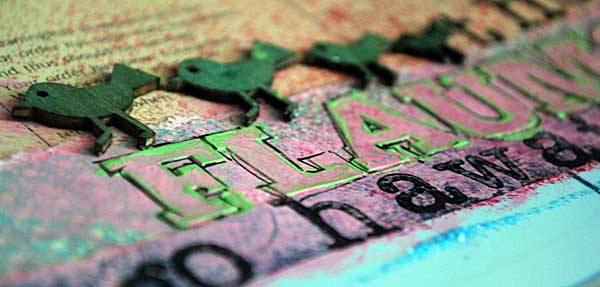
This is still very much a “kit” page paper wise, and I pulled out some birds too. But I also grabbed alpha stamps, other alpha stickers, buttons galore, and more. In other words, I worked on using up kit paper, but let the embellishing follow the feel I was looking for.

Above you can see a bit of my process… pretty simple really. I love stamping those G45 typewriter letters with paint, but also re-coloring my “flaum” letter stickers with paints then edging with black pen.

And now, the important step too many people forget, it’s going to be time to say goodbye to the kit.

You see, that is the life-cycle of a paper crafting kit for me. At this point, ready to move on after I’ve played with it and exhausted my specific ideas that stay within the kit’s realm I:

  • “add-on” [this could be additions purchased or additions I pull together myself]
  • play ‘clean up’ meaning leave kit contents on the desk and use them in projects until they are all gone, but don’t use them as a cohesive kit
  • dismantle it and incorporate it back into my stash.

For me, the danger of leaving a kit together when it becomes bits and pieces is that I will forget about it. That makes the bits useless, and really what’s the point?

I hope that you’ve enjoyed this kit series and some of my thoughts on creating with a kit. I do adore a good paper kit… and this was a lot of fun to sit and play with all week – including this BONUS Camp Scrap post! [a 6th project post in one week?! wow I’m on a roll!] Stay tuned for my Kit-tastic class with Big Picture coming in September for even more kit love – and of course stay tuned to Camp Scrap for a whole lot more to come! We’re not even 1/2 through this mega-crafting event!


Today’s bonus post is sponsored by Studio Calico! BIG thanks to them for being such a big supporter of Camp Scrap, and for this special offer that expires soon:

Note: Their July kit may already be sold out, but the offer stands for starting with a future month! If you would like to take advantage of the generous offer shown above email WaitingList@StudioCalico.com to get set up for a subscription.