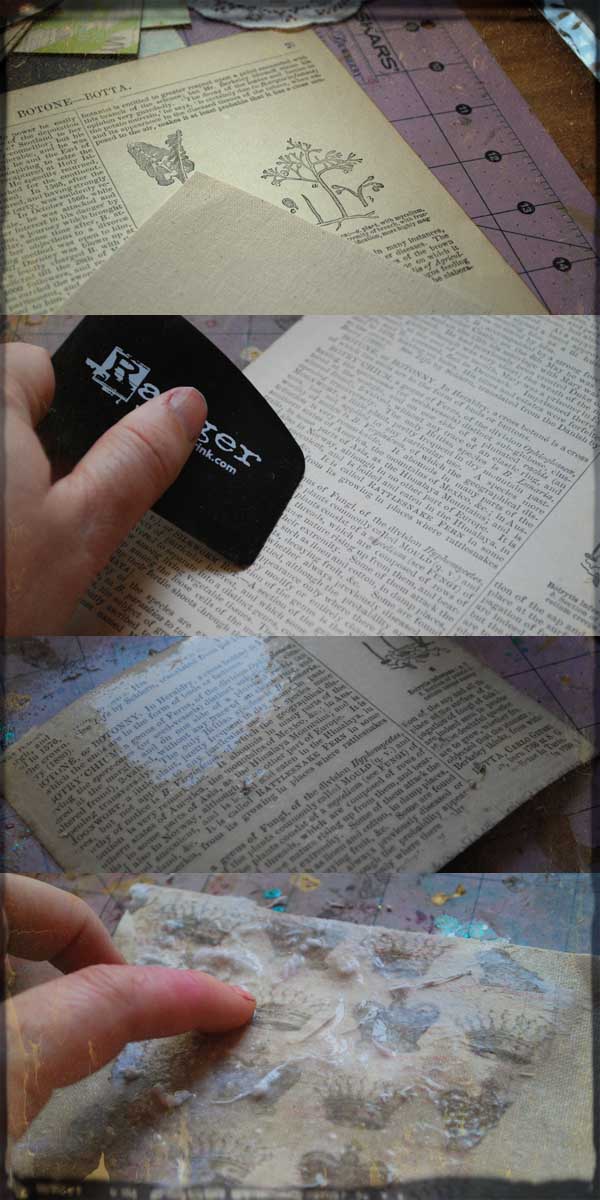
One technique I have never been a fan of is the transfer. You get an image (could be patterned paper maybe, a book page, something printed on laser/photocopy machine…) and instead of just using it, you stick it into something else then WAIT for it to dry. Then you use water to rub away all paper leaving a faded mirror image – aka image transfer.
It takes time. It doesn’t always work. I can never figure out why I’d not just use the direct image.
that is, until I took a class from Claudine Hellmuth! For the first time EVER I had successful transfers and she taught us a way to do it instantly too. This is my favorite of the methods because I don’t have to wait. I can just GO! Here are the steps [adapted from RangerU curriculum]:
Supplies:
Steps:
1. Cut a piece of sticky-back canvas + paper to same size
2. Remove paper backing from sticky back canvas, take patterned paper and press printed side to sticky side of sticky back canvas (note: if double sided paper use the side you WANT down).
3. Burnish the paper. [rub it in a lot of directions, firmly. You’re sticking the image here!]
4. Spray the paper with water (saturate!) – or use a small tub/bucket and do this in it. Whatever you do: don’t dump paper pulp down a sink!!! It will clog and be a hot mess. Rub until the paper is gone. use pads of your fingers, the paper will ball up and roll away.
5. Use a little gloss multi medium over the surface- rub it in (like you were applying lotion to skin). This will get rid of any remaining bits of paper particles and seal it up.
NOTE: You will see that I used 2 different papers in the photos below. I’m working on a few things here in the studio, and I took some pics of the process with my book paper, some with my scrapbook paper.

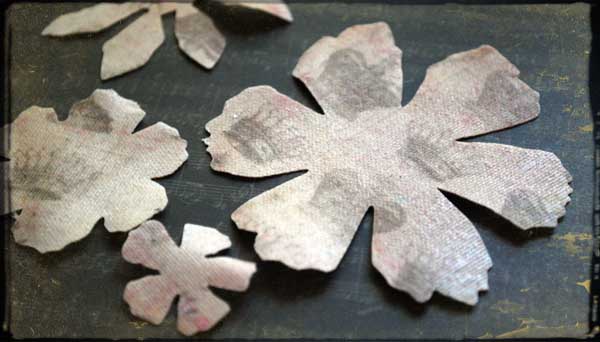
Now what? Well you could use it onto a project as you would any bit of paper! Perhaps you would like to die cut it as I have –

I really like that I can have patterned paper on canvas texture. YES, I could also just print a digital paper pattern onto my canvas. Similar result just less faded. Where are my crown accented flowers headed? Well I’m working on that, and I’ll be back to share the results very soon!
Very cool. Sounds easier.
you said everything that I have thought-thought too much work for results that could be printed..but then you did show me the uh huh moment. I will try this after all.
Hi May, I recently found your website and LOVE IT!!!! So excited about your getting to attend Ranger U.
Okay, question here. If you apply to the sticky side of the canvas, doesn’t that make the transfer sticky? or does the water take away the sticky residue? No, I haven’t tried it yet and probably should have. Thanks
I have never tried the other method simply because it sounds like a lot of work for an image that could easily be substituted with something else. I just might try this method someday. Your transfers look great.
Love what you did with your transfer. I have never tried transfers either, for the same reasons you mentioned. This looks doable… will have to try it out.
you have to do the sticky side, or it wouldn’t work. Yes, when done there is a tiny bit of stickiness left, but that is why the final step is rubbing in the multi-medium. That seals it all up nice, and makes it so there is no stickiness! 🙂
I have tried tranfers the regular way a couple of times & found it too much work for the result. Thanks for your tutorial. I’ll have to give this a try.
In step 2 you say “patterned paper and press printed side to sticky side of sticky back canvas”. Does it mean that the image will be seen through the canvas?
No, it means that a transfer will happen. Whatever you press into the sticky side of the canvas is what will be left after paper pulp is removed.
YES finally a easy way to do transfers!!! Love canvas and cannot wait to give this a try! Thanx so much for sharing! 🙂