I was a guest this week on the paperclipping roundtable (we’re talking double page layouts) and my crafty pick was the Hero Arts + Basic Grey “Life of the Party stars” background stamp. (Available @simonsaysstamp.com)
I’m loving this stamp because while it’s stars, it can take on a festive holiday “snowflake-like” look with the right ink – or in this case paint (dabber in pearl)! Today since I just picked that stamp (and that new episode is now up!) I thought it would be the perfect time to show you this fun thing I’ve been doing with my snowman texture fade.

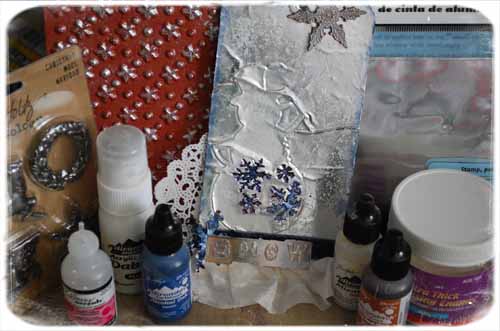
Pictured above is just about everything I used to make this tag. I’ve been having a BLAST with my foil sheets (by ranger) – they’re adhesive backed and super thin so you can die cut, emboss, do anything to them AND they work great with alcohol inks, embossing powder, and more. Such fun! Ok, so here’s the how-to:
Apply Ranger’s paint dabber (pearl) onto stamp and then stamp onto foil. Allow to dry fully before moving on.

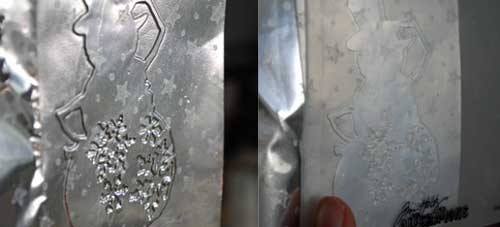
Once dry, place sheet into texture fade folder and run through die cut machine. The result is an embossed snowman ready to play! This could be cut out, made into a card, a page accent, a tag…

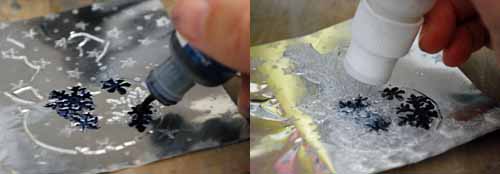
Today I’m going to make a tag. First, I need to spruce up our snowman. I will start by attaching the foil to my tag (it’s adhesive backed, so just stick it on!). Then I will drop some blue alcohol ink into his snowflakes. Then I will apply some pearl alcohol ink to his body, and use this to ‘tidy up’ around the snowflakes if the blue overflowed. Though honestly? A bit of overflow is fine. Once that is set, I wanted more texture so I added pearl paint dabber to the snowman’s body, as well as along the base to add “snow” to the ground.

Now that the foil part is set up, time to move onto my embellishing! I attached some ribbon to the bottom (to cover where the foil didn’t cover the tag), and I altered a metal snowflake to use at the top of the tag:

To alter the metal snowflake I first dripped pearl (alcohol ink metallic mixative) onto snowflake until fully covered. Then I used the felt applicator to rub brown (ginger) lightly onto it so that some of the raised surfaces took on that color. LOVE altering my metals this way!

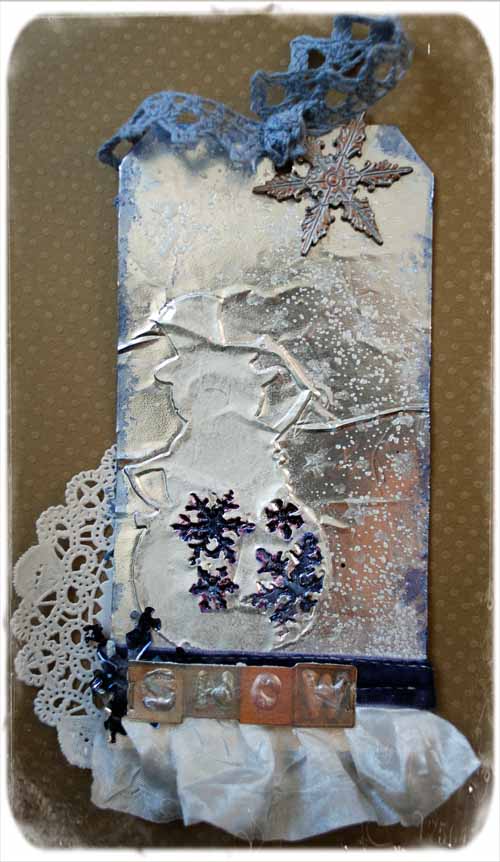
At the bottom of the tag I added a sticker (says snow.. I didn’t wait long enough for my glossy accents to dry so my pearl paint mushed it! WHOOPS!), foil snowflake die cut, and a doily.

At the top I attached ribbon and my charm – and that’s it!
Hmmm… if only I had a bit more dimension, some “snow”…

I sprinkled UTEE (pearl) onto my tag and then heated from underneath with a heat gun. This melts the powder in place, and creates a sprinkled effect. Love it! The foil works really well for that technique.

As you can see I’ve been having all kind of fun! You’ll be seeing all of these products more in my 25 days of holiday craftiness series for sure!
Supplies:
Can’t wait to listen! You’re one of my favorite guests on PRT! I love star themed supplies, because I have all sons. So versatile!
Great tag. I need to get me some of those metal sheets. Love your project!!!
WOW! I’m pretty much speechless!
This is wonderful. You have given me so many ideas with all of your techniques. I have been trying to stay away from so many blogs this past week because I seem to do a lot more inspiration gathering than actually creating. I just could not stay away from yours. You have so much to offer in one project.
May that is stunning!